The Firebox and flue should be secured by fixing with seismic strapping and/or
brackets to framing.
Flue bends are available from Real Fires if the flue needs to be offset.
Appropriate weatherproof roof flashing/ chimney capping must be used to comply
with NZS 5261
Once the installation of the firebox and flue is complete, the building work around the
fireplace can continue. A timber cross frame is usually fixed above the firebox for gib
fixing. This must be at least 25mm from the firebox.
The firebox has an electrical cable from the rear left hand side. The cable is
approximately 1.2 metre long, it is intended to be connected by an electrician to an
isolating switch positioned facing the room preferably on the left hand side of the
fireplace cavity. See diagram---
(Please ensure the cable is not left behind the firebox and overlooked. It is difficult to
gain access once the giboard is fixed)
Timber surround
If a timber surround is to be fitted, ensure it complies with Real Fires minimum
clearance dimensions. See installation drawing
Installation of Real Fires burner into firebox
The electronic controlled burner is supplied assembled and boxed complete with,
reflectors, front panel vermiculite, logs, & coals.
To make the gas connection, place the burner in the firebox with the bottom tray
fitting into the cut outs in the bottom of the firebox and it is positioned central. The
gas pipe should be bent into position & marked for cutting. Remove the burner, cut
the pipe and make a flare connection.
Replace the burner into the firebox.
Plug in electrical connectors
Line in 3 pin socket connects to 3 pin plug to control box
4 pin socket from control box connects to 4 pin plug to fan
The lead with small jack plug connects to the remote control receiver board on the
back of the front fascia. The fascia panel will need to be left off until the fire has been
connected and tested.
Connect the gas pipe. Test for soundness.
Natural Gas Burner
Fill the burner tray with the vermiculite supplied ensuring the burner tube is
completely covered.
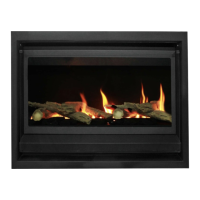
Lay logs and coals on top of the vermiculite as shown in the Log/Coal layout
drawing. Note that the shelf at the back of the burner is also used. Do not place logs
or coals close to the pilot. It important that the coals are not too tightly placed as
this will affect the heat output. The flame picture and radiant glow is better when
there is good spacing between the coals.
 Loading...