Do you have a question about the Realistic 31-1987 and is the answer not in the manual?
Details on connecting the equalizer using PRE OUT/MAIN IN jacks or with tape monitor switches.
Explains the function and effect of individual frequency adjustment sliders.
A chart correlating musical instruments with their frequency output ranges.
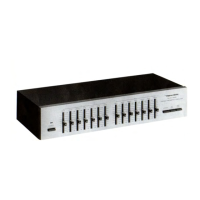
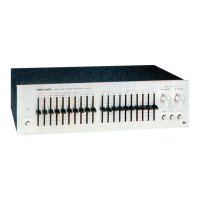
The Realistic Stereo Frequency Equalizer is a specialized audio component designed to fine-tune the frequency response of your stereo system. With separate controls for each channel, it offers an almost infinite array of sound customization options. Each control provides a range of approximately 24 dB (±12 dB), marked in 4 dB increments, allowing for precise adjustments to the audio spectrum.
This equalizer addresses various factors that influence sound quality, such as speaker placement, room acoustics, and individual hearing preferences. For instance, moving a speaker just a few inches from a wall can cause a significant drop in bass response. Similarly, room furnishings like stuffed chairs, draperies, and carpets can dramatically impact high and mid-frequency sound. Human hearing also changes with age and varies from person to person, with low-frequency response often decreasing at lower volumes.
Unlike conventional tone controls that affect broad segments of the audio spectrum, the equalizer's five frequency ranges allow for targeted adjustments. This precision prevents common issues like muddy bass (when boosting low bass also boosts middle bass) or an inability to adjust midrange frequencies without altering the entire high-frequency response. The equalizer enables you to match your speakers to your room and your personal listening preferences without introducing distortion, hum, or hiss.
Beyond live playback, the equalizer is a valuable tool for recording. It can be used to process old LPs or 78s, preserving the main musical content while eliminating scratchy highs and adding needed bass, effectively revitalizing vintage recordings. The device incorporates a new type of tone control circuit designed for extremely low distortion, utilizing high-quality components to ensure years of excellent sound.
Before powering on the equalizer, ensure the volume control on your receiver or amplifier is set to minimum. Connect the equalizer according to your system's configuration.
If your audio system has a separate pre-amplifier and power amplifier, connect the equalizer between them, ensuring correct channel notations (L for left, R for right). The equalizer's MONITOR switch should be in the "out" position (button extended). Once connected, press the POWER switch, select your desired signal source on your amplifier/receiver, and then adjust the sliding frequency controls to tailor the sound.
For integrated amplifier/receivers with a tape monitor switch, connect the equalizer as shown in the manual. Set your amplifier/receiver's Tape Monitor switch to the "in" or MONITOR position. To bypass the equalizer, set the amplifier/receiver's Monitor switch to the "out" position. Note that with this connection, the amplifier/receiver's Tape Monitor switch will no longer perform its original function for tape monitoring; instead, the equalizer provides its own Monitor function with a dedicated switch and jacks.
To use the tape monitor feature with the equalizer, adjust connections as detailed in the manual. If your tape recorder has a monitor function (a 3-head deck), press the equalizer's MONITOR button to hear the recording after it has been made, or for normal playback of tapes. For monitoring, both the amplifier/receiver's Monitor and the equalizer's MONITOR switch must be "in." If monitoring isn't needed, the equalizer's MONITOR switch can be in either position. To process the "source" signal through the equalizer, leave the amplifier/receiver's Monitor switch "in."
Important Note on Monitoring: When using the connections for tape recording, monitoring the recording will show the processed signal, not the original. For accurate monitoring under these conditions, set the equalizer's sliding frequency controls to the center "0" position.
If you wish to apply equalization to your recordings, connect the equalizer as specified in the manual and leave the equalizer's MONITOR switch in the "out" position. This approach allows for creative sound manipulation during recording, though it may result in recordings that differ from ordinary, unprocessed ones. With these connections, you can monitor the recording (if your tape recorder has 3 heads) using the amplifier/receiver's Monitor switch, but the "source" signal will not be processed by the equalizer.
Each slide control adjusts the level of a narrow band of frequencies centered around the indicated frequency, with a range of ±12 dB. To ensure smooth frequency control, these controls slightly overlap. For example, the 1000 Hz control subtly affects the ranges covered by the 240 Hz and 3500 Hz controls. The net effect of these controls is to either emphasize (+) or cut (-) frequencies.
The manual includes a chart correlating musical instruments with their fundamental and harmonic frequencies. Most musical fundamentals are below 3500 Hz, but harmonics and overtones give each instrument its unique character. The human ear is more sensitive to midrange frequencies, where speech and voice communication occur, meaning small energy changes in this range have a more significant psychoacoustic effect than larger changes at frequency extremes.
The musical spectrum can be divided into five ranges for qualitative tonal balance adjustments:
The Realistic Stereo Frequency Equalizer is covered by a 2-year limited warranty against defects from the date of purchase. Within this period, repairs for parts and labor are free. Simply bring your sales slip as proof of purchase to any Radio Shack store. The warranty does not cover transportation costs or damage due to misuse or accidental damage.
| Input Impedance | 50 kOhms |
|---|---|
| Output Impedance | 600 Ohms |
| Power Supply | 120V AC, 60Hz |
| Control Range | ±12dB |
| Weight | 2.5 kg |
| Signal-to-Noise Ratio | 90 dB |
| Power Supply (Detailed) | 120V AC, 60Hz, 15W |
| Weight (lbs) | 5.5 lbs |
| Type | Stereo Equalizer |
| Frequency Bands | 10 per channel |
| Frequency Response | 20 Hz to 20 kHz |
| Total harmonic distortion | 0.05% |
| Frequency Bands (Specific) | 1k, 2k, 4k, 8k, 16kHz |
| Dimensions (Inches) | 17 x 3 x 9 |