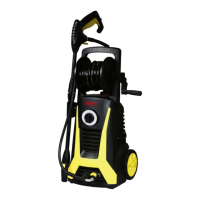
This document describes the Realm BY03-VBP-WTR Electric Pressure Washer, a high-pressure cleaning device designed for residential outdoor use.
Function Description:
The Realm BY03-VBP-WTR is an electric pressure washer intended for cleaning vehicles, machines, buildings, facades, and similar surfaces. It operates by generating a high-pressure water jet to remove dirt and grime. The machine is equipped with a pump encased in a shock-absorbing housing and features a spray wand with a non-slip handle grip for optimal working position. It is designed for use with cold water, as higher temperatures can damage the pump. The appliance should only be used with clean, unfiltered water; dirty or chemically contaminated water can impair operation and shorten the machine's life.
A key safety and energy-saving feature is the Total Stop System (TSS), which incorporates a micro-switch sensitive to water flow. When the trigger gun is released, water flow to the pump stops, and the TSS automatically turns off the motor. This prevents the pump from overheating, conserves energy, and extends the pump's lifespan. The unloader valve reduces pressure if it exceeds pre-set values, and a thermal sensor protects the motor from overloading, restarting the machine after a few minutes once it has cooled.
The pressure washer can be used with detergents specifically designed for pressure washers. It includes a built-in detergent bottle and a detergent nozzle for effective dirt removal. The manual explicitly warns against using household detergents, acids, alkaline solutions, bleaches, solvents, flammable materials, or industrial-grade solutions, as these can damage the pressure washer.
Important Technical Specifications:
- Model: BY03-VBP-WTR
- Motor Type: Brush
- Max. Pressure: 2400 PSI
- Max. Flow: 1.75 GPM (Gallons Per Minute)
- Current: 14 A
- Voltage: 120 V~ / 60 Hz
- Max. Water Inlet Temperature: 104°F / 40°C
- Operating Temperature Range: 32°F (0°C) to 104°F (40°C)
Usage Features:
The pressure washer features several components for user convenience and effective cleaning:
- Trigger Gun with Safety Lock: Prevents accidental operation. The trigger must be released and the lock engaged when changing nozzles or performing maintenance.
- High-Pressure Hose and Connection: Connects the machine to the trigger gun.
- Extension Spray Lance: Extends the reach of the spray.
- Adjustable Nozzle: Allows for adjustment of pressure and cleaning range by turning it.
- On/Off Switch: Controls the power to the unit.
- Hand Crank and Hose Reel: For convenient storage and winding of the high-pressure hose.
- Trolley Handle and Wheels: Facilitate easy movement and portability.
- Quick-Connect Double Sealing High Pressure Hose: Ensures secure connections.
- Power Cord: For electrical connection.
- Gun Holder: Provides storage for the trigger gun when not in use.
- Water Inlet Pipe and Connection: For connecting to a garden hose. The unit must never be operated without a system separator on the potable water system, and water that passes through it is classified as non-potable. The system separator should always be connected to the water supply, not directly to the device.
- Water Outlet: For the high-pressure hose connection.
- Built-in Detergent Bottle and Detergent Nozzle: For applying cleaning solutions. The amount of foam can be adjusted by rotating the nozzle head.
- Power Cord Holder: For organized storage of the power cord.
- Onboard Storage for Quick-Connect Nozzles: Keeps nozzles readily accessible.
- Optional Accessories: The manual mentions optional accessories such as a brush, turbo nozzle, angle nozzle, and patio cleaner, which can enhance cleaning versatility. The angle nozzle (26) is useful for cleaning hard-to-reach areas like car underbodies. The patio cleaner is a powerful accessory for cleaning large flat surfaces.
Operation Sequence:
- Positioning: Place the washer as close as possible to the water supply on a secure, stable, upright surface.
- Assembly: Insert the gun holder and power cord holder. Snap the spray lance into the trigger gun and rotate to lock. Then snap the nozzle into the spray lance until locked.
- Hose Connections: Connect the high-pressure hose to the trigger gun and the water outlet. Connect the garden hose adapter to the water inlet of the pressure washer, then thread the garden hose into the adapter. Ensure the water supply is at least equal to the washer's delivery capacity.
- Water Flow: Let water run through the garden hose before connecting it to the machine to prevent sand and dirt from entering.
- Electrical Connection: Ensure the motor switch is in the OFF position before plugging the unit into a power outlet. Check that the electrical supply voltage and frequency match the pressure washer's rating plate. The GFCI (Ground Fault Circuit Interrupter) may need to be reset upon initial plug-in.
- Starting: Turn on the water supply tap completely. Release the trigger lock and press the trigger for a few seconds until water flow is steady to purge air and residual pressure. Turn the switch to the ON position to start the pressure washer.
- Detergent Application (Optional): Unscrew the cap from the built-in detergent bottle, fill with appropriate detergent, and install the detergent nozzle on the spray wand. Turn on the pressure washer and pull the trigger; detergent will automatically mix with water. Apply detergent from bottom to top on dry surfaces, allowing it to remain briefly before rinsing. Do not let it dry on painted surfaces or work on hot surfaces/direct sunlight. After use, rinse the detergent system with fresh water at low pressure for one minute to prevent clogging.
- Rinsing: Turn off the pressure washer and water supply. Pull the trigger to release water pressure. Engage the safety lock on the trigger handle. Remove the nozzle from the spray lance and store it.
- Shutting Down: Turn the switch to OFF and unplug the power cord. Turn off the water source. Hold the trigger to release water pressure. Disconnect the garden hose from the water inlet and the high-pressure hose from the trigger gun. Release the trigger and engage the gun safety lock.
Maintenance Features:
Regular maintenance is crucial for optimal performance and longevity:
- Water Inlet Filter: Regularly check and clean the water inlet filter (Fig. 19, 20). Remove the filter and rinse it with water to prevent foreign matter from clogging the pump.
- Nozzle Cleaning: Clean the nozzle with the provided needle clean-out tool (Fig. 21). Remove the spray lance from the gun, remove any dirt from the nozzle hole, and rinse.
- Back Flushing: Remove additional debris by back flushing water through the nozzle and spray wand. This involves placing the end of a running garden hose to the tip of the nozzle, pushing water and debris out of the back opening.
- Machine Cleanliness: Keep the machine clean and ensure cooling air can pass freely through the machine vents.
- Coupling Lubrication: Regularly grease couplings to ensure easy connection and prevent o-rings from drying up.
Storage:
Proper storage is essential, especially in cold climates:
- General Storage: Store the pressure washer indoors in a dry, covered, frost-free area, away from adverse weather conditions.
- Hose Storage: Unlock the hose reel by pulling out the hand crank and turn it to wind the hose.
- Accessory Storage: Store the trigger gun and spray lance on the gun holders. Store the power cord, nozzles, and brush on the washer unit.
- Winterizing (Below 32°F / 0°C):
- Disconnect all water connections.
- Turn on the machine for a few seconds until remaining water exits the pump, then turn off immediately.
- Do not allow the high-pressure hose to become kinked.
- Store the machine and accessories in a room that does not reach freezing temperatures.
- Do not store near a furnace or other heat sources that could dry out pump seals.
- Operate the pressure washer with a non-corrosive/non-toxic anti-freeze, pump saver, or pump protector before storing for the winter.
- WARNING: Before reusing after winterization, completely flush the unit with clear water, as anti-freeze products can damage paintwork.
Safety Instructions:
The manual emphasizes numerous safety precautions:
- The appliance is for private outdoor use only.
- Keep away from heat, direct sunlight, moisture, rain, ice, and sharp edges.
- Only trained persons who have read the manual should operate the machine.
- Regularly check for defects, especially the electric cable insulation.
- High-pressure jets are dangerous if misused; never direct them at persons, electrical equipment, or the appliance itself.
- Wear protective clothing, gloves, and safety glasses to protect against dislodged debris.
- Hold the lance firmly with both hands due to recoil.
- Only use pressure washer detergent; other chemicals may affect safety.
- Disconnect from power supply before maintenance.
- Use only manufacturer-supplied or approved spare parts, hoses, accessories, and couplings.
- Do not use if the power cable or important parts (safety device, high-pressure hose, handgun) are damaged.
- Do not use with wet hands; unplug immediately if damp or wet.
- Do not place in water.
- Avoid directing the jet at tires and valves, as they can burst.
- Never use in an explosive environment.
- Do not clean asbestos-containing surfaces at high pressure.
- Do not use below 0°C.
- Extension cables must be waterproof, conform to specified dimensions (1.0 mm² max. 12.5 m, 1.5 mm² max. 20 m), and be completely unwound to prevent overheating.
- Electrical connections should be made by a qualified electrician, and a residual current device (RCD) with a tripping current of 30 mA for 30 ms is recommended.
- In case of accidental contact with detergent, wash with water and seek medical assistance if it contacts eyes.
- Do not attempt to repair the appliance yourself; contact a professional technician.
- Do not spray flammable liquids.
- Water circulated in the anti-back flow system is not considered drinkable.
- Supervise children to ensure they do not play with the appliance.
- Never change nozzles while the trigger is engaged.
Environmental Protection:
Old appliances contain valuable recyclable materials. Users are instructed to arrange for proper recycling through appropriate collection systems, as incorrect disposal can harm the environment and human health.
Warranty:
The product comes with a 12-month warranty from the date of purchase by the first user. The warranty does not cover damage from inappropriate use, negligent maintenance, overload, fluid permeation, excessive dust, intentional damage, incompetent usage, inexpert assembly, lightning strikes, or erroneous net voltage. Claims do not prolong the warranty period. The manufacturer reserves the right to reject claims if purchase cannot be verified or if the product has not been properly maintained. Transportation costs for warranty claims are borne by the customer unless otherwise agreed. Contact information for support is provided.