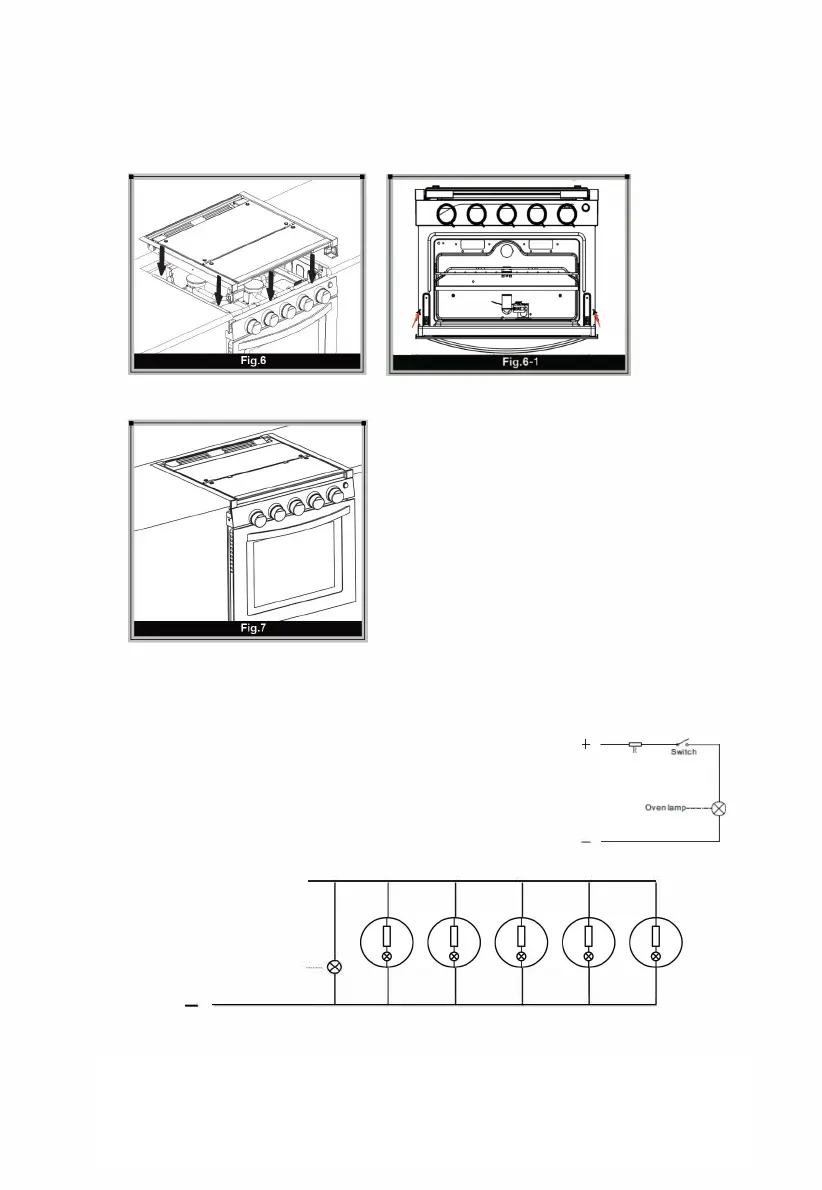
7. Install the top glass assembly as directed by the arrow.
Tighten the screws marked in the picture Fig.1-1.
(Fig.
6
-1
,
The holes on the left and right sides of the inside door frame are optional for
mounting and do not re
q
uire screws to be used.)
8. Installation is now complete. (Fig. 7)
ELECTRICAL CONNECTION:
Range Oven without Light Eliminating
Diode (LED) lighting: Attach the wires of
the oven and lamp to a 12V DC circuit
with a fuse protected and a max rating of
no more than 5 amps.
Note: Make sure to connect the wires
with the correct polarity.
Black
=
+ (positive)
White
=
-
(negative)
Range Oven with Light Eliminating Diode
(LED) lighting: Attach the light wires to a 12V DC
circuit with a fuse protector and a max rating of no
more than 5 amps.
DC12V
Wi
「
ing Diagram
+
一
千
DC 12V
Oven lamp
Wiring Diagram
14
I
Page