®Instructions for “Safe-T-Switch SS1 Directional Cleanout Tool”
1. Remove SS1 Cup/Float subassembly from SS1 body (i.e. the Tee).
2. Clear debris or any other obstacles inside SS1 body.
3. Route the Cleanout Tool into SS1 body. Either upstream or downstream depending on where
blockage is. Insert the rubber nozzle portion into the 3/4" pipe glued to SS1 body on the
blockage side.
4. Attach a pressurizing (or vacuuming) device (such as RectorSeal Might Pump) to Cleanout Tool’s
rigid plastic opening. Pump or vacuum until the blockage is cleared.
5. Disconnect the pressurizing (or vacuuming) device from Cleanout Tool.
6. Remove Cleanout Tool and hang it outside of the SS1 body.
7. Insert SS1 Cup/Float subassembly into SS1 body. Test SS1 function.®
6. For inline installation, glue ¾” outlet of Tee onto drain line.
7. Wire switch according to instructions under Wiring, below.
8. Test all drain and fitting connections for plumbing leaks.
9. Test switch sensitivity: plug drain downstream from installation point and run unit to fill pan. Float should
rise and unit should stop before pan
overflows. If pan overflows, reposition float lower by either:
A. plumbing entire assembly lower, or
B. turning switch assembly counter-clockwise /” away from cap/plug, so that it stops unit sooner in response to rising water.
10. Ax warning sticker to air handler or condenser unit.
Furnace / A.C.
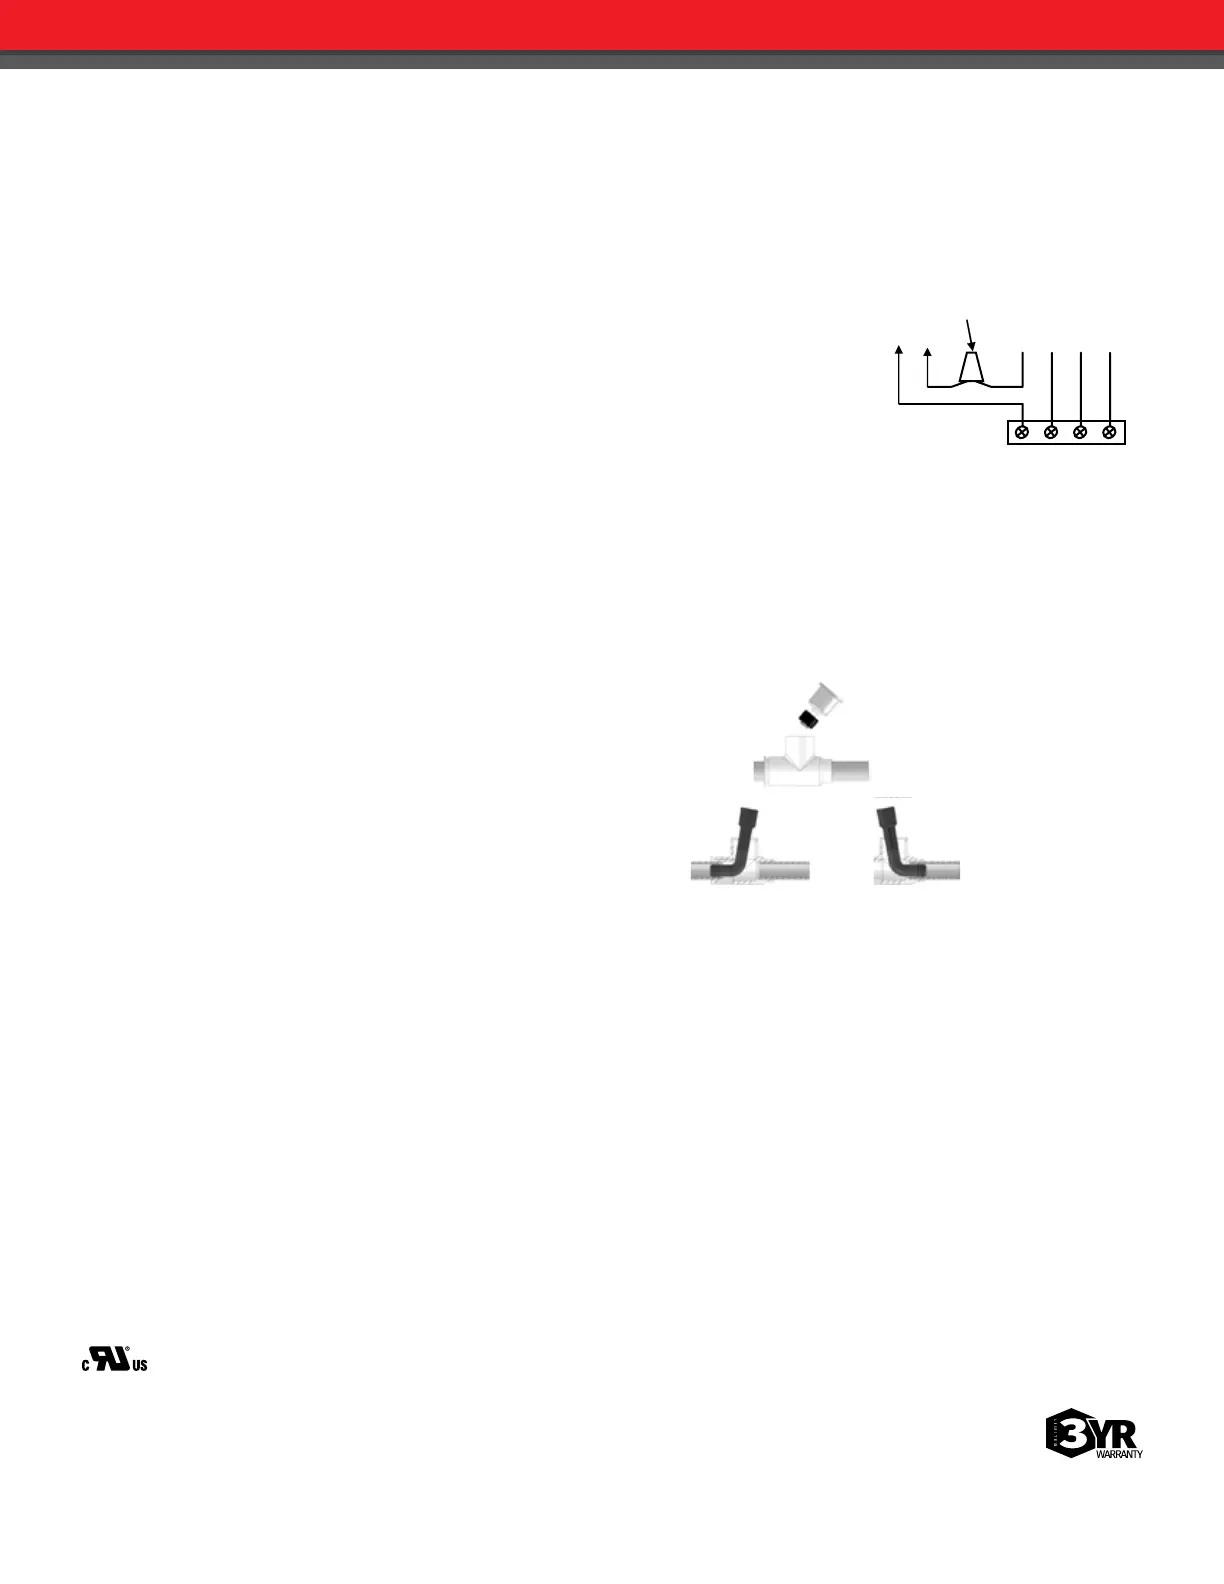
Figure 5: Wiring Diagram for Unit Shutdown
Red
White
Green
Yellow
From Thermostat
To Switch
Wire Nut
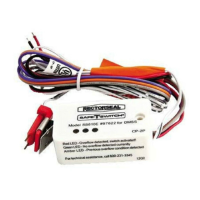
WIRING (see g. 5)
1. WARNING: Disconnect power to unit at main panel prior to performing electrical work.
2. If not present, it is recommended that an inline fuse be installed to protect 24-volt circuit and time
delay to avoid rapid cycling of equipment.
3. Locate 24-volt thermostat cable entering the air handler unit.
4. Disconnect or cut the red wire and connect to switch lead using wire nut. Connect other switch lead
to air handler terminal. Incorporating switch in red circuit shuts down entire unit. If placed in the
yellow circuit, fan continues to run (inhibits mold during long absences.)
5. Test switch by liting float while unit is running. If wired correctly, unit will stop when float is lited.
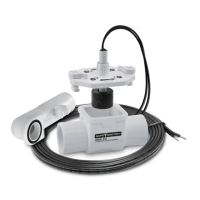
INSTRUCTIONS
Safe-T-Switch SS1 Directional Cleanout Tool
1. Remove SS1 Cup/Float subassembly from SS1 body. (i.e. the Tee).
2. Clear debris or any other obstacles inside SS1 body.
3. Route the Cleanout Tool into SS1 body, either upstream or
downstream depending on where blockage is. Insert the rubber
nozzle portion into the 3/4” pipe glued to SS1 body on the blockage
side.
4. Attach a pressurizing (or vacuuming) device (such as RectorSeal
Mighty Pump™) to Cleanout Tool’s rigid plastic opening. Pump or
vacuum until the blockage is cleared.
5. Disconnect the pressurizing (or vacuuming) device from Cleanout
Tool.
6. Remove Cleanout Tool and hang it outside of the SS1 body.
7. Insert SS1 Cup/Float subassembly into SS1 body. Test SS1 function.
• For directional cleanout of condensate drain line
• Fits perfectly with Safe-T-Switch® SS1 & all 3/4” drain lines
• Can be let with Safe-T-Switch® or removed for future jobs
• Can be used with Mighty Pump™ or a shop vac
WARNING: This device must be installed strictly in accordance with manufacturer’s instructions (to ensure proper operation) and in
accordance with all applicable local plumbing, drainage and electrical codes.
WARNING: Electric shock hazard. Disconnect power supply before installing this product to avoid electrical shock and/or equipment
damage. Use in Class 2 (thermostat) circuit only, not to exceed 24-volts, 1.25 amps to avoid damage or fire hazard.
CAUTION: This device will not detect clogs occurring upstream from the installation point.
CAUTION: If not present, it is recommended that a fuse and time delay be installed, to protect the 24-volt circuit and avoid rapid cycling of
equipment, prior to installing this product.
CAUTION: When installing this device in plugged configuration on auxiliary drain outlets, it is essential that PVC plug is closed o and
water-tight.
CAUTION: This product is intended for use in water only. Not for use in the presence of flammable liquids or vapors.
CAUTION: Refer to the appropriate HVAC equipment operation manual prior to installing this product.
CAUTION: Do not use on dual compressor systems.
24 Volt AC, 1.25 Amp, GP, Use in Class 2 (Thermostat) Circuit Only
6 ft. 18 AWG Lead Wire
RectorSeal
®
• 2601 Spenwick Drive, Houston, TX 77055, USA • 713-263-8001 • rectorseal.com
A CSW Industrials Company. RectorSeal, the logos and other trademarks are property of RectorSeal, LLC, its aliates or its licensor’s and are protected by copyright, trademark and other intellectual
property laws, and may not be used without permission. RectorSeal reserves the right to change specifications without prior notice. ©2022 RectorSeal. All rights reserved. R50109 1022
Technical Support Call 1-800-231-3345
 Loading...