APC Fence Device Configuration Procedure
7
After configuring the APC switch as a shared fence device, use the following procedure to configure
the APC switch as the fence device for node clusternode1.example.com
1. At the detailed menu for the cluster apcclust (below the clusters menu), click Nodes. Clicking
Nodes causes the display of the status of each node in apcclust.
2. At the bottom of the display for node clusternode1.example.com, click Manage Fencing for
this Node. This displays the configuration screen for node clusternode1.example.com.
3. At the Main Fencing Method display, click Add a fence device to this level. This causes a
dropdown menu to display.
4. From the dropdown menu, the apcfence fence device you have already created should display
as one of the menu options under Use an Existing Fence Device. Select apcfence (APC
Power Device). This causes a fence device configuration menu to display with the Name, IP
Address, Login, Password, and Password Script values already configured, as defined when
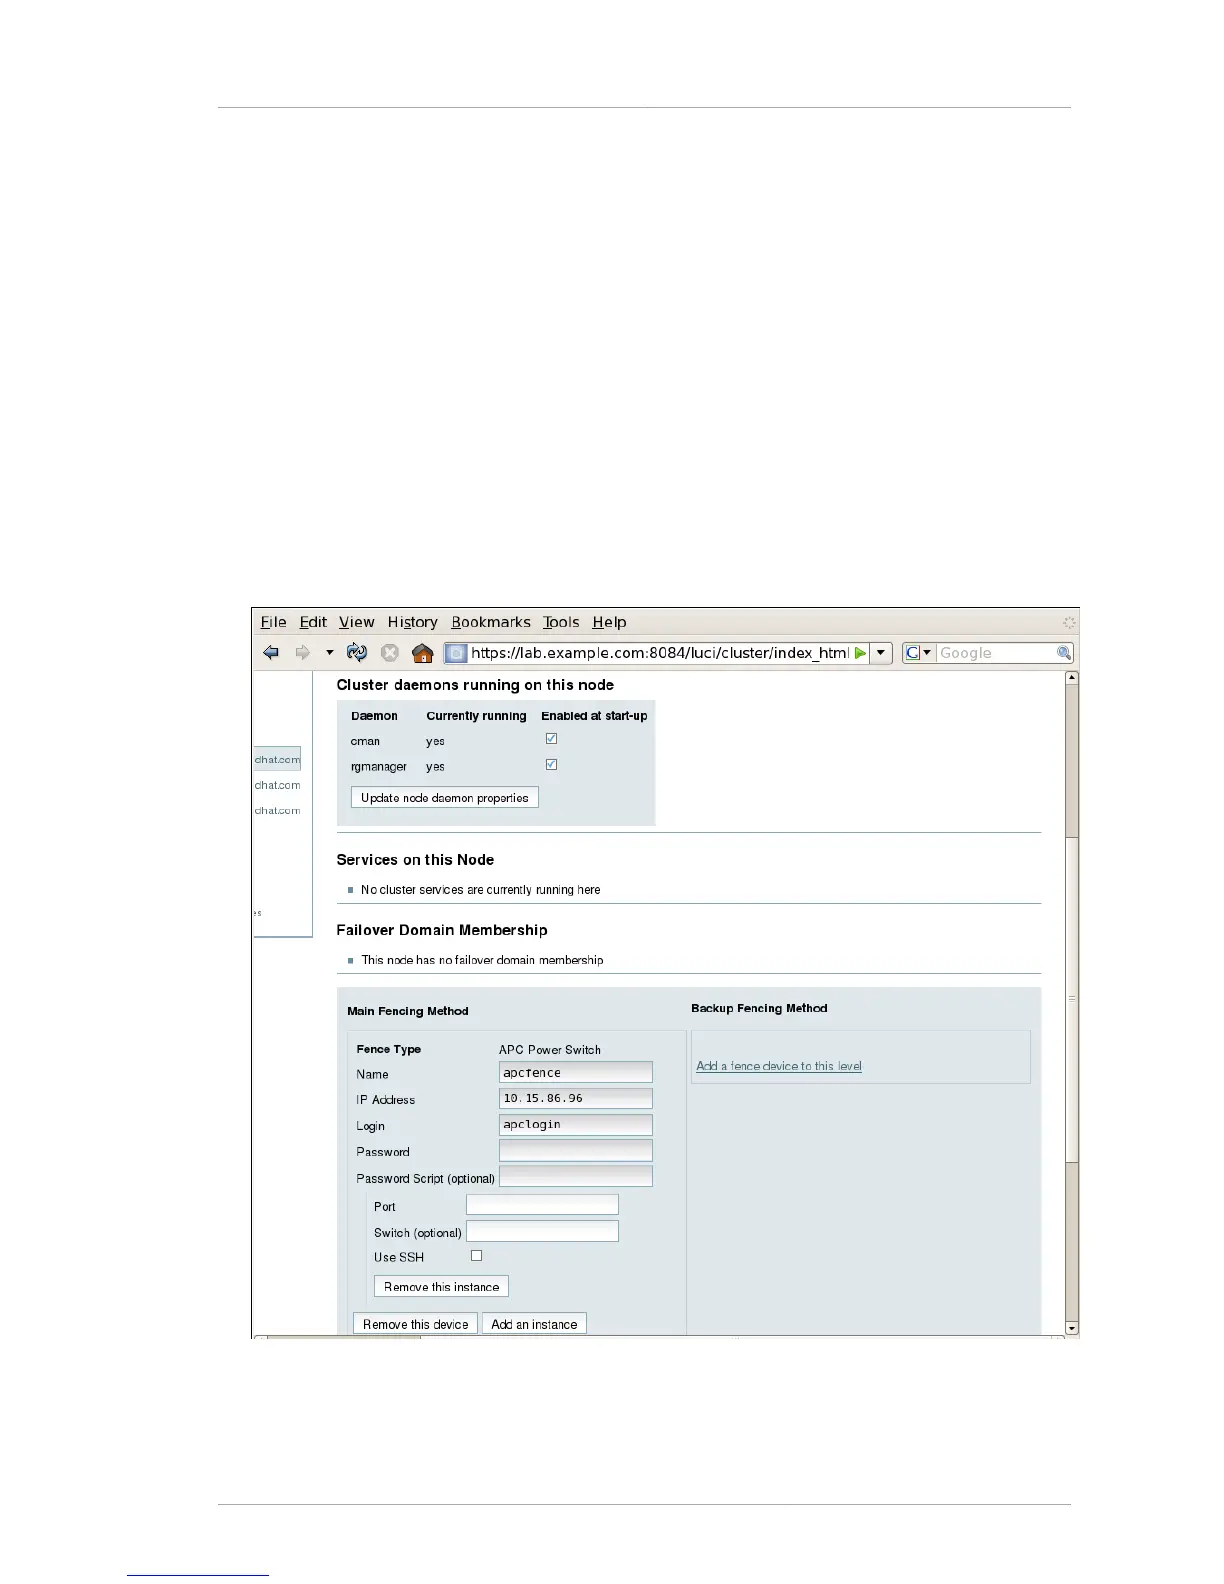
you configured apcfence as a shared fence device. This is shown in Figure 2.3, “Adding an
Existing Fence Device to a Node”.
Figure 2.3. Adding an Existing Fence Device to a Node
5. For Port, enter 1. Do not enter any value for Switch.