EasyManua.ls Logo

Reddot R-9777 User Manual

Reddot R-9777
4 pages
To Next Page IconTo Next Page
Page #1 background imageLoading...
Page #1 background image
Red Dot Corporation P.O. Box 88790, Seattle, WA 98138 (425) 251-6897 Fax (425) 251-3934
RD-3-9821-0 REV - For Reference Only. Subject to change without notice Page 1 of 4
INSTALLATION INSTRUCTIONS
Model R-9777
Air Conditioner /
Heater
NOTE
1. Please read instructions all the way through, making sure you have all the parts and tools.
2. While working on or around a vehicle, disconnect the battery to prevent accidental start-up or electrical shorts.
3. Use care so as not to release any R-134a refrigerant into the atmosphere.
4. A/C systems operate under high pressure. At 77°F the R-134a container will be pressurized to approximately
80 psi. Use caution when working with these materials. Goggles are recommended.
5. To function properly the A/C system must be clean and dry. Keep caps or protective covers on all refrigerant
hoses and fittings until final assembly.
1. A compressor, compressor bracket, belts and refrigerant hoses are required to complete the installation.
These items may be obtained from your RED DOT Distributor.
2. The compressor must have sufficient capacity to allow the unit to deliver the rated BTU output. An 8 cubic
inch compressor turning faster than 1,750 rpm is required.
3. For pressurizing the cab and drawing fresh air, 78R 5110 remote mount filter is available with booster blower
(73R 9202-12V or 73R 9204-24V).
1. Connect drain hose and 90° elbows as provided in the
installation kit (RD-3-9146) to the unit.(See Figure 1)
2. Determine the location for mounting the heater-air
Conditioner unit per Red Dot template.
a. Refer to figure 2.
b. Mark the front-to-rear centerline of the cab on the
outside of the cab roof.
c. Place the mounting template on the roof using the
centerline as a guide.
d. Ensure that air flow to the unit is not obstructed.
e. Do not mount the unit with the front lower than the
rear, as this will prohibit water drainage.
f. Avoid cuffing roof stiffeners if possible. If stiffeners
are cut or roof is weakened due to the cut-out,
reinforcement may be required.
3. Tape the template to the roof at the desired location.
Mark the roof cut-out area (scribe the roof).
NOTE: Before taping the template to the roof, decide
what direction the unit is to be oriented. It is
recommended that the "recirc inlet" be to the rear and the
"discharge air" be positioned toward the front of the cab
(This puts the condenser at the front and the plumbing to
the rear).
BEFORE STARTING
MOUNTING THE UNIT ON CAB ROOF
Question and Answer IconNeed help?

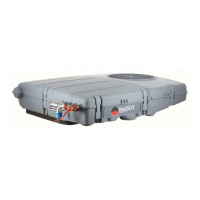
Do you have a question about the Reddot R-9777 and is the answer not in the manual?

Reddot R-9777 Specifications

General IconGeneral
BrandReddot
ModelR-9777
CategoryHeater
LanguageEnglish

Summary

Before Starting Installation

Required Components and Compressor Specs

Lists required components like compressor, bracket, belts, and hoses, plus compressor capacity requirements.

Air Circulation System Options

Mentions the availability of a remote mount filter and booster blower for cab pressurization.

Mounting the Unit on Cab Roof

Connect Drain Hose and Elbows

Connects the drain hose and 90° elbows provided in the installation kit to the unit.

Determine Unit Mounting Location

Determines the mounting location using a template and cab centerline.

Mark Roof Cut-out Area

Tapes the template to the roof and marks the roof cut-out area.

Cut Holes and Drill Mounting Points

Cuts rectangular inlet/outlet holes and drills 1/2" diameter mounting holes.

Clean and Seal Mounting Area

Cleans the roof area and applies sealant around cut-out and mounting holes.

Secure Unit with Mounting Bolts

Installs four mounting bolts, applying sealant and avoiding impact wrenches.

Refrigerant Hose Installation

Cut and Fit Hoses

Cut hoses to length, clean, and install steel bead lock fittings.

Route Hoses to Compressor

Route hoses over the cab and down the back wall to the compressor.

Secure Hoses with Clamps

Use clamps to secure hoses and prevent movement or abrasion.

Secure Drain Hoses

Attach Drain Tubes

Secure drain tubes with tie wraps, attaching to refrigerant hoses if downhill.

Inspect Drain Tubes

Inspect drain tubes to ensure they are not kinked, especially at the back.

Air Diffuser and Recirc Plenum Installation

Wire Unit Components

Connects fan circuit, blower circuit, and compressor clutch circuit wires.

Install Control Converter

Installs the cable control converter through the control panel.

Attach Air Distribution Plenum

Attaches the air distribution plenum to the headliner and starts mounting bolts.

Install Recirc/Filter Plenum

Installs the recirc/filter plenum to the headliner and starts mounting bolts.

Final Assembly and Check

Evacuate, Test, and Charge System

Evacuates the system, tests for leaks, and charges with R-134a refrigerant.

Connect Battery and Test Operation

Connects the battery and tests fan speeds, A/C clutch, and blower operation.

Engine Running Pressure Check

Starts the engine and checks gauges for normal pressures at specified RPM.