5 6
Connection Diagram
VGAHDMIUSB
AUDIO
OUT
DC 48V
ON
2 4 6 8
1 3 5 7
OFF
LAN
eSATA
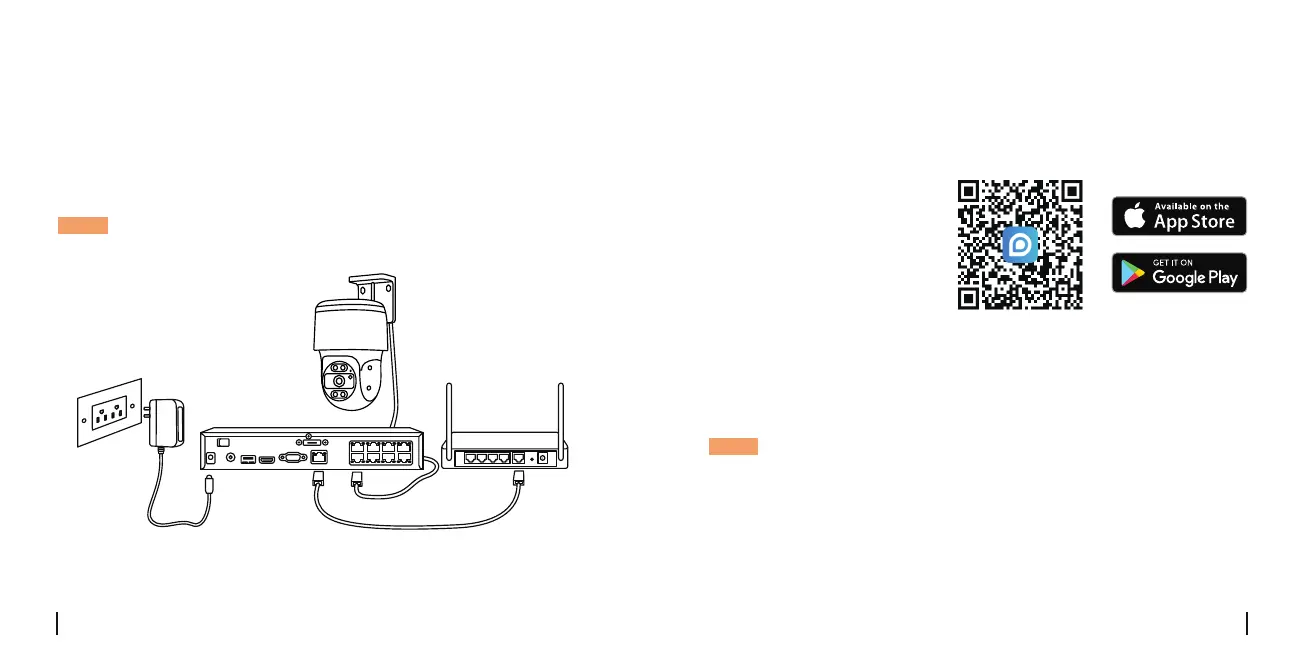
Beforeusingthecamera,pleaseconnectyourcameraasinstructed
belowtonishinitialsetup.
1.ConnectthecameratoaReolinkNVR(notincluded)withanEthernet
cable.
2.ConnecttheNVRtoyourrouter,andthenpowerontheNVR.
PoEIPCamera
ReolinkNVR Router
Power Adapter
EthernetCable
EthernetCable
NOTE:Thecamerashouldbepoweredwitha12VDCadapteroraPoE
poweringdevicesuchasPoEinjector,PoEswitchorReolinkNVR(notin-
cludedinthepackage).
*YoumayalsoconnectthecameratoaPoEswitchorPoEinjector.
Set UP the Camera
• On Smartphone
Scan to download
theReolinkApp.
DownloadandlaunchtheReolinkApporClientsoftware,andfollowthe
onscreeninstructionstonishinitialsetup.
NOTE:
•IfyouareconnectingthePoEcameratoaReolinkPoENVR,pleaseset
upthecameraviatheNVRinterface.
English English