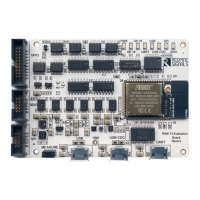
The RS9113 Module Evaluation Kit (EVK) is a comprehensive platform designed for evaluating the RS9113 modules, which integrate multiple host processors/MCUs over interfaces like SDIO, USB, USB-CDC, SPI, and UART. The EVK includes a sample driver and applications to facilitate testing.
Function Description:
The RS9113 module is a low-power, single spatial stream, dual-band 802.11n + BT4.0 + ZigBee Convergence SoC. It features a multi-threaded MAC processor with integrated analog peripherals and support for digital peripherals, baseband digital signal processor, analog front-end, crystal oscillator, calibration OTP memory, dual-band RF transceiver, dual-band high-power amplifiers, baluns, diplexers, diversity switch, and Quad-SPI Flash. This fully-integrated solution is designed for embedded wireless applications.
The evaluation kit supports various modes of operation, including:
- Wireless Functionality: Wi-Fi, BT 4.0, and ZigBee.
- Security Modes: Supports various security protocols for secure communication.
- Throughputs: Designed to demonstrate the throughput capabilities of the RS9113 module.
- Power Consumption: Allows for evaluation of the module's power efficiency.
- Firmware Upgrade: Provides mechanisms for updating the module's firmware.
The kit includes:
- RS9113 Module Evaluation Board
- USB Pen drive
- USB-to-microUSB Cable
- SDIO Adaptor Cable
- SPI Adaptor Cable
Redpine provides drivers for multiple OS's and MCU platforms for both n-Link® modules and OS-less MCU platforms for WiSeConnect® modules. The software provided in this kit enables easy and quick evaluation on a PC.
Important Technical Specifications:
The RS9113 module supports:
- Wi-Fi: Client, Access Point, Wi-Fi Direct, Wi-Fi Client and Bluetooth Classic, Wi-Fi Client and Bluetooth Low Energy, Wi-Fi Client and Zigbee.
- Bluetooth: BT 4.0 (Bluetooth Classic and Bluetooth Low Energy).
- ZigBee: Zigbee Home Automation Profile.
- Interfaces: SDIO, USB, USB-CDC, SPI, and UART.
- Operating Modes: Client, Access Point, Wi-Fi Direct, Wi-Fi Access Point Mode.
- Baud Rate: 115200 for UART communication.
- Frequency Bands: 2.4GHz and 5GHz for Wi-Fi.
- Security Types: WPA, WPA2, WEP-64, WEP-128, WPA-PSK (TKIP), WPA2-PSK (CCMP), EAP-TLS, EAP-PEAP, EAP-FAST.
- IP Version: IPv4 and IPv6 support.
- GPIOs: 19 GPIO pins available for general purpose I/O, with specific pins supporting 3.3V supply.
- SPI Header Pins: Includes SPI_CS, SPI_CLK, SPI_MOSI, SPI_MISO, SPI_INTR, and RESET pins.
- SDIO Header Pins: Includes SDIO_CMD, SDIO_DATA0, SDIO_DATA1, SDIO_DATA2, and SDIO_CLK pins.
Usage Features:
The evaluation process typically involves connecting the EVB to a PC via USB-to-microUSB cable or micro-USB port labeled "UART". The kit is designed to be bootable from the USB drive, which contains Fedora Core 18 OS and necessary drivers.
Initial Setup:
- Booting the EVB: The USB drive provided with the kit is bootable. Insert the USB drive into the PC and turn on the host PC. Interrupt the PC from booting in normal mode (default) by pressing 'F12' key to select the boot menu option and choose the USB storage device.
- Menu Options: Once booted, a menu will be presented with options to Start RS9113 or Troubleshooting.
- Linux Environment: Wait until the booting completes and then get to the Linux screen. Open a terminal window and enter "gnome-terminal" to open a new terminal.
- Super User Mode: Enter "sudo su" command and the password "redpine" to enter super user mode.
- EVB Connections:
- USB/UART/USB-CDC: Connect the USB-to-microUSB cable between a USB port of a PC/Laptop and the micro-USB port labeled USB, UART or USB-CDC on the EVB. Verify that the LED labeled "USB", "UART" or "USB-CDC" lights up.
- SDIO Mode: Connect the USB-to-microUSB cable between a USB port of a PC/Laptop and the micro-USB port labeled USB on the EVB. Insert the SDIO Adaptor into the SDIO slot of the PC/Laptop. Verify that the LED labeled "SDIO" lights up.
- SPI Mode: Connect the USB-to-microUSB cable between a USB port of a PC/Laptop and the micro-USB port labeled USB on the EVB. Connect the other wires of the SPI adaptor to the SPI signals of a Host MCU platform.
Wi-Fi Client Operation:
- Installation: Navigate to the
/home/OneBox-Mobile/<interface> folder and enter the parameters of the Wi-Fi network.
- Configuration: Configure SSID, security type (WEP-64, WEP-128, WPA-PSK, WPA2-PSK), and passphrase.
- Connection: Run the
start_sta.sh script to load the driver modules and connect to the Access Point.
- Verification: Use
ifconfig -a and iwconfig wifi0 to check the connection status.
- Throughput Testing: Use
iperf to measure UDP and TCP throughputs.
Bluetooth Manager:
- Installation: Run the
bt_insert.sh script in /home/OneBox-Mobile/<interface> folder to start the Bluetooth Classic module.
- Verification: Use
hciconfig to check if the Bluetooth module has started successfully.
- Pairing: Open the Bluetooth Manager, search for devices, and pair with a target device.
Zigbee Coexistence Mode:
- Installation: Run the
zigb_insert.sh script in /home/OneBox-Mobile/<interface> folder to start the Zigbee module.
- Home Automation Application: The kit includes a sample Home Automation switch application. Build and run the application using
make clean, make switch, and run the switch app by giving following command # ./switch.
- Callbacks: The application callbacks are defined in
app_callbacks.c and handle events such as AppScanCompleteHandler(), AppEnergyScanResultHandler(), AppNetworkFoundHandler(), AppZigBeeStackStatusHandler(), etc.
Driver Uninstallation:
remove_all.sh: Uninstalls the complete driver and all modules.wlan_remove.sh: Uninstalls the Wi-Fi specific modules only.bt_remove.sh: Uninstalls the Bluetooth specific modules only.zigb_remove.sh: Uninstalls the Zigbee specific modules only.
Maintenance Features:
-
Firmware Upgrade: The EVK supports firmware upgrades for n-Link® and WiSeConnect® modules via UART using TeraTerm.
- Download and install TeraTerm.
- Open TeraTerm and set up a "new connection".
- In the TeraTerm window, click on Setup -> Terminal... and configure the settings.
- Click on Setup -> Serial port... and set the Baud Rate to 115200.
- After the Automatic Baud Rate Detection timeout, a "Welcome" message and available options will appear.
- Select '2' to select Firmware Upgradation mode.
- Click on File -> Transfer -> Kermit -> Send... and navigate to the firmware file (
RS9113.NBZ.WC.GEN.OSI.x.x.x.x\Firmware folder).
- A dialog box will open showing the transfer of the firmware file.
- Once the firmware is transmitted, the module boots up with the updated firmware.
-
BIOS Setup for Windows 8 and Later PCs:
- Boot up the PC and press F2 to enter the BIOS setup screen.
- Scroll down to "Security" section and select "Secure Boot".
- Disable "Secure Boot" option.
- Scroll down to "Advanced" section and hit Enter.
- Scroll down to "System Configuration" option and hit Enter.
- In the new screen, select "Boot Mode" and set it to "UEFI Boot".
- Select "Boot Mode" option and hit Enter to disable UEFI Boot and enable CSM Boot.
- Exit the setup and save the changes.
-
Troubleshooting: The manual provides guidance on various issues, including driver initialization failures, network connectivity problems, and throughput measurement discrepancies. It also includes commands for debugging driver prints (cat /proc/onebox-mobile/stats and echo 0x0 > /proc/onebox-mobile/debug_zone/).
The RS9113 Module Evaluation Kit provides a robust and flexible platform for developers to evaluate and integrate Redpine Signals' wireless modules into their embedded applications, covering a wide range of functionalities from basic connectivity to advanced security and coexistence scenarios.