Do you have a question about the Regency 72” STORAGE CABINET LSC7236 and is the answer not in the manual?
Lists and identifies all hardware components and cabinet parts required for assembly.
Connect front support (N) to middle support (O) by inserting the dowel rod.
Connect front and middle supports to the bottom panel (P) using dowel rods.
Insert cam pins into back panel (M) and connect to bottom (P) by locking cams.
Insert cam pins into the left (Q) and right (R) side panels for connection.
Attach side panels (Q, R) to back (M) and bottom (P) using cam locking mechanism.
Screw in 6 adjustable glides (I) into the base using medium screws (G).
Insert cam pins into bottom (P) and attach center wall (W) by locking cams.
Screw cam pins into top panel (T) and attach it to the main structure.
Attach mounting brackets (A) and hinges to sides (Q, R) and center wall (W).
Attach right doors (U) to sides (Q, R) and left doors (V) to center wall (W).
Use large screws (J) to attach door handles (K) to the cabinet doors.
This document provides comprehensive instructions for assembling and maintaining the Regency 72" Storage Cabinet, models LSC7236 and VSC7236, designed for office environments. The cabinet serves as a robust and organized storage solution, offering ample space for various office supplies, documents, and other items, thereby contributing to a clutter-free and efficient workspace. Its design emphasizes both functionality and ease of assembly, with clear, step-by-step guidance provided to ensure a smooth setup process.
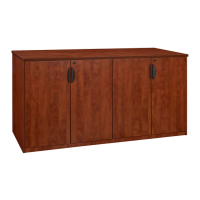
The Regency 72" Storage Cabinet is primarily designed for organizational purposes within an office setting. It features a multi-compartment structure, including four shelves, two right-side doors, and two left-side doors, along with a center wall, allowing for segregated storage and easy access to contents. The cabinet's substantial height of 72 inches maximizes vertical storage potential, making it suitable for environments where floor space is at a premium. The inclusion of adjustable glides ensures stability on uneven surfaces, a crucial feature for maintaining the integrity and levelness of the cabinet in various office floor conditions. The doors are equipped with handles and a locking mechanism, providing security for sensitive documents or valuable items. The cabinet's construction is intended to be durable, supporting the weight of numerous items without compromising structural integrity. The design also facilitates the integration of the cabinet into existing office furniture arrangements, offering a professional and cohesive look.
The assembly process for the Regency 72" Storage Cabinet is meticulously detailed, starting with the organization of parts and hardware. Users are advised to have a Phillips head screwdriver, a flat head screwdriver, and a rubber mallet on hand, indicating that the assembly is largely tool-assisted but manageable for individuals with basic DIY skills. The hardware components are clearly labeled, including mounting brackets, inner and outer hinges, lock lips, various screws (small, medium, large), cam pins, shelf pins, adjustable glides, door handles, and keys. This detailed labeling system is crucial for preventing errors during assembly and ensuring that each component is used in its correct location.
The assembly begins with attaching the front support to the middle support using dowel rods, followed by connecting these to the bottom panel. This foundational step establishes the base structure of the cabinet. Cam pins are a recurring feature in the assembly, used to secure various panels together, such as the back to the bottom, and the left and right sides to the back and bottom. The instructions emphasize the correct orientation of cam locks, which is vital for a secure fit. The center wall is then attached to the bottom using cam pins, ensuring the internal division of the cabinet.
A key feature for stability and adaptability is the installation of adjustable glides. Six glides are screwed into the bottom of the cabinet using medium screws, allowing users to level the cabinet on uneven floors, preventing wobbling and ensuring the doors align correctly. The top panel is secured to the structure using cam pins and small screws for the locking lips, completing the main body of the cabinet.
The door installation process involves attaching eight mounting brackets to pre-drilled holes in the sides and center wall. These brackets are designed with an open end facing out, facilitating the mounting of hinges. Inner hinges are mounted to the center wall, and outer hinges to the side panels. The hinges are secured by sliding a bolt into the open end of the mount and tightening a screw on the back, ensuring a firm and adjustable attachment. Finally, the right-side doors are mounted to the side panels, and the left-side doors to the center wall, using medium screws for each hinge. Door handles are then attached to the doors using large screws, completing the cabinet's functional elements. The inclusion of keys indicates a locking mechanism, providing an added layer of security for the stored items.
The manual provides several important notices regarding the care and maintenance of the cabinet, primarily focused on preventing damage during assembly and ensuring longevity. Users are strongly advised to place all wooden parts on a clean and smooth surface, such as a rug or carpet, during assembly. This precaution is critical for preventing scratches and other surface damage that could compromise the aesthetic appeal and durability of the cabinet.
Before starting assembly, users are instructed to verify that all parts and hardware are present. This step is essential for avoiding interruptions during the assembly process and ensuring that the cabinet can be fully constructed as intended. Furthermore, removing all wrapping materials, including staples and packing straps, before assembly is highlighted as a necessary step to prevent any accidental damage or obstruction during the construction phase.
A crucial maintenance guideline is to avoid fully tightening all screws and bolts until the entire cabinet is completely assembled. This allows for minor adjustments and alignments during the assembly process, ensuring that all panels fit together correctly and the structure is square. Overtightening prematurely can lead to misalignments, stripped screws, or even damage to the wooden components. Once the cabinet is fully assembled and aligned, all fasteners can then be securely tightened.
Finally, a safety reminder is included: "Keep all hardware parts out of reach of children." This is a standard safety measure for furniture assembly, preventing potential choking hazards or injuries from small components.
In case of any problems or questions during assembly or use, customers are directed to call Regency Office Furniture, providing a dedicated support line. This ensures that users have access to assistance, which is a key aspect of product maintenance and customer satisfaction. The comprehensive instructions, coupled with these maintenance advisories, aim to provide users with a durable, functional, and well-maintained storage solution for their office environment.
| Product Name | Regency 72” STORAGE CABINET LSC7236 |
|---|---|
| Category | Indoor Furnishing |
| Width | 36 inches |
| Height | 72 inches |
| Depth | 18 inches |
| Material | Steel |
| Color | Black |
| Number of Shelves | 4 |
| Lockable | Yes |
| Wheels | No |