EasyManua.ls Logo

Relax-A-Lounger SKYLAR User Manual

Relax-A-Lounger SKYLAR
16 pages
To Next Page IconTo Next Page
Page #1 background imageLoading...
Page #1 background image
WARNING
WW - 12 / 25 / 2017
SKYLAR
ASSEMBLY INSTRUCTIONS
This product has been designed for seating three (3) average adults. To prevent injury and damage to this unit, PROHIBIT jumping on it.
This product is designed for home use and not intended for commercial use.
Children under the age of 5, small infants and babies should not sleep alone on this product for safety reasons.
Recommended # of people needed for handling: 2 (however it is always better to have an extra hand.)
THIS INSTRUCTION BOOKLET CONTAINS IMPORTANT SAFETY INFORMATION. PLEASE READ AND KEEP FOR FUTURE REFERENCE.
STOP
Need parts or assistance?
Please call :
866-626-7826
For prompt, reliable service; please have your assembly
manual ready.
If a part is missing or damaged, call our
toll - free customer service line.
DO NOT RETURN PRODUCT TO THE
STORE
individual stores do not stock parts.
R
Question and Answer IconNeed help?

Do you have a question about the Relax-A-Lounger SKYLAR and is the answer not in the manual?

Relax-A-Lounger SKYLAR Specifications

General IconGeneral
Product TypeRecliner
Frame MaterialWood
ColorGray
Weight Capacity300 lbs
Assembly RequiredYes
MaterialFabric
Reclining Positions3

Summary

Parts Identification

Hardware Identification

Assembly Steps

Step 1: Connect Pull Out A to Sofa Body

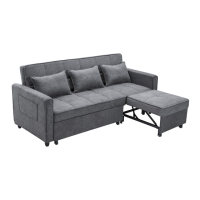
Connect the Pull Out A unit to the main Sofa Body.

Step 2: Attach Arms

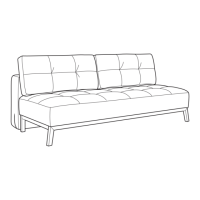
Attach the Arm components to the sides of the assembled sofa structure.

Step 3: Install Base Frame

Secure the Base Frame to the main body of the sofa.

Step 4: Attach Support Legs

Mount the Support Legs to the designated points on the sofa frame.

Step 5: Final Tightening

Ensure all previously installed bolts are securely tightened.

Step 6: Integrate Pull Out B

Connect the Pull Out B unit into the sofa assembly.

Step 7: Complete Assembly

Final assembly actions to complete the sofa structure.

Step 8: Final Fabric Adjustment

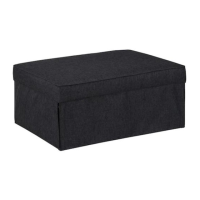
Adjust and tuck any loose fabric for a neat finish.
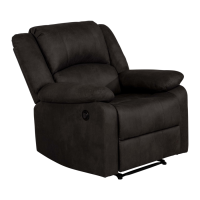
Product Functions Overview

Related product manuals