11.
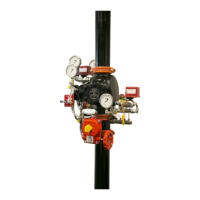
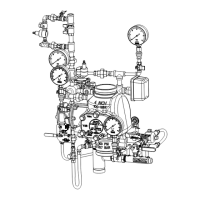
Maintenance & Trouble Shooting (Refer to Fig. 1)
The following table provides a simplified, trouble-shooting guide which indicates the necessary corrective maintenance
for the more common problems, which may occur.
Symptom Probable Cause Correction
Air flows rapidly through
the Accelerator and
into the outlet port
when resetting.
The Push-Rod is in the held down position by
contamination, the Push-Rod is bent or the
Push-Rod guide is too tight.
Clean or replace as needed.
Minor air flow or leakage
through the Accelerator.
1. Contamination in the poppet area.
2. The Poppet “O”-Ring has blown off the
Poppet, or is cut.
3. The Accelo-Check diaphragm has a
hole or rip allowing air to reach the outlet
through passageway (F).
4. Leakage past the Push-Rod Guide “O”-
Ring.
5. The Push Rod or Push-Rod Guides dam-
aged causing leakage.
1. Clean.
2. Install new “O”-Ring.
3. Replace.
4. Replace.
5. Replace.
No or low air pressure
in the top chamber
(gauge pressure does
not increase, and no air
pressure in the outlet).
1. Filter assembly is clogged.
2. Restriction area (Passageway G) is
clogged or the filter on the diaphragm
nut is clogged.
1. Replace
2. Replace.
Accelerator will not trip
during a system test.
1. The top chamber air pressure is bleed-
ing back to the system too fast through
restriction area.
2. The top chamber air pressure is bleeding
back to the system through the ripped
diaphragm.
3. External leak in top chamber.
4. Filter assembly restricted.
1. Clean the top of the Push-Rod and
mating surface in diaphragm nut, or
replace.
2. Replace
3. Check the gauge and the drain plug
for tightness-use new PTFE tape on the
plug after each resetting.
4. Replace.
Accelerator floods with
water.
1. Check Valve A (Figs. 3, 4, 5 or 6) for leak-
age when the system is filled with water.
2. The Accelo-Check “O”-Ring is missing or
cut.
3. Leakage past the Push-Rod Guide “O”-
Ring.
4. Push rod or Push-Rod Guide is dam-
aged allowing leakage.
5. Condensate from the compressor has
not been drained.
1. Wipe off the clapper facing and seat
clean.
2. Replace if necessary.
3. Replace.
4. Replace.
5. Remove Plug B (Figs. 2 & 3) to drain
any water from the air supply.
Accelerator operates
prematurely.
1. Water or dirt in the restriction area.
2. Air is not bleeding back through the re-
striction area to compensate for minor
pressure fluctuations.
3. Dry pipe valve is operating prematurely -
not the accelerator.
4. On-Off is setting of the compressor’s
pressure switch allowing the system
pressure to decay too far.
5. Excessive leakage between air/nitrogen
supply and Check Valve A (Figs. 3, 4, 5
and 6).
1. Clean top of the Push-Rod and mating
surface-perform sensitivity test.
2. Replace Push-Rod and / or diaphragm
nut. In “Test” section of this Technical
Bulletin - perform sensitivity test.
3. Review the correct pressure settings
from the corresponding system’s tech-
nical bulletin.
4. Readjust the differential of pressure
switch to minimum (6-8 psi) when us-
ing an accelerator.
5. Repair leaks.
 Loading...