grey
grey
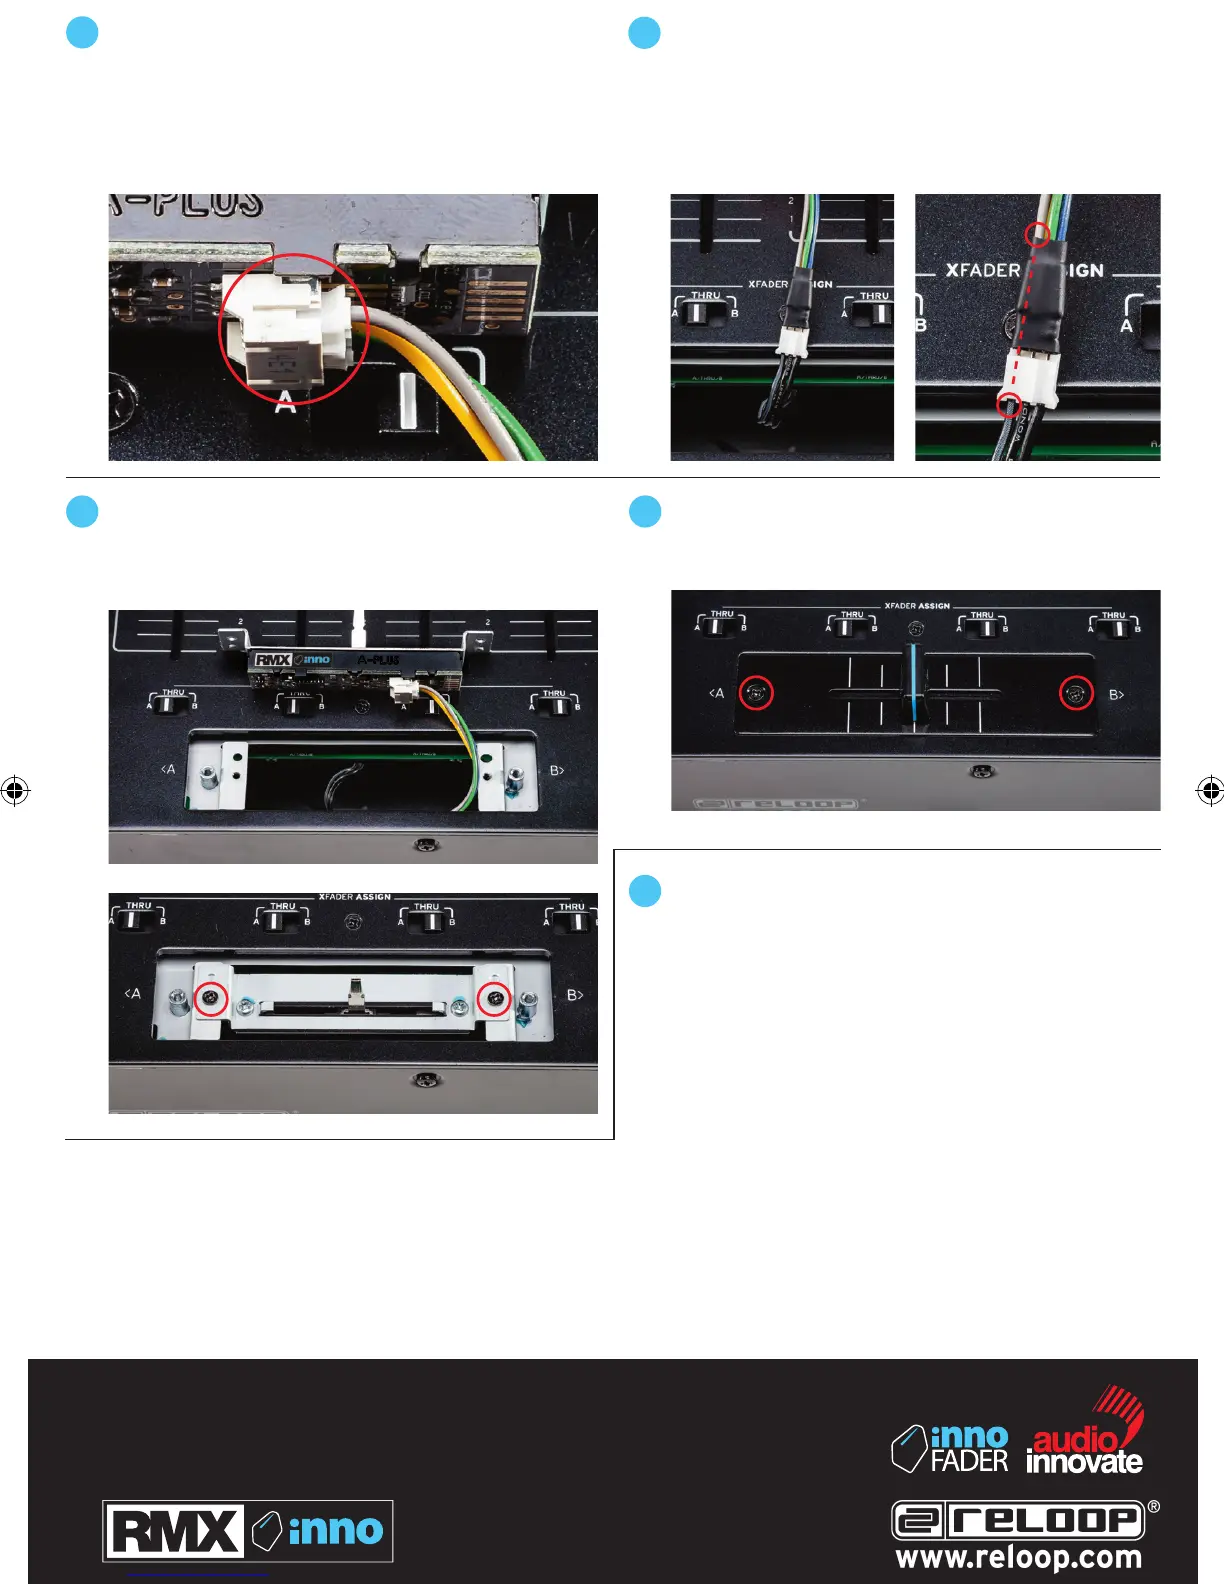
5
Now,takethemountingplateandxitontheminiInnofader
using the two screws to fasten it. Take the included adapter
cable and insert the 4Pin connection to the mini Innofader
socket.
The mounting plate should be in the correct upside-down
position to match with your mixer.
6
Now, plug the other end of the adapter cable to the mixer
connection.
ATTENTION: The grey adapter cable shown in the image
below must be aligned towards the grey cable from the
mixer connection. If the fader doesn‘t work at all you
probably did this wrong.
7
Place the mini Innofader into the unit and tighten the screws.
Please be sure the socket connector is oriented to the right
andthemountingplatesitsushandmatchesthemounting
groove.
8
Put the crossfader plate on the unit and place the two
screwsshownintheredcircletoxit.Putthefadercapon
the shaft.
9
Reconnect power cable to the mixer and power on. The
mini Innofader should now operate correctly. The Reloop
mini Innfofader is already calibrated for perfect sharpness.
If you wish to adjust the CUT IN manually please refer to
further manuals here:
www.reloop.com/reloop-rmx-innofader
IM_RMX_innofader_V1.5_15012015.indd 2 16.07.2015 09:25:21
 Loading...