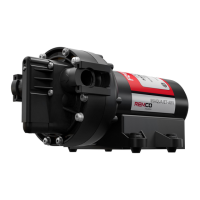
AQUAJET SERIES PUMPS
Operational and Installation Guidelines
55AQUAJET-AES – 3.4 GPM/12VDC, WITH FUSE
55AQUAJET-OES – 3.4 GPM/12VDC, NO FUSE
55AQUAJET-ARV – 5.0 GPM/12VDC, WITH FUSE
55AQUAJET-ORV – 5.0 GPM/12VDC, NO FUSE
RV Water System Pumps
Maintenance Tips
1. Never operate the pump in an atmosphere where flammable gases may be present, since arcing at the motor brushes or
switch contacts may cause an explosion.
2. After extended operation, or if malfunctioning, metal surfaces of the pump may become hot and cause burns if touched.
If this occurs, disconnect electrical power and wait 30 minutes before touching pump.
3. Never mount the pump where the surface temperature of the motor or the controller (200° F maximum) may cause
ignition of the surrounding materials.
4. Do not wrap the pump with an insulating material or enclose it so tightly that air circulation around the pump is
prevented. The pump will generate approximately the same amount of heat as a 75 watt light bulb.
5. The pump should be mounted in a dry location away from any heat and water source(s).
6. Pumphead materials are designed for use with water only and should never be used with petroleum products. Chlorine
will deteriorate the parts in the pump. Always rinse the system with fresh water after sanitizing to help prolong the life of
the parts.
7. The pump is equipped with a pressure sensing demand switch which controls the maximum operating pressure as
set at the factory. Never subject the pump to pressures above 90 PSI maximum. This switch should never be adjusted
without consulting factory.
8. Always consider electrical shock hazards when working with and handling electrical equipment. If uncertain in your
abilities, please consult an electrician.
9. 55Aquajet ORV, OES, ARV and AES Series pumps are equipped with an automatically resetting thermal protector. If a
pump is not running, it may restart at any time.
10. Both the 55Aquajet ARV and AES Series include a fuse-holder. It is important to use only a 15 amp AGC automotive type
fuse for the Aquajet RV Series and a 10 amp AGC fuse for the Aquajet ES Series. Once again, use only these types of
fuses with these specific pumps.
11. It is necessary to use a screen filter between the water holding tank and the pump to prevent debris from entering the
pump. Particulate matter may cause the valves inside the pump to stick open. This filter needs to be cleaned on a regular
basis, or it will restrict water to the pump.
12. Winterizing the pump: If water is not drained from the system during freezing temperatures, damage to the pump and
the plumbing is likely:
a. Drain the water holding tank.
b. Chlorine will deteriorate the parts in the pump. Always rinse the system with fresh water after sanitizing to help
prolong the life of the parts.
c. Open all faucets and run the pump to expel all water.
d. Disconnect inlet and outlet fittings and run pump to remove residual water from the pump.
e. Leave fittings disconnected from pump.
Installer qualifications
If you intend to install an Aquajet Series pump without professional assistance, you should clearly be “handyman” competent
enough to do simple low voltage electrical wiring, crimp connectors, obtain voltage measurements, understand polarity as
well as schematics which illustrate relay connections. Additionally, you should be comfortable with water system plumbing,
installing hose clamps, using Teflon tape, and removing/re-tightening compression fittings.
A typical Aquajet installation takes between 1 - 2 hours and requires the following:
Warning
The 5-chamber Aquajet Series pumps are more powerful than most existing RV water pumps and, as a result, may draw more
current (Amps) than the pump(s) they replace. It is imperative that any power supply, fuses/circuit breakers, wiring, switches,
connectors, or controllers that are used to supply 12 VDC to the pump are adequately sized. Inadequately sized components
may overheat, causing an electrical fire.
When installing an Aquajet Series pump, positive voltage (+12VDC) must be connected to the Aquajet’s red fused leadwire.
Reversing polarity will instantly blow the fuse and may permanently damage the controller.
If you are uncertain with respect to any of this information, Remco highly recommends that a qualified technician perform
your installation and determine the existing polarity of your current wiring.
Please read the following instructions before attempting an installation. When properly installed, Aquajet Series
pumps can be used in virtually any existing RV.
If you prefer to have the pump professionally installed, contact Remco (1-800-228-2481) to locate your nearest
authorized service center.
www.remcoindustries.com Page 1


