(SSPUMVYTH[PVUJVU[HPULKVU[OPZZOLL[PZ[OLWYVWLY[`VM9LTV[L2PUN7;@3;+
<UH\[OVYPZLK\ZLVYYLWYVK\J[PVUPZWYVOPIP[LK
9. On the screen should be dis-
SOD\HG³U´+ROGWKH¿UVWEXW-
ton on the original remote, un-
WLOµ¶µ$¶RUµ3¶EULHÀ\
appears on the screen. If there
LVDQHUURUDPHVVDJHZLOOÀDVK
RQVFUHHQDQ\ÀDVKLQJRQWKH
screen is an error). In this case,
press button 1 on the cloning
machine and try the button on
the remote again.
10. On the screen should be dis-
played “r--2”. Press the second
button on the original remote. If
it only has 1 button, skip to step
13.
11. On the screen should be
displayed “r--3”. Press the third
button on the original remote.
If it only has 2 buttons, skip to
step 13.
12. On the screen should be dis-
played “r--4”. Press the fourth
button on the original remote. If
it only has 3 buttons, just ignore
this step.
13. Connect the data link ca-
ble (as pictured) to the RCR10
cloning remote. Press button
‘2’ on the cloning machine. If it
LVVXFFHVVIXO³3´RU³3´
will be displayed on screen. You
have now successfully cloned
a remote.
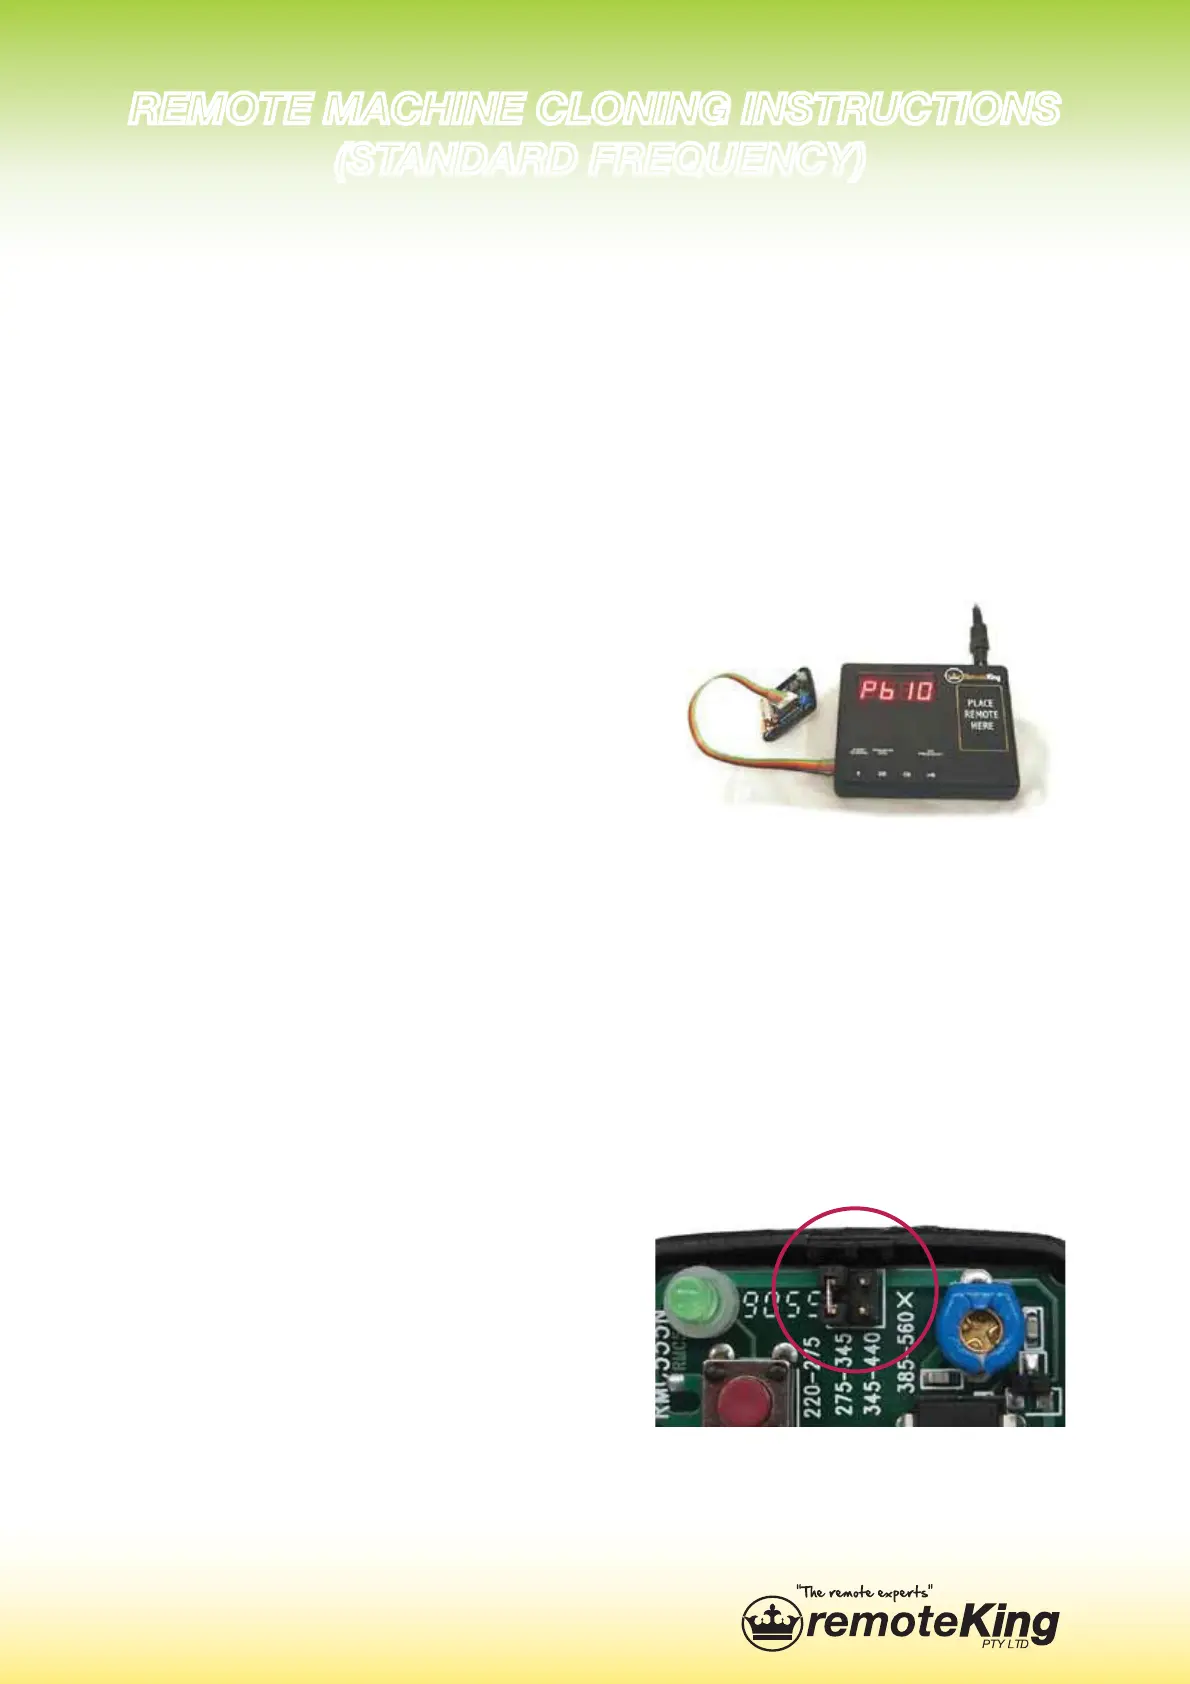
Note: In order for the RCR10
to reach 434MHz, it is required
for the ‘jumper’ to be moved
across to the other set of prongs
(as pictured). They are situated
next to the blue tuner dial.
9,46;,4(*/05,*36505.05:;9<*;065:
:;(5+(9+-9,8<,5*@
 Loading...