English English5 6
Install the Solar Panel with Strap
IMPORTANT NOTICE
If you plan to mount the solar panel to a tree, you are recommended to use the strap.
• Make sure the solar panel is not blocked. The energy harvesting eciency drops drastically even
when a small portion of the solar panel is blocked.
• Please don’t install the solar panel completely horizontally. Otherwise your solar panel might
accumulate dust and other debris easily. It’s advised to install the solar panel angularly to receive
the most direct sunlight.
• Wipe the solar panel regularly to remove dust or debris.
• Please charge the batteries in temperature between 0°C and 45°C (32-113°F). The solar panel
won’t charge the camera at temperatures below 0°C (32°F).
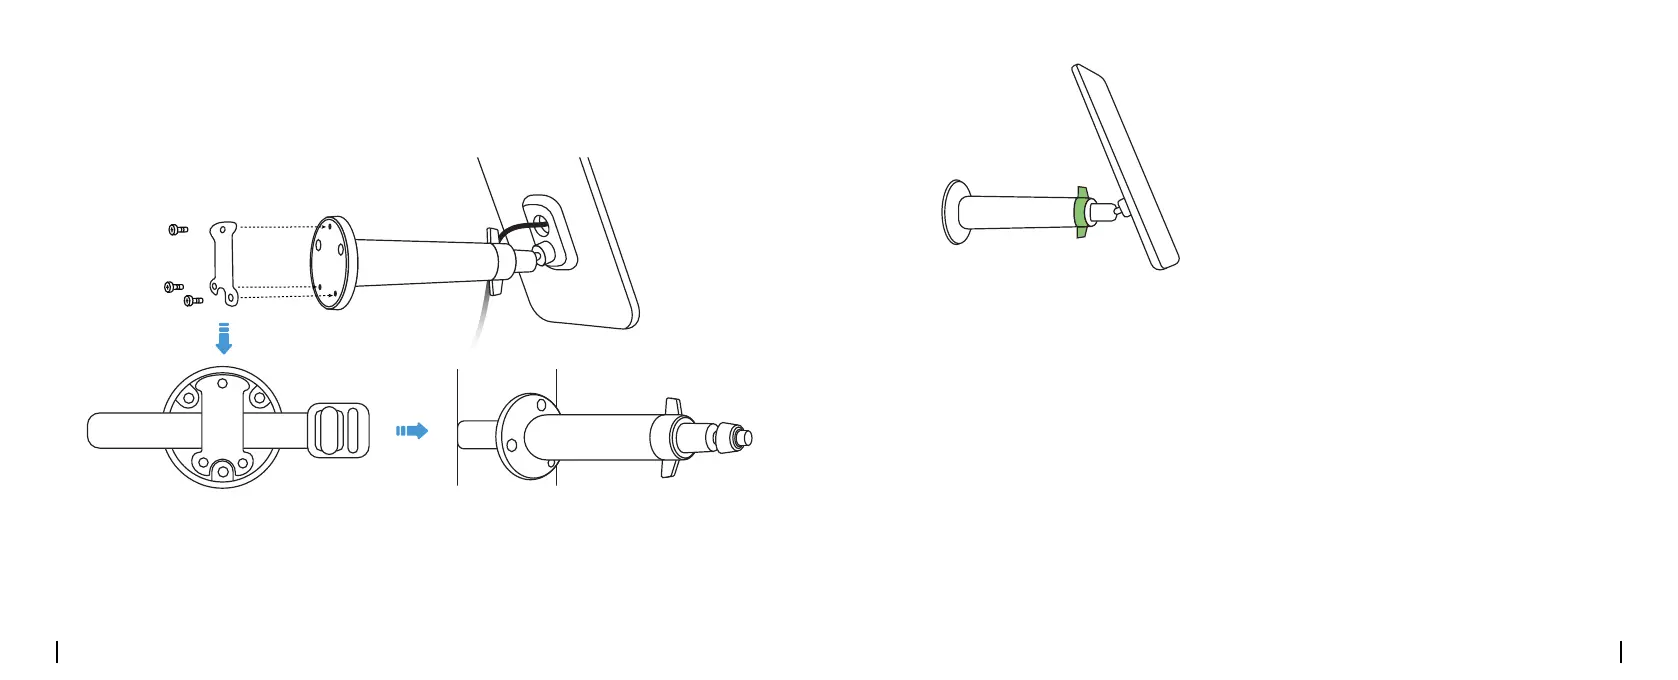
1. Put the strap on the bottom of the bracket. Fix the strap with the mounting plate and secure the
mounting plate with screws. Attach the bracket to the tree and fasten the strap.
2. After the bracket is xed, slot the solar
panel into the bracket, adjust the solar panel,
and connect the solar panel to camera. (You
can refer to steps 3 to 5 in “Install the Solar
Panel with Screws”.)