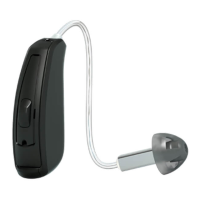
ReSound LiNX 3D
TM
Rechargeable
61 62 62
Insert one end of the
multi-tool into the
opening of the
clear receiver lock
just above the top
microphone.
Insert the tip of the blue tool
into the small slot on the
housing, behind
the receiver.
Insert the tip of the white tool
into the small slot in
the receiver locking
mechanism.
Insert one end of the multi-tool
into the cut-out at the bottom
of the locking
mechanism.
Using the multi-tool as a lever, lift
the receiver lock gently
until it protrudes from
the hearing instrument.
Note: the receiver
lock does not
need to be
completely
removed.
Using the blue tool as a lever,
swing the blue tool out and
away from the hearing
instrument to unlock
the microphone
cover.
Lower the tool at the angle
shown, and pull the receiver lock
-
ing mechanism up.
Using the multi-tool as a lever, lift
the bottom of the locking mecha
-
nism to unlock the
receiver tube.
NOTE: Do not attempt to
disconnect the locking
mechanism from the
hearing instrument.
Pull the receiver out to remove it from
the hearing instrument.
Pull the receiver down & out to
remove it from the hearing
instrument.
Pull the old receiver tube straight
out to remove it from the hearing
instrument.
Pull the old receiver tube straight
out to remove it from the hearing
instrument.
To insert a new receiver, push the
new receiver tube until it is fully
seated.
To insert a new receiver, push the
new receiver tube in until it is fully
seated.
To insert a new receiver, push the
new receiver tube in until it is fully
seated.
To insert a new receiver, push the
new receiver tube in until it is fully
seated.
Lock the receiver tube in place by
pushing the clear receiver lock into
the hearing instrument until it is
flush.
Attach a dome or custom
Micromold to the receiver.
Lock the receiver tube in place by
clicking the locking
mechanism closed.
Attach a dome or custom
Micromold to the receiver.
Lock the receiver tube in place by
firmly pushing down the
locking mechanism
until snugly in place.
Attach a dome or custom
Micromold to the receiver.
Lock the receiver tube in place by
clicking the locking mechanism
closed.
Attach a dome or custom
Micromold to the receiver.
Changing a Sure Fit receiver
MK604484 REV. E 2017.06
65
400402000-15.03-Rev.A
03-03-2015 08:36:56
61
MK604484
PN 0490-059
PN 15502500
PN 17327600
ReSound
Government Services
8001 E. Bloomington Freeway
Bloomington, MN 55420
1-800-392-9932
resound.com/governmentservices
Manufacturer according to FDA:
ReSound
North America
8001 E. Bloomington Freeway
Bloomington, MN 55420
1-800-248-4327
resoundpro.com
Manufacturer according to Health Canada:
ReSound
Canada
303 Supertest Road
Toronto, Ontario M3J 2M4
1-888-737-6863
resoundpro.com
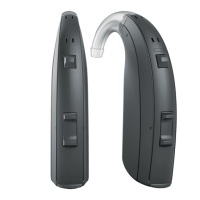
ReSound LiNX 3D
TM
and ReSound LiNX
2
TM
ReSound LiNX 3D
TM
and ReSound LiNX
2
TM
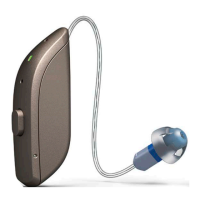
ReSound Enya
TM
61-DRWZ
PN 17327600

 Loading...