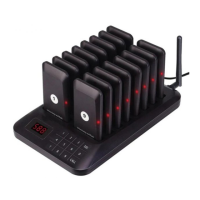
TD177 Instruction Manual
Inse DC power supply or put in batteries x3, press the power switch, wait for the screen display "----"
to enter the standby inteace
Click button to enter the system menu inteace, enter the user password ("2580" is the manufacturer's
super password (authority greater than the user password)). Click or to select the menu option,
press the [CALL] button to enter the menu option, press the [CALL] button again to save the current
parameters, press the button to exit the menu inteace.
Note: The charging function is not suppoed when the batte is powered by AAA batteries, please replace
the batte in time when the power is low.
This function sets the sound, light and vibration duration of the pager,
rstly enter menu inteace and touch
or switch the menu to "E-00" or enter the number "0", and then click CALL to enter, enter the number
of hours to be set or through or adjust the time, the unit is "seconds", ("00" picker does not remind;
"00-99" will remind the corresponding length of time, the facto default is 10 seconds), click" CALL" button
to save, touch the button to exit.
Menu inteace touch or to switch the menu to "E-01" or enter the number "1", click "CALL" to enter.
Input the system channel you want to set (value range: "001-999", default is 001), then click “CALL” to save.
Finally touch the button to exit.
Note: After modifying the system channel, you need to reset the charging base ID and then reset the pager
number, otherwise you can't call the pager.
Touch or switch the menu to "E-02" or input the number "2", click "CALL" to enter,.
Input the set
stepping length of the pager number (the stepping value of one-key code change function) (the range of
value is "1-999", the facto default is 001), click "CALL" to save, and touch the button to exit.
Note: The step length value is the dierence between the two pager numbers in the neighborhood of
one-key code change.
Pager registration number = ((charging base ID -1)*10 )*step length + input sta number + slot number
(0-9)*step length. For example:
When the step value is 1, the base ID is 1, the one-key code change number is 1(the sta number). The
dierence of neighboring picker number is 1, So the pager number is: 1,2,3,4,5,6,7,8,9,10.
If you modify the step value to 5 and the base ID is still 1, set the pickup number again, one-key to change
the code number to 5, then the dierence between the numbers of adjacent pager is 5, So the pager number
is: 5,10,15,20,25,30,35,40,45,50.
If at this time to modify the step value to 5, the base ID is modied to 2, one-key code number is 1, and
again set the number of pager. Then at this time the dierence between the number of pager is 5, pager
number is: 51,56,61,66,71,76,81,86,91,96.
If there are more than one base in use, it is recommended that the base ID should be set in order (e.g., 1,2,3,
etc.) and the step length is recommended to be set to 1.
ashing light prompt on/o [E-03]
Menu inteace touch or to switch the menu to "E-03" or enter the number "3", click "CALL" to enter,
touch or switch to N or F (N: open, F: close.). (N: open, F: close, the facto default is "N" ), click "CALL"
button to complete the setup, touch the button to exit.
Sound Ale On/O [E-04]
Menu inteace touch or to switch the menu to "E-04" or enter the number "4", click "CALL" to enter,
touch or switch to N or F (N: open, F: close, facto default is "N"), click "CALL" button to complete the
setup, touch the button to exit.
vibration prompts on/o [E-05].
Menu inteace touch or to switch the menu to "E-05" or enter the number "5", click "CALL" to enter,
touch or switch to N or F (N: open, F: close, the facto default is "N"), click "CALL" button to
complete the setup, touch the button to exit.
4.8 Setting the sta time of pager out-of-bounds prompt [E-06].
Menu inteace touch or to switch the menu to "E-06" or enter the number "6", click "CALL" to enter,
enter the number of hours to be set, the unit is Minutes" (the value range is "00" or "01-30", "00" does not
turn on the out-of-bounds prompt; "01-30" means the pager alarm will be activated after receiving no signal
from transmitter. The transmitter will send three wireless signal within the out-of-bound promt minutes, and
as long as the pager receives any one of them, it means that there will be no out-of-bounds prompt within
the range of the signal; the facto default is "00" to turn o the prompt) Click “CALL" button to complete
the setup, touch the button to exit. Once the out-of-bounds prompt is triggered (the prompt alternately
displays "pager number/out"), the prompt must be canceled by putting it back to the charging base, and it is
invalid to cancel it by pressing the mute button on the pager
Note: When you turn on this function ,you need to avoid the transmitter power outage, shutdown or pager is
in
the basement, such as signal shielding zone may triger the false trigger alarm prompts!
seice
Menu inteace touch or to switch the menu to "E-07" or enter the number "7", click "CALL" to enter,
input "00-99"minutes ("00" does not sta countdown; “01-99”Min means that at the end of the setting time
(when the pager is called, the countdown is staed, and the countdown is reminded again when the
countdown is completed), the pager has a sound/light/vibration reminder, and once the reminder is triggered
(the "pager number/CALL”is alternately displayed when the reminder is triggered), the user needs to put the
pager back to charging base to cancel the prompt, and it is invalid to cancel it by pressing the pager mute
button, and the facto default is "00"). Click "CALL" button to nish setup, touch the button to exit.
Menu inteace touch or
to switch the menu to "E-08" or enter the number "8", click "CALL" to enter,
touch or to switch to N or F (N: open, F: close, facto default is "N"), click "CALL" button to complete
the setup, touch the button to exit.
This function is used to set the password when entering the setup menu. Touch or to switch the menu
inteace to "E-09" or enter the number "9", click the "CALL" button to enter. Input the 4-digit password
"0000-9999" (the initial password is "1234", "2580" is the manufacturer's super password, the authority is
greater than the user password), click the "CALL" button to complete the setup, touch the button to exit.
Menu inteace touch or to switch the menu to "E-10" or enter the number "10", click "CALL" to enter,
enter "00-99"Minutes ("00" does not turn on the countdown timer, "01-99" Min means that at the end of the
set time, the pager will have a countdown timer. When the countdown time is over, the pager will have
sound/light/vibration
reminder, once the prompt is triggered (the screen alternately displays "pager
number/donE"), the user has to put it back to the charging base to cancel the prompt, and it is ineective to
cancel the prompt by pressing the pager mute button. The facto default is "00" (o).
Click "CALL" button to complete the setup, touch the button to exit.
This function sets the timing display mode: no display / positive timing / countdown display mode.
Menu inteace touch or to switch the menu to "E-11" or enter the number "11", click "CALL "Enter.
(Touch or to switch the mode state or enter "0" to close, "1-9" any number of keys to open), press
"CALL" to save, and touch the key to exit.
Note: Display format is “U.X1.d.X2”. "U" means positive timing; X1 can be set to "N"-open/"F"-close, " d"
means countdown time, X2 can be set as "N" open/"F" closed. Countdown time or positive time can be set
through menu "E-10".
The settings are as follows-only one can be selected:
"U.F.d.F" - no timing display;
"U.N.d.F" - positive timing display;
"U.F.d.N" - countdown display;
This function is to set the prompting mode when the countdown is completed, the prompting mode is:
sound/light/vibration prompting mode.
The setting format is: "C.X1.X2.X3", when “C” is “N” to turn on /C is “F" to turn o X1.X2.X3. Touch the menu
inteace or to switch the menu to "E-12" or input the number "12", click "CALL" to enter. Touch
or to switch the prompt state or enter "0" for "F"-close, "1-9 "any number of keys for the "N"-open). Press
"CALL" to save , touch the button to exit.
Note1: "C.X1.X2.X3"-- "X1" represents the sound prompt state ("F"-o / "N"-on); X2" represents the light
prompt state("F"-o/"N"-on); "X3" represents the vibration prompt state("F"-o/"N"-on);
Note2: This function is only eective in the setting of the timing function, the function needs to be combined
with the length of [E10] with the use of (* facto default is "F.F.F" (all o)).
sound On/O [E-13]
Menu inteace touch or to switch the menu to "E-13" or enter the number "13", click "CALL" to enter.
Touch or to switch to N or F (N: open, F: close, facto default is "N" open), click "CALL" button to
complete the setup, touch the button to exit.
vibration on/o [E-14]
Menu inteace touch or to switch the menu to "E-14" or enter the number "14", click "CALL" to enter.
Touch or to switch to N or F (N: open, F: close, facto default is "N" open), click "CALL" button to
complete the setup, touch the button to exit.
Note: If the user modies the parameters for use, he/she must rst complete the setting of all system
parameters of the transmitter, then set the charging base ID, and then set the number of the pager in order
to take eect (the order of this setting cannot be reversed).
Input the pager number on transmitter and press the [CALL] button to call the pager. Touch or to
increase or decrease the number.
Put the pager back to charging base with the power on, or touch the mute button on the side of the pager (
this touch cancel function can only be triggered 3s after the call, to avoid the user accidentally triggered) to
cancel the call.
Note: In case of countdown timer, or seice countdown prompt, the pager must be put back on the charging
base to stop.
4.19 Powering o/on the pager
When the o-power pager is placed on the charging base in the power-on state, the pager will be turned on
directly. If the pager is already in the charging base, it can be turned on/o by pressing the [Power] button
on the transmitter, and the corresponding keyboard will enter the corresponding state at the same time.
Note: The transmitter can only be used to control the power on/o of the pager after the code is matched
between the pager and the transmitter, and the charging base ID is already setup.
F1 (Modify Charging Base ID Synchronization Setting Parameter) Function
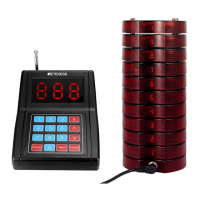
Conrm that the transmitter "E-00" to "E-14" menu parameters at all levels have been set, enter the ID
number (1-999) in the standby inteace, press the base button (base diagram 2) to enter the setup state
(press again to exit the setup state or automatically exit after 10s), then press the "F1" button and hear the
long beep of the base buzzer, so the charging base ID setting is completed.
Note: The ID number of the charging base is related to the staing number of the pager when you change
the code by one-key change function
Staing number of each charging base pager = ((base ID -1)*10 )*step length + staing number.
When the step value is 1, the base ID is 1. When the one-touch code change staing number is 1. The
staing number of pager is: ((1(base ID)-1)*10 )*1 (step length) + 1 (staing number) =1, at this time, the
number of pager is: 1, 2, 3, 4, 5, 6, 7, 8, 9, 10
If you change the base ID to 2, when the step value is 1 and the staing number of one-key code change is
1, the staing number of the pager: ((2(base ID)-1)*10 )*1(step length) + 1(staing number) =11, and the
number of the pager at this time is: 11,12,13,14,15,16,17,18,19,20.
Note: Eve update of the system parameters must be synchronized with the base again to set F1, there are
more than one base it is recommended to set the base ID number in order (eg: 1,2,3, etc.).
F2 (one-key code change) function
Conrm that the "F1" function has been set, enter the staing number (1-999), click "F2", the base begins to
write the number of the pager in turn, waiting for the base to sound a long beep and all the pager back to
the charging state (the number setup is complete).
Note: Pager number = ((base ID -1)*10 )*step length + sta number + slot number*step length, where slot
number is 0-9.
If the charging base ID is set to "10" (refer to F1 to modify the charging base), and the step length value is
set to "5", using the one-key code change function (refer to F2 function) to set the staing number is 1, the
number of the pager in the charging base will be modied in order as follows:
451,456,461,466,471,476,481,486,491,496.
Conrm that the "F2" function has been set and the "E-08" function is "On", then click "F3". Press "F3" to
group call all pagers, press again within 5s to cancel the group call, and press again after 5s to group call
again.
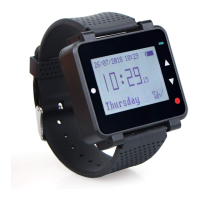
F4 (Call bracelet) function
This function can call TD112 bracelet, the diagram of TD112 bracelet is as below:
When the transmitter clicks "F4", the screen displays "P.----", enter the ID number of the bracelet (1-999),
and click "CALL" to call the bracelet. (The bracelet can only be called after it is registered in this way in
advance.)
Note: Click "F4" again to exit the call bracelet function, the screen displays "----".
The operation of the bracelet is as follows:
1. Set TD112 bracelet ID (serial number):
(1)Under the standby state of TD112, long press [A] key to enter the setting menu, press [A] key twice to
select the "Name and ID" of the bracelet.
(2) Long press [A] key to enter, touch [B] key to shift to select the number of digits that need to be operated,
touch [A] key to switch digital/alphabetical cycle (single digit of ID is digit 0-9; the name is upper and lower
case letters (A-Z; a-z)).
(3) Long press [B] key 2 times to exit and return to standby mode.
2. Register the transmitter ID to the TD112 bracelet:
(1) Under the standby state of TD112 bracelet, long press [A] key to enter the setting menu, touch [A] key
again to enter the code pairing mode, select (extension code pairing/transmitter host code pairing).
(2)Touch [A]/[B] key, switch to "Transmitter Host Code", long press [A] key to enter the code pairing mode,
the inteace displays the ID number of the bracelet, the serial number of the keypad (01-50), and the ID of
the keypad ("FFFF" means that the keypad ID is not registered, the current one is registrable). (unregistered,
currently registerable), long press [A] key to delete the current paired keyboard ID.
(3)Long press [A] key to enter, touch [A]/[B] key to turn up and down to the desired keyboard ID (01-50),
after the transmitter inputs the current ID of the bracelet, press [CALL], then the transmitter ID will be copied
to the bracelet automatically, the bracelet will vibrate and display OK, at this time, "FFFF" will be shown as
the registered keyboard ID in the inteace of the bracelet, "FFF" will be shown as the registered keyboard ID.
"FFF" will be displayed as the ID number of the registered keyboard.
(4) Long press [B] key 2 times to exit, TD112 bracelet returns to standby mode.
(5) Transmitter inputs the ID number of the bracelet and clicks "CALL" to call the registered bracelet.
1,If the pager responds to the call within 5s after it is removed from the charging state, there will be no beep
during this period (this is the time of IR uploading). , if the transmitter is in the charging status, the call
response will be made within 5s.
2,If the transmitter appears "Lo" when it is powered by batte (this is the low batte state), please replace
the batte immediately and use it again; or use the power adapter to power the transmitter.
3, the transmitter in the power-up state / batte and power switching state (about 6s time), do not touch
the panel (at this time the system self-test touch the initial baseline data), or lead to the normal use of the
keys do not work / can not be used.
4,When the transmitter is in normal use after power on, do not press the key for more than 20s (at this time,
the system will automatically update the touch baseline data), otherwise it will lead to the normal use of the
key does not work/unusable after that.
5, Transmitter in the process of use, in order to ensure the integrity of the signal, need to keep the antenna
placed veically and the power cord as far as possible away from the antenna (not entangled in the
antenna).
6,To modify the E00-E12 menu parameters during use, you need to reset the F1 (Modify Charging Base ID)
function, and then use the F3 (One-Key Code Change) function to re-register the pickup number before the
pickup will take eect.
This product suppos the use of the upper computer connection operation.
Upper computer control software download address: https://www.retekess.com/resources/download
EN(01-14)
DE(15-30)
FR(31-45)
IT(46-60)
ES(61-76)
RU(77-92)
PT(93-107)