Lightly press “[ ]”or“[ ]”to choose from the three modes. “ [ ]”means L2 backlight
is always on in the mode of reception; “[ ] ” means L2 backlight will be off automatically
with no operation in 5 seconds the mode of reception; “[ ]” means L2 backlight is turned off
in the mode of reception.
16.3: L3: backlight can be always on. It will be off automatically after 5 seconds. The
operation is shown as follows: Long press“[ ] ” for 2 seconds,“ L1” appears on LCD.
Lightly press“ [ ]” twice, the symbol“[ ] ”,“[ ] ” or“[ ] ” appears on LCD. Lightly
press“ [ ]” or“[ ] ” to choose from the three modes.
“[ ] ”means L3 backlight is always on in the mode of reception; “ [ ]”means L3
backlight will be off automatically with no operation in 5 seconds the mode of reception;
“[ ] ” means L3 backlight is turned off in the mode of reception. After choosing according
to above instructions, this product.
17:TYPE-C USB: charge&computer AUX-IN function
17.1: Charge: DC5V/1A-DC3A charging device is recommended to charge the radio to avoid
damage to lithium battery or radio. If the radio is not in use for a long time, please charge it
every month or take the battery out.
If“[ ] ” flashes on the screen after inserting USB cable, it 22:Precautions means it’s
charging. When the radio is fully charged,“[ ] ” appears and stops flashing. The charging
time is generally 4-5 hours.
17.2: USB external audio input: when the radio is powered on, connect it to computer with
USB cable, now audio files can be input.“[ ] ” appears on LCD.
18: External sound source (AUX) input and play
When the radio is powered on, insert 3.5MM sound source device (e.g. mobile, computer,
etc.) into AUX“[ ] ” outside the radio using 3.5MM audio cable. Lightly press“[ ] ” to
choose the mode of“ sound source input”,“ LINE” appears on LCD, now this product is used
as an external source source. (Note: we don’t provide the audio cable)
19: Computer data transmission:
Insert TF card and connect the radio to computer using our standard USB cable. Lightly
press“[ ] ” , the computer will automatically install the driver software.“ PC” appears on
LCD, which means successful connection. Now the computer can read, copy and delete the
files on TF card (use as card reader).
Please note that this operation is not compatible on computers with different accessories.
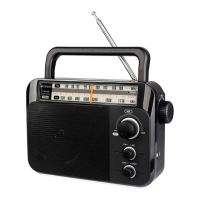
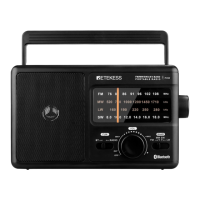
20: Use the antenna:
Before listening to FM, VHF, SW, AIR and WB, pull out the antenna and change its length
and direction to find the best position of receiving.
*Note: in case of channels disorder due to strong interference, shorten the antenna. Listen to
MW The radio uses a built-in magnetic antenna to receive MW. The magnetic antenna will be
affected by direction when receiving signals, so when listening to MW, you can rotate the
radio to find the best position of receiving.
15