Do you have a question about the Retro-Bit BIG6 and is the answer not in the manual?
Details on specific button combinations for macro functions like clearing pairings, switching modes, and remapping DPad.
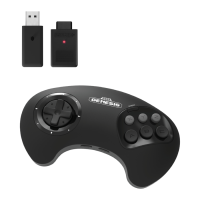
Includes SEGA Genesis and USB wireless receivers for versatile connectivity.
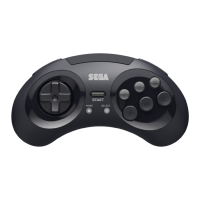
Retains familiar grip and sleek design, with additional Home, Select, and shoulder buttons.
Features a rechargeable 500mAh Li-ion battery and a USB-C charge cable.
Works with SEGA Genesis/Mega Drive via Genesis receiver and PC/Mac/USB devices via USB receiver.
Connect receiver, press Start on controller, press Sync on receiver until LEDs are solid.
Reset by holding Start + R for 4s or using the reset hole with a paperclip.
Plug USB-C cable into controller and USB end into charger/console. LED stays lit when charged.
LED is red for 6-Button, blue for 3-Button. Switch with Start + B.
On Genesis Mini, LED must be red; switch from blue using Start + B.
On Saturn, LED must be red; switch from blue using Start + B.
Set D-Pad to Left Analog (Left+Start), Right Analog (Right+Start), or normal (Up+Start).
Flip the A/B and X/Y face buttons using Down+Start.
Switch between D-Input (Red LED) and X-Input (Blue LED) using Start + B.
Ensure controller LED is red for Mac use; switch from blue using Start + B.
Visit www.retro-bit.com/support for latest news, manuals, and firmware updates.
Statement regarding RF exposure limits and compliance with Part 15 of FCC Rules.
The Retro-Bit BIG6 2.4GHz Wireless Arcade Pad is a versatile gaming controller designed to offer a classic arcade experience with modern wireless convenience. It is compatible with a range of gaming systems, including SEGA Genesis®/Mega Drive consoles, SEGA Genesis® Mini I & II, SEGA Saturn® (with a V2 Saturn receiver), PC, Mac®, Android® devices, and the Nintendo Switch.
The BIG6 is a wireless arcade pad that emulates the design and feel of classic SEGA Genesis controllers, enhanced with additional features for broader compatibility and improved functionality. It allows users to play games wirelessly, eliminating the need for tangled cables. The controller supports multiple input modes and button mappings, making it adaptable to various gaming platforms and preferences. It comes with two types of receivers: an Original Port receiver for SEGA Genesis/Mega Drive consoles and a USB® receiver for modern devices.
If pairing issues occur, the controller can be reset in two ways:
The controller offers several macro inputs for quick configuration:
SEGA Genesis® / Mega Drive:
SEGA Genesis® Mini I & II:
SEGA Saturn® (REQUIRES V2 SATURN RECEIVER):
Nintendo Switch:
PC / Android®:
Mac®:
The device complies with Part 15 of the FCC Rules, ensuring it does not cause harmful interference and accepts received interference. Users are advised to reorient or relocate the receiving antenna, increase separation between equipment and receiver, or connect to a different circuit if interference occurs. Any unauthorized modifications to the unit could void the user's authority to operate the equipment.
For the latest news, manuals, and firmware updates, users can visit www.retro-bit.com/support.
The Retro-Bit BIG6 2.4GHz Wireless Arcade Pad is designed for both nostalgic gamers and those seeking a versatile wireless controller for modern platforms, offering a blend of classic design and contemporary functionality.
| Brand | Retro-Bit |
|---|---|
| Model | BIG6 |
| Category | Video Game Controller |
| Language | English |