User’s Manual Electric Bike
Section II- Electrical Components Operation, Maintenance, & Safety
The e-bike in this manual features “Start Aid”. This electric assistance system will help
riders save their energy when starting the bike rolling.
How Start Aid Works: When pressing the Start Aid button, the bike can be started at a
speed of ~3.5MPH (6km/h). When the bike starts moving forward, start to pedal and
release the “Start Aid” button.
Note: You can pedal one crank revolution to start the motor without using the “Start
Aid “button.
Contents:
1. Important System Caution notices
2. Operation
3. Battery Installation & Usage
4. LCD Function Indicators
5. Using and Maintaining the Battery
6. Using and Maintaining the Battery Charger
7. Using and Maintaining the Electric Hub Motor
8. Maintaining the Controller
9. Maintaining the Power-o Control of the Brake Lever
10. Simple Troubleshooting
11. Electrical Circuit Diagram and Specications
12. Main Technical Specication Sheet
1. Important Safety Precautions
• We strongly advise wearing an approved helmet which meets local safety
standards.
• Obey local trac rules when riding on public roads.
• Be aware of trac conditions.
• The rider must be over 14 years old.
• Have your bike serviced only by authorized bicycle shops.
• Regular servicing will ensure a better performance and a safe riding experience.
• Do not exceed more than 220lbs (100kgs) on bicycle, including the rider and cargo.
• Never have more than one rider on the bicycle.
• Follow the regular maintenance schedule in this owner’s manual.
• Do not open or attempt maintenance on any electrical components yourself.
Contact your local bicycle specialist for qualied service when needed.
• Never jump, race, perform stunts, or abuse your bicycle.
• Never ride under the inuence of intoxicating drugs or alcohol.
• Do not ride at night. If riding at night, low-light, or poor weather conditions is
unavoidable, we strongly recommend using front & rear lights, reectors, and
bright, safety clothing.
• Wash with mild soapy water. Dry immediately with a soft, non-abrasive cloth.
• Do not use strong chemicals or abrasives.
WARNING! Do not direct water spray at hubs, bearings, and electrical components
and NEVER use a high-pressure washer - these actions may damage electrical
components and bearings (bottom bracket, hubs, headset).
2. Operation
Your new electric assistance bicycle is a revolutionary means of transport, using
an aluminum frame, Li-Ion battery, a super high eciency electric hub motor, and
controller with electric pedal assistance system, to support normal pedaling. These
components will ensure safe riding with excellent function and performance. It is
important for you to note the following guidelines to ensure getting the best possible
experience from your electric bicycle.
2.1 Always check your bicycle before riding.
2.1.1 Before riding, check that the tires are fully inated as indicated on the tire
sidewall.
Remember, performance of the bike and battery range is directly related to the weight
of the rider and baggage/load, together with the stored energy in the battery. Battery
range/performance can vary signicantly based on terrain, load, & weather conditions.
2.1.2 Charge overnight, prior to riding the next day.
2.1.3 Clean and apply chain lube periodically as needed. With a soft rag or towel, wipe
o excess lube. Clean and lubricate half-yearly (minimum).
3. Battery Installation & Usage.
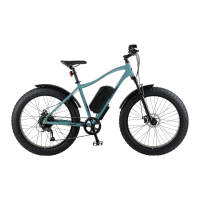
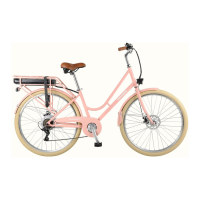
Retrospec Beaumont Rev 36V/350W & 48V/500W E-bikes have the battery positioned
within the rear carrier (the battery pack is directly connected to the controller box in
the front of the carrier (Fig. 1)
The battery housing (that which the battery slides into) is attached to the carrier by
screws. Then the entire Battery Pack is locked into the Battery Housing by the key -
see the operation details below. (Fig. 2)
1) Insert and slide the Battery Pack horizontally into the Battery/Controller Housing,
and push it into the housing/slider and ensure a snug t.
2) Make sure the Battery Pack is rmly pushed into the controller housing and its
connector is securely inserted inside the controller box.
Fig. 1
Fig. 2
15 16
 Loading...