Connecting The Handlebar To The Stem
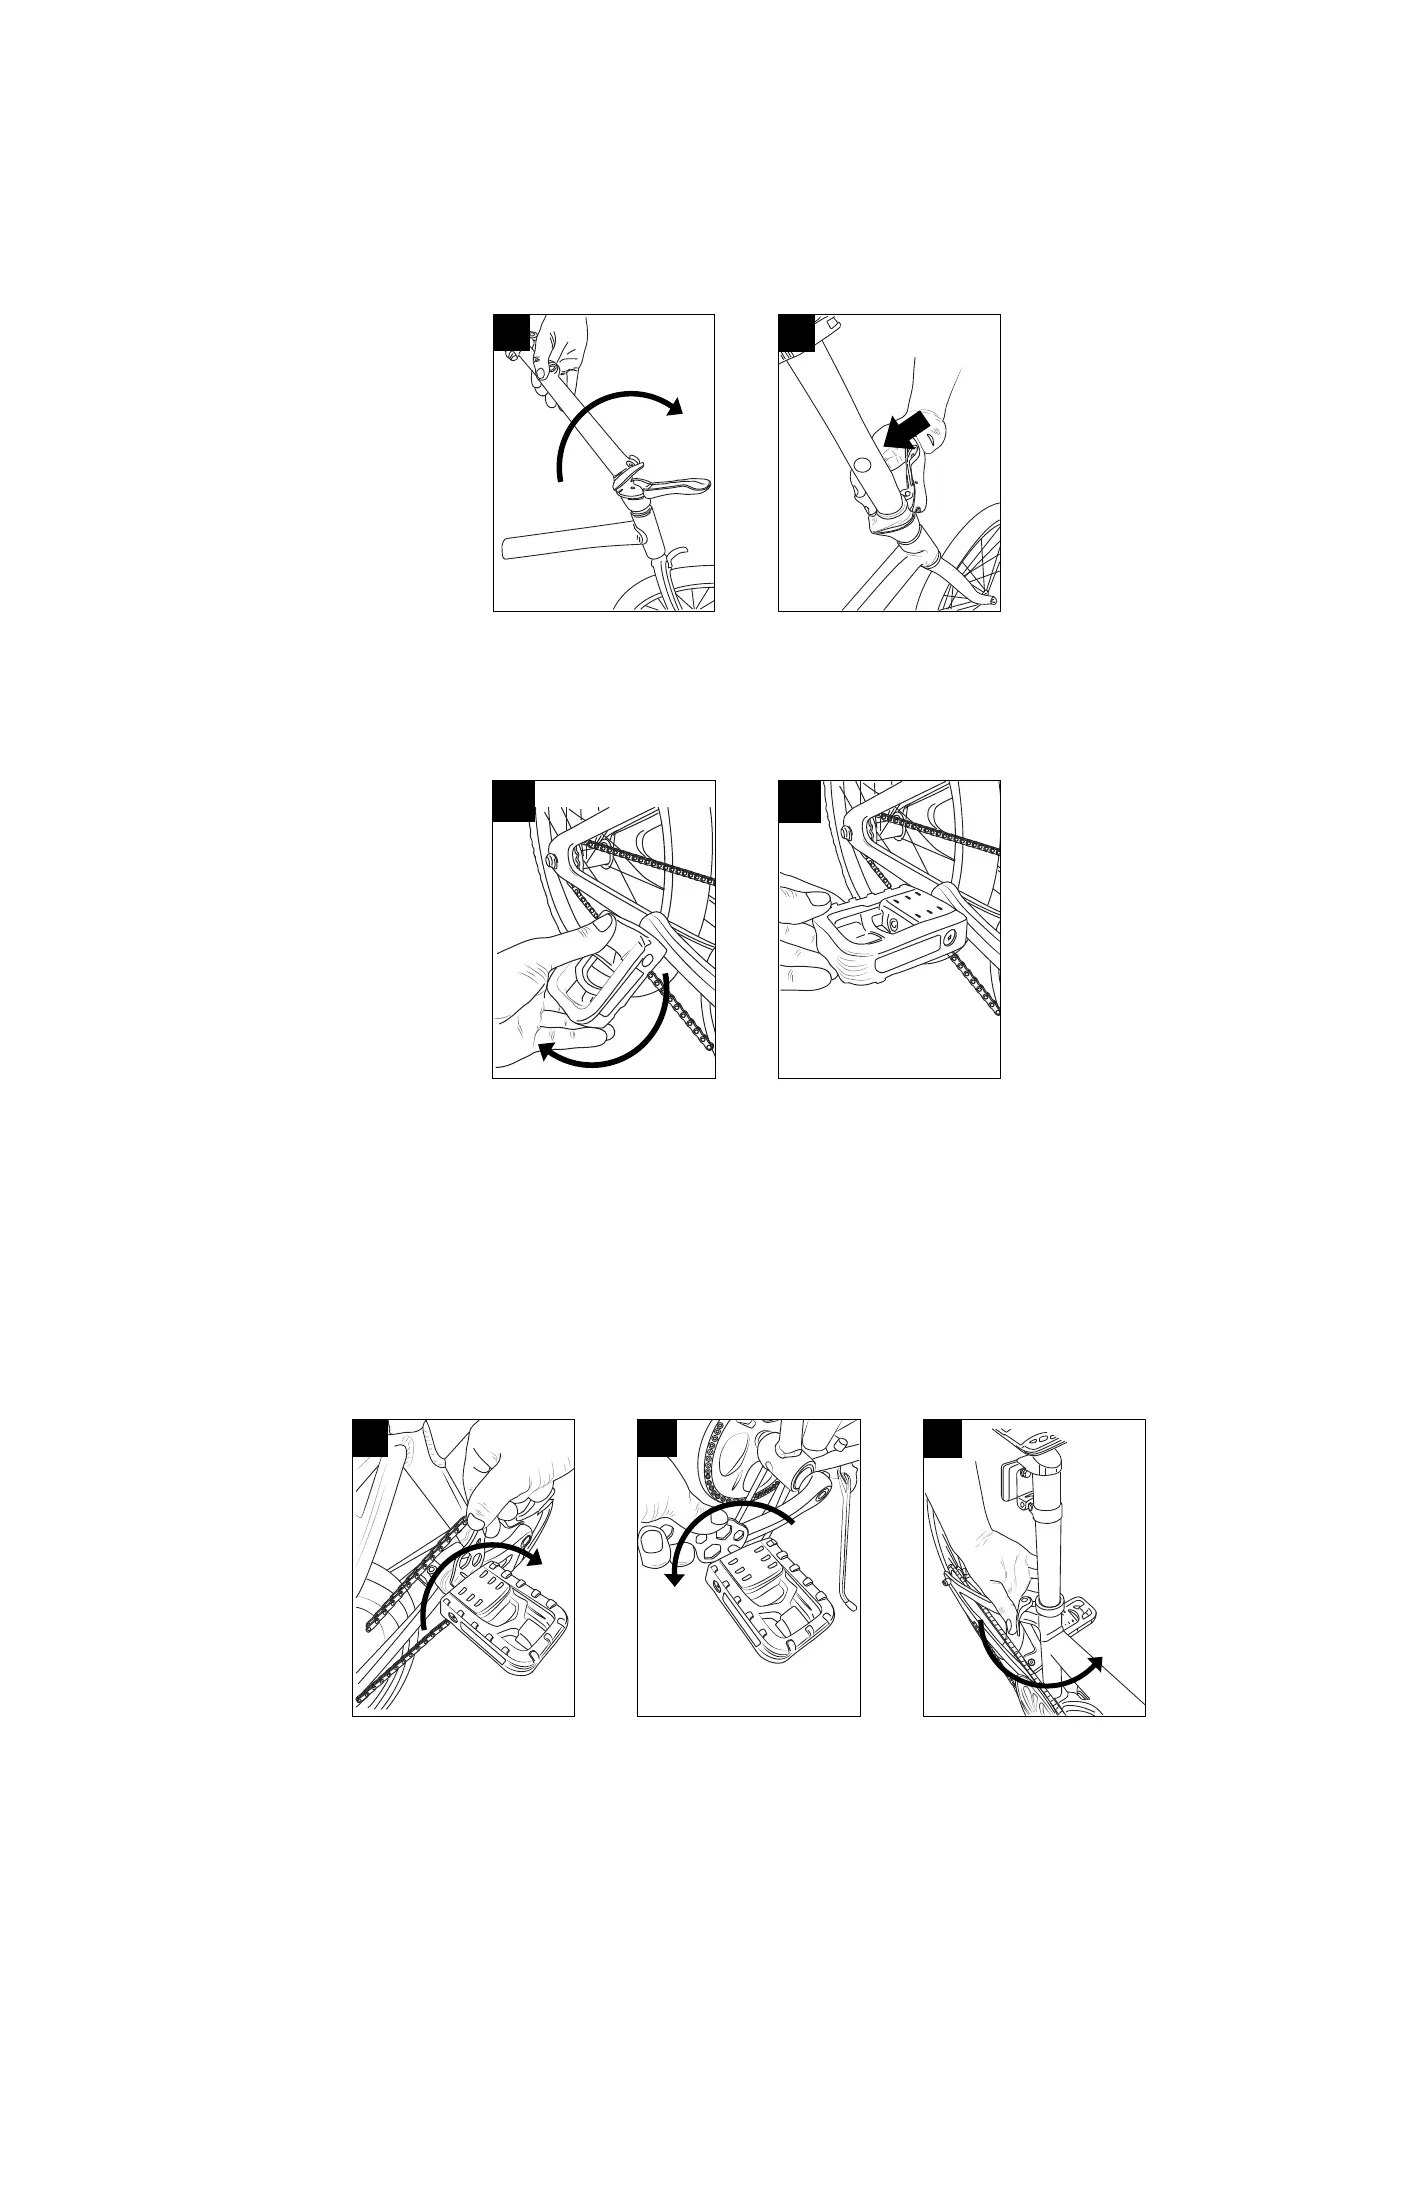
1. Swing the handlebar assembly into place by rotating upwards (Fig.8).
2. Once the handlebars are in the upright position, lock into place by pressing the lever
to the handlebar mast (Fig.9).
Unfold Pedals
1. Unfold the pedals by simply applying pressure to pull them in the riding position.
You will hear a click when they lock into position. (Fig. 10 & 11)
Check Pedal Tightness
1. Pedals need to be checked for tightness.
2. Use the 15mm portion of the included multi-wrench, your own 15mm open end
wrench, or adjustable wrench.
3. The right side pedal tightens clockwise (Fig.12). The left side pedal tightens
counterclockwise (Fig.13). The pedals need to be tightened with a considerable amount
of force so that they do not come lose. Pedal side is determined when you sit on bike.
Adjust Seat Height
1. To adjust the seat height, pull the quick release lever attached to the top of the seat
tube outwards and adjust the seat to your desired height.
2. Once you have adjusted the seat post to your desired height, lock it in place by
closing the quick release lever against the clamp (Fig.14). The lever should require
some force to close. If it closes too easily and does not hold or if the eort to close the
clamp is too great, adjust the clamping force by loosening or tightening the adjusting
nut on the side opposite the lever.
IMPORTANT! Your seat post is extra-long to t a variety of rider sizes to the compact,
folding frame design. Check the seat post closely. It has upper limit line marked on rear
of seatpost (how low your seat can go), and lower limit line (how high your seat can go)
marked on the front of the seatpost.
Lower Limit Line: Never adjust the seat height so that the limit line at the lower end of
the seat post is showing outside of the frame (Fig.15).
Upper Limit Line: Always adjust the seat height so that the limit line at the upper end
of the seat post is showing outside of the frame (Fig.16).
WARNING! Using the bike with the minimum insertion line on the lower portion of
the seat post showing above the frame could result in a failure of the seat post and/or
the frame causing a loss of control with potential injury to rider. Such failures are not
covered by warranty as it is improper use of the product.
Check Tire Ination & Installation
1. Locate the tire manufacturer’s recommended ination pressure found on the tire
sidewall (listed as “PSI”).
2. Using a hand or oor pump with a gauge, begin to inate the tire to half its
recommended ination pressure and check to see that the tire is properly seated on
the rim. Be sure to inspect both sides of
the tire for proper t.
3. If the tire is seated unevenly or bulges out along the rim, let some air out of the tire
and reposition the tire by hand so that it sits evenly on the rim.
4 Continue to inate the tire to the manufacturer’s recommended pressure.
5. Do not exceed the recommended pressure as this will cause an unsafe condition
potentially causing the tire to unexpectedly explode.
6. Do not use a compressed air device to inate your tires as the rapid ination of the
tire can cause it to blow o the rim.
7. Tires and tubes are not warranted against damage caused by over-ination or
punctures from road hazards.
7 8
8
9
10
12
11
13
15
16
14
Lower Limit Line Upper Limit Line


 To Next Page
 Loading...