4
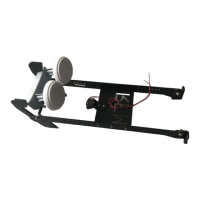
11. Tuck excess Cable Loom back through the Reflector. Leave enough out to prevent binding.
12. Lift on the LNB Arm making sure there is no stress on the Cable Loom as the arm is lifted into the center
of the dish.
You have completed the work needed on the antenna now move SAFELY back to the controller in the RV.
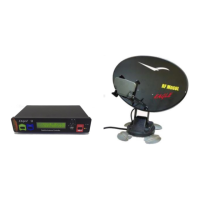
13. Plug your RF Mogul antenna controller and receiver back in. The LNB and PS LEDs should both be
illuminated.
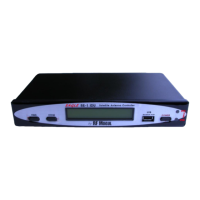
14. Power the RF Mogul antenna controller back ON and insert the USB JUMP Drive that has the RF Mogul
antenna controller software loaded on it. The LCD display should change and show that the software is
downloading. When the software download is complete, remove the USB JUMP drive.
15. Press POWER button to get into the MENU OPTIONS. Push the SEARCH or STOW button to get to the
MENU ITEM that says TEST DISH. At this MENU ITEM hit the POWER button again and the controller
will execute the TEST DISH function and connect the new software with the ANTENNA UNIT.
16. Press POWER button after the TEST DISH to get back to the MAIN MENU – HIT SEARCH and let the
antenna lock onto the satellite.
NOTE: The initial SEARCH could take 15-20 minutes please be patient.
Please contact RF Mogul Tech Support if you have any questions at:
Phone: 801-895-3392
Email: techsupport@rfmogul.com
Website: www.rfmogul.com/submit-a-ticket
 Loading...