RELAY 1 RELAY 2
RELAY 3
RELAY 4
FUSE
POWER
TIMER
Timer Select Button – Used to select timer mode
Erase Button – Press and hold to erase all pairings, see
advanced operation for individual erase
Signal Test mode – Press to enter signal test mode
Sync/Pair Button – Press once to auto pair. See
Advanced operation for other pairing options.
Momentary/Latching Jumper Links – It is possible to set the relay switches on
the ELITE receiver to either momentary or latching operation.
Latching (link removed) - One press for on, one press for off.
Momentary (link fitted)- On while button is held only.
To set a relay switch to either momentary/latching choose the associated link cap.
NOTE:
If link is changed, power cycle the receiver (turn off/on) otherwise it will
stay in the same mode it was previously set in.
230Vac power
input
Power input fuse – must be 500mA
(Fast blow fuse recommended)
Relay switch terminals:
Neutral
Live
Earth
FUSE
RELAY 1
RELAY 2
RELAY 3
RELAY 4
SYNC
TEST
ERASE
FUSE
FUSE
FUSE
Output Fuses must be 4A
(Slow blow fuses recommended)
Status LEDs– Flash when
signals are sent/received
L N E
L N E L N E L N E L N E
8
7
6
5
4
3
2
1
Mag sync – Touch a
magnet to the plastic
case in the cross
hatched area to
replicate the sync
button on board
without opening the
case
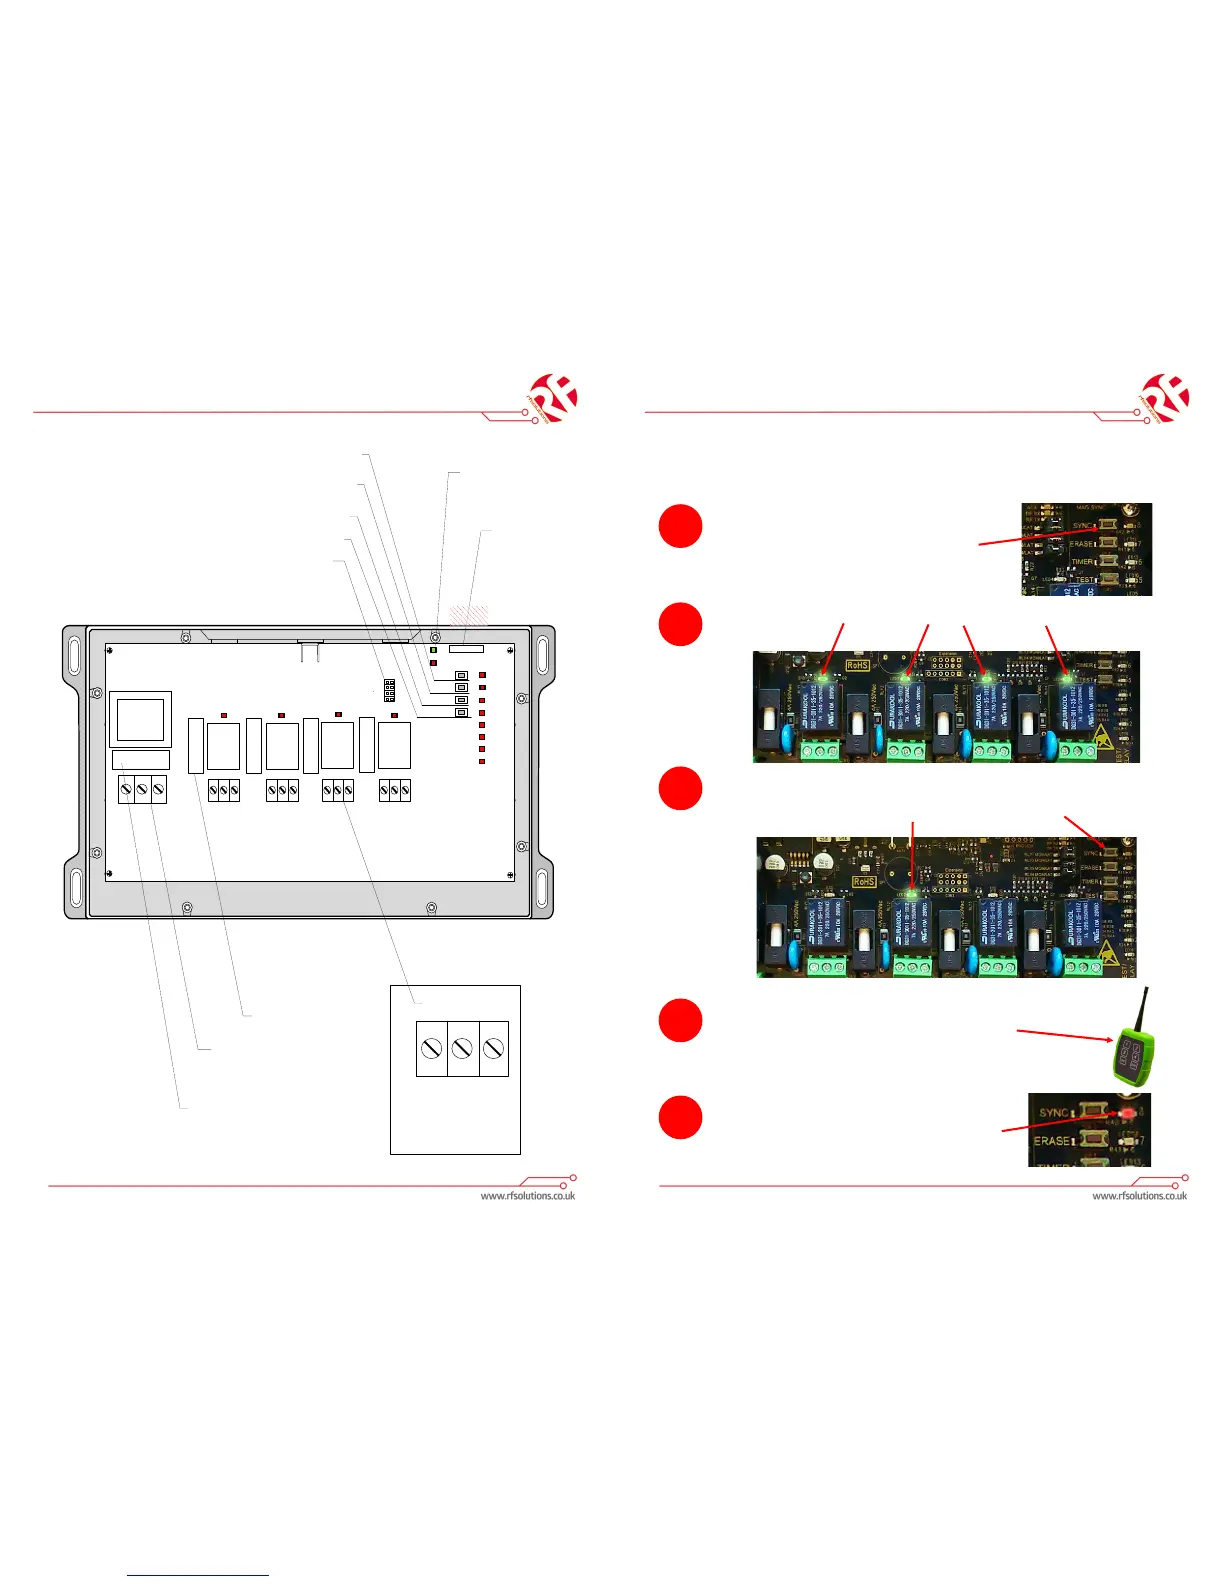
ELITE Remote control System
Pairing a transmier
NOTE: The transmier supplied with the system should already be paired.
If an addional transmier needs to be paired, simply follow the below instrucons.
1.
To SYNC a specic ELITE handheld transmier
buon to a specic output on the ELITE receiver
box—press and release the SYNC buon on the
ELITE receiver board.
2.
The ELITE receiver will ash all its relay output LED’s at a high rate to show that it is ready to
SYNC.
3.
Press and release the SYNC buon again—the ELITE receiver will ash output LED1 this is
showing that output 1 is selected. Pressing and releasing the SYNC buon again will select
output 2 and so on, through to output 4.
4.
Once you have selected the required output (only that out-
put LED is ashing) press and release the SPECIFIC buon
on the transmier that you wish to SYNC to the receiver.
5.
The ashing LED’s will go out, the SYNC LED will ash quick-
ly for 2 seconds then go out.
 Loading...