Do you have a question about the Rhin-O-Tuff Onyx HD7000 and is the answer not in the manual?
Essential safety guidelines for operating and maintaining the HD 7700 punch to prevent injury.
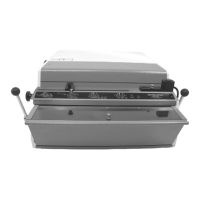
Guidelines for selecting a suitable location for the HD 7700, including surface and space considerations.
Instructions for connecting the power cord and understanding the power indicator light.
Step-by-step guide for securely installing dies into the HD 7700 punch using quick-change handles.
Details about extra capacity dies and their higher sheet punching capabilities.
Explanation of comb dies, including their adjustable backstop for margin control.
Instructions on how to safely remove individual punch pins from the die assembly.
Guidance on how to properly oil and maintain the punch dies to ensure longevity.
How to adjust the Accu-Set paper stop for precise hole placement using course and fine settings.
Steps for correctly positioning and punching paper, including tips for different stock types.
Instructions for removing and emptying the paper waste drawer to prevent jams.
Procedures for manually reversing the punch pins and addressing common paper jam issues.
A list and diagrams of common punch die types with their specifications.
Solutions for common problems like the machine not cycling or dies not seating properly.
Wiring diagram for the HD 7700 punch, showing power flow and components.
Introduction to the base unit supporting various binding modules.
Details on the coil inserter module for binding books with plastic spiral coils.
Information on the wire closer module for binding books with metal wire.
Details on the comb opener module for binding books with plastic combs.
Procedure to attach the OD 4300 coil inserter to the combo binding station.
Guide to selecting the correct plastic coil size and corresponding mandrel.
Procedures for installing the mandrel into the coil inserter's holder bracket.
How to adjust the mandrel bracket and paper stop for proper alignment.
Adjusting the front table and lexan guide for proper coil insertion assistance.
Explanation of the forward/off/reverse switch and its function.
Step-by-step process for placing and threading the coil into the book using the inserter.
Adjusting the drive wheel stop screw to prevent excessive pressure on the mandrel.
Using crimper pliers to cut and terminate the inserted coil ends.
Electrical schematic for the OD 4300 coil inserter module.
Procedure to mount the OD 4200 wire closer module onto the binding station.
Table for selecting the appropriate wire diameter based on book thickness and sheet count.
Steps for preparing the book and inserting the wire through the punched holes.
Adjusting the closing bar on both ends for a perfect wire closure.
Final steps to close the wire binding, ensuring a secure and neat finish.
Instructions for mounting the OD 4400 comb opener module onto the binding station.
Table for selecting the correct plastic comb diameter based on book thickness.
How to position the plastic comb onto the opener's rake fingers.
Aligning the book's punched holes with the fingers of the opened plastic comb.
Adjusting the comb die's backstop for optimal hole-to-edge margin.
| Punching Die Sets | Interchangeable |
|---|---|
| Die Disengagement Pins | Yes |
| Power | Electric |
| Voltage | 115V |
| Warranty | 3 years |
| Paper Size | Up to 14 inch |
| Speed | 30 holes per minute |
| Hole Punching Capacity | Up to 45 sheets (20 lb bond) |