Rhino 2500 series for Euro Crossbar
.
7
MX
XX
T
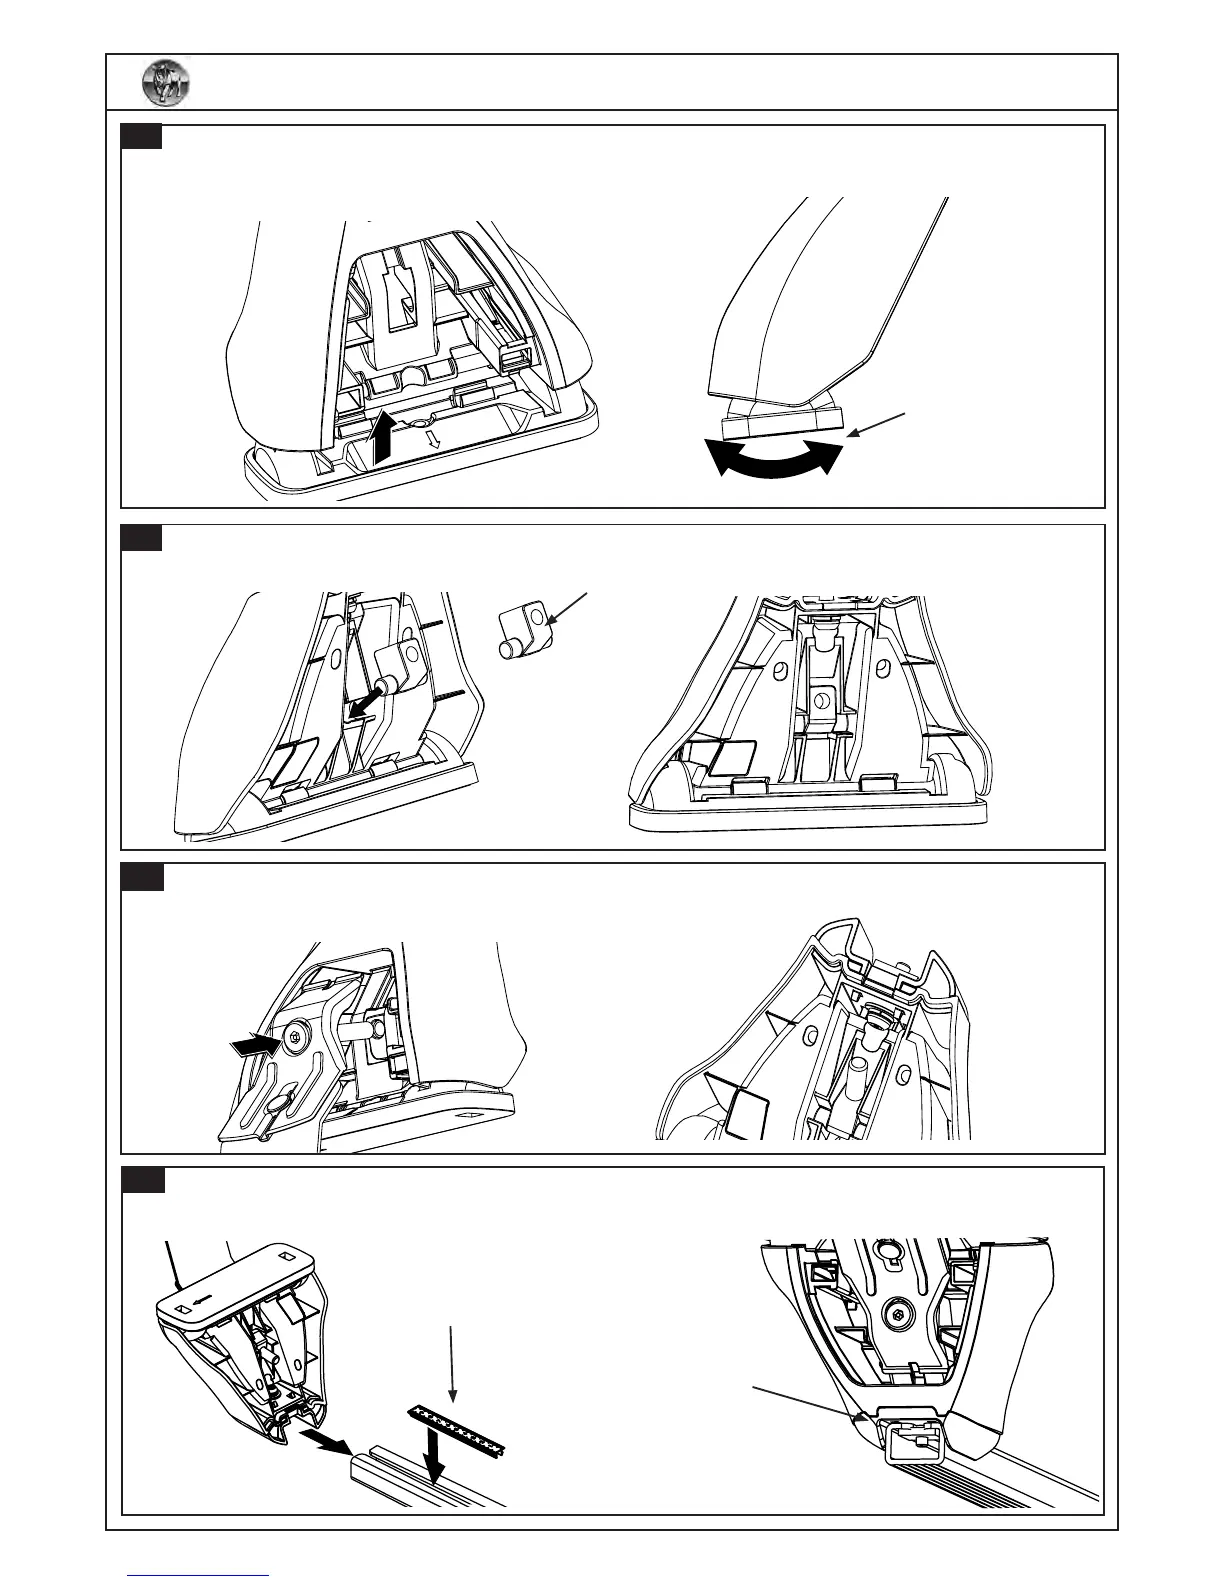
urn the crossbar over and clip the bar measuring strip into the cut out, ensure the end of the strip locates
against the end of the cut out. Slide assembled leg into the cut out untill it butts up against the end of
the Bar measurement strip.
Ensure the Square nut locates
into the Euro crossbar
.
Refer the DK Specica-
tion sheet for bar strip
cut length.
6
Insert the M8 clamp bolt through the clamp and from the front of the leg, screw the bolt into the pivot nut.
DO NOT TIGHTEN
AT THIS STAGE.
5
If the nut is removed, insert the pivot nut into the back of the leg. Ensure the nut snaps inplace. Note: large
portion of the nut to face the rear of the leg.
This face to rear of
Leg.
Clip
the foot plate onto the leg with the arrow facing in the correct direction
IN or Out according to your vehicle listed in the DK specication sheet.
Diagram shows arrow facing OUT).
Foot pad must swing
freely.
4

 Loading...