Do you have a question about the Riccar 3300 and is the answer not in the manual?
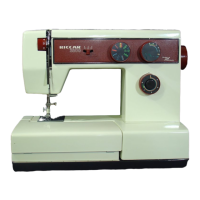
Selects each stitch function. Set dial to desired stitch and match other dials.
Controls stitch length. Fabric will not feed at '0'.
Push center button for reverse stitching and backtacking.
Controls stitch width. '0' for straight, larger numbers for wider zigzag.
Regulates upper thread tension. Smaller numbers mean lighter tension.
Raises presser bar. Can be raised further for extra heavy material.
Drops feed dog for patching/darning. Press upper side for drop, lower side to raise.
Disengages sewing mechanism when in use. Wind bobbin here.
Specialized feet for hemming, cording, buttonholes, zippers, and blind hems.
Includes screwdrivers, seam ripper, oiler, brush, and bobbins for upkeep.
Tools like the quilter and needle set for specific decorative techniques.
Keep table horizontal, push in direction of arrow to attach.
Lift at point of arrow to open the inside compartment.
Connect machine to power source as illustrated. Unplug when not in use.
Regulates sewing speed. Consult electrician if unsure about connection.
Mains lead colours (Blue-Neutral, Brown-Live) and plug connection.
Learn to remove and attach presser feet using the one-touch lever.
How to remove the shank and fit the quilter accessory.
Choose the right needle for fabric/thread and correctly set it in the clamp.
Chart matching needle sizes (65-110) to fabric types and thread weights.
Details on standard, semi-ball point, full ball point, and leather needles.
Recommendations for natural, synthetic, and knit fabrics.
Information on twin needles for utility and decorative work.
Open the cover before winding, close it after. Don't forget.
Steps to thread the machine for winding the bobbin correctly.
Push bobbin onto spindle until firmly engaged. Needle drive disengages.
Wind thread by hand, press foot control to start winding.
Insert bobbin clockwise, pass thread through slot and tension spring.
Use finger tip in groove to pull cover toward you.
Pull out hinged latch with needle up, then pull case toward you.
Align groove in case with shuttle hook holder. Ensure thread pulls smoothly.
Pass thread under cover guide, through gap, and between tension plates.
Pass thread under spring guide and pull upward into the spring.
Draw thread down and into the arm thread guide as shown.
Thread the needle bar guide and pass thread through needle eye.
Hold top thread, rotate hand wheel to bring bobbin thread up.
Turn dial to regulate pressure for different fabric weights (1-5).
Keep feed dog up for normal sewing, drop for freehand embroidery or darning.
Turn dial to desired stitch pattern, matching pattern to pointer.
Sets zigzag stitch width. Larger number means wider zigzag.
Controls stitch length. Fabric will not feed at or near '0'.
Press button to sew backwards. Release to resume forward sewing.
Suspend bobbin in case, check if thread comes out slightly.
Use tension dial to regulate upper thread. Usually sufficient.
Balanced tension creates neat seams. Too tight/loose causes issues.
Set tension dial to smaller/larger numbers as needed.
Turn selector knob for stitch pattern, adjust stitch length dial.
Use '2' or '3' for general purposes; vary with fabric and thread.
Finer fabric/thread needs shorter stitch; heavier fabric needs longer stitch.
Steps to start sewing, handle thick fabrics, and change direction.
How to backtack stitches and properly remove fabric after sewing.
Basic settings for needle position, stitch width, and length.
Adjusts needle position (left, middle, right) via pattern selector dial.
Set width no more than '3' and use centre needle position.
Details on controlling zigzag width, maximum '5', warning for twin needles.
Controls stitch length and density. '2.5' or below for neat stitches.
Varying stitch width during sewing creates patterns, used in freehand embroidery.
Illustrates how to fold the fabric for the blind hem stitch.
Turn hand wheel to left, position needle above blind hem foot.
Keep fold against guide, ensure needle barely pierces fold.
Open fold and press with an iron after sewing.
Use zigzag foot, position fabric so needle barely penetrates edge.
Helps regulate tension for fabrics prone to raveling or curling.
Match zigzag width to buttonholes, start at left hole, lower drop feed.
Stop after stitches, remove fabric, tie off threads on wrong side.
Use sliding foot to measure size; calibrated lines help determine length.
Set dial in green range; stitches denser as dial approaches '0'.
Sew sections 1, 2, 3, 4. Be careful not to over-sew stages 2 and 4.
Buttonhole width can be altered between settings 3.5 to 5.
Loop cord on projection, pass ends into clip, sew over cording.
Pull threads to hide loop, slit buttonhole with seam ripper.
Attach snap-on zipper foot, sew along right side, move slider.
Change foot position, repeat process for left side.
Zipper foot can be used for sewing close to cording for piping.
Double fold the edge of the fabric as illustrated.
Sew a few stitches on fold, pulling threads away with moderate tension.
Guide folded fabric into hemmer scroll, ensure correct positioning.
Use two upper threads, one through each needle eye.
Use quilter to maintain regular spaces between stitches.
Cutting fabric on bias gives fine results for tucking.
Tighten upper tension (larger numbers) for better results.
Insert cord between spring and body of cording foot from the right.
Pass cord through center groove, set zigzag width slightly larger than cord.
Wind cord around bobbin, hand-wind as necessary.
Insert bobbin, turn tension screw left until yarn pulls smoothly.
Set presser foot pressure heavy (4-5), sew on reverse side.
Set machine for long straight stitch, tension '0'. Sew rows to gather.
Reset tension, sew stay-stitching to hold gathers, then add decorative stitches.
Use ready-to-sew pieces or pin/fuse your own designs to fabric.
Sew around design with satin stitch. Lock stitches by setting length to '0'.
Use hoops, thin needles, and fine threads. Cotton/rayon threads recommended.
Loosen screw, place fabric, fit inner frame, tighten screw. Stretch taut.
Make 5-6 fastening stitches at '0' width at beginning/end. Drop presser bar.
Optional accessory for stitching without hoops or for firm fabrics.
Practice moving hoop while sewing for even stitches or moving hoop when needle is off fabric.
Sew small loops/circles, then move frame as in dot stitching for sand-like stitches.
Specifications for V-belt and synchro belt tension (500 g/cm, 8mm sag).
Loosen set screws, adjust holder position for synchro belt tension.
Loosen bolt, position V-belt for specified tension (8mm sag), tighten bolt.
Use brush to clean area. Turn hand wheel counterclockwise. Replace parts in reverse.
Pull thread while turning hand wheel back and forth to release jam.
Tilt head, remove bobbin case, clean parts with oily cloth.
Apply oil to arrow-indicated points in face plate and needle bar area.
Remove arm cover, oil arrow-indicated points. Turn hand wheel for even distribution.
Remove free arm cover, oil arrow-indicated points.
Covers top/lower thread breaks, skipped stitches, and looping stitches.
Addresses needle breakage, puckering, and irregular stitching/feeding.
Troubleshooting for noisy or rough machine operation, requiring oiling or cleaning.
Light is controlled by a push switch on the right side of the arm.
Unplug machine, swing out face plate, replace bulb. Ensure it's screwed tightly.
| Type | Mechanical |
|---|---|
| Stitch Width | 5mm |
| Stitch Length | 4mm |
| Buttonhole Styles | 4-Step |
| Presser Feet | Buttonhole, Zipper, All-Purpose |
| Included Accessories | Bobbins, Needles, Seam Ripper, Screwdriver |