lnstallation for 10" Belt Drive Table
Saw
--
1.
Make sure the table saw is completely
assembled and mounted to legset.
Turn the switch to the OFF position,
remove switch key and unplug the
saw from its power source.
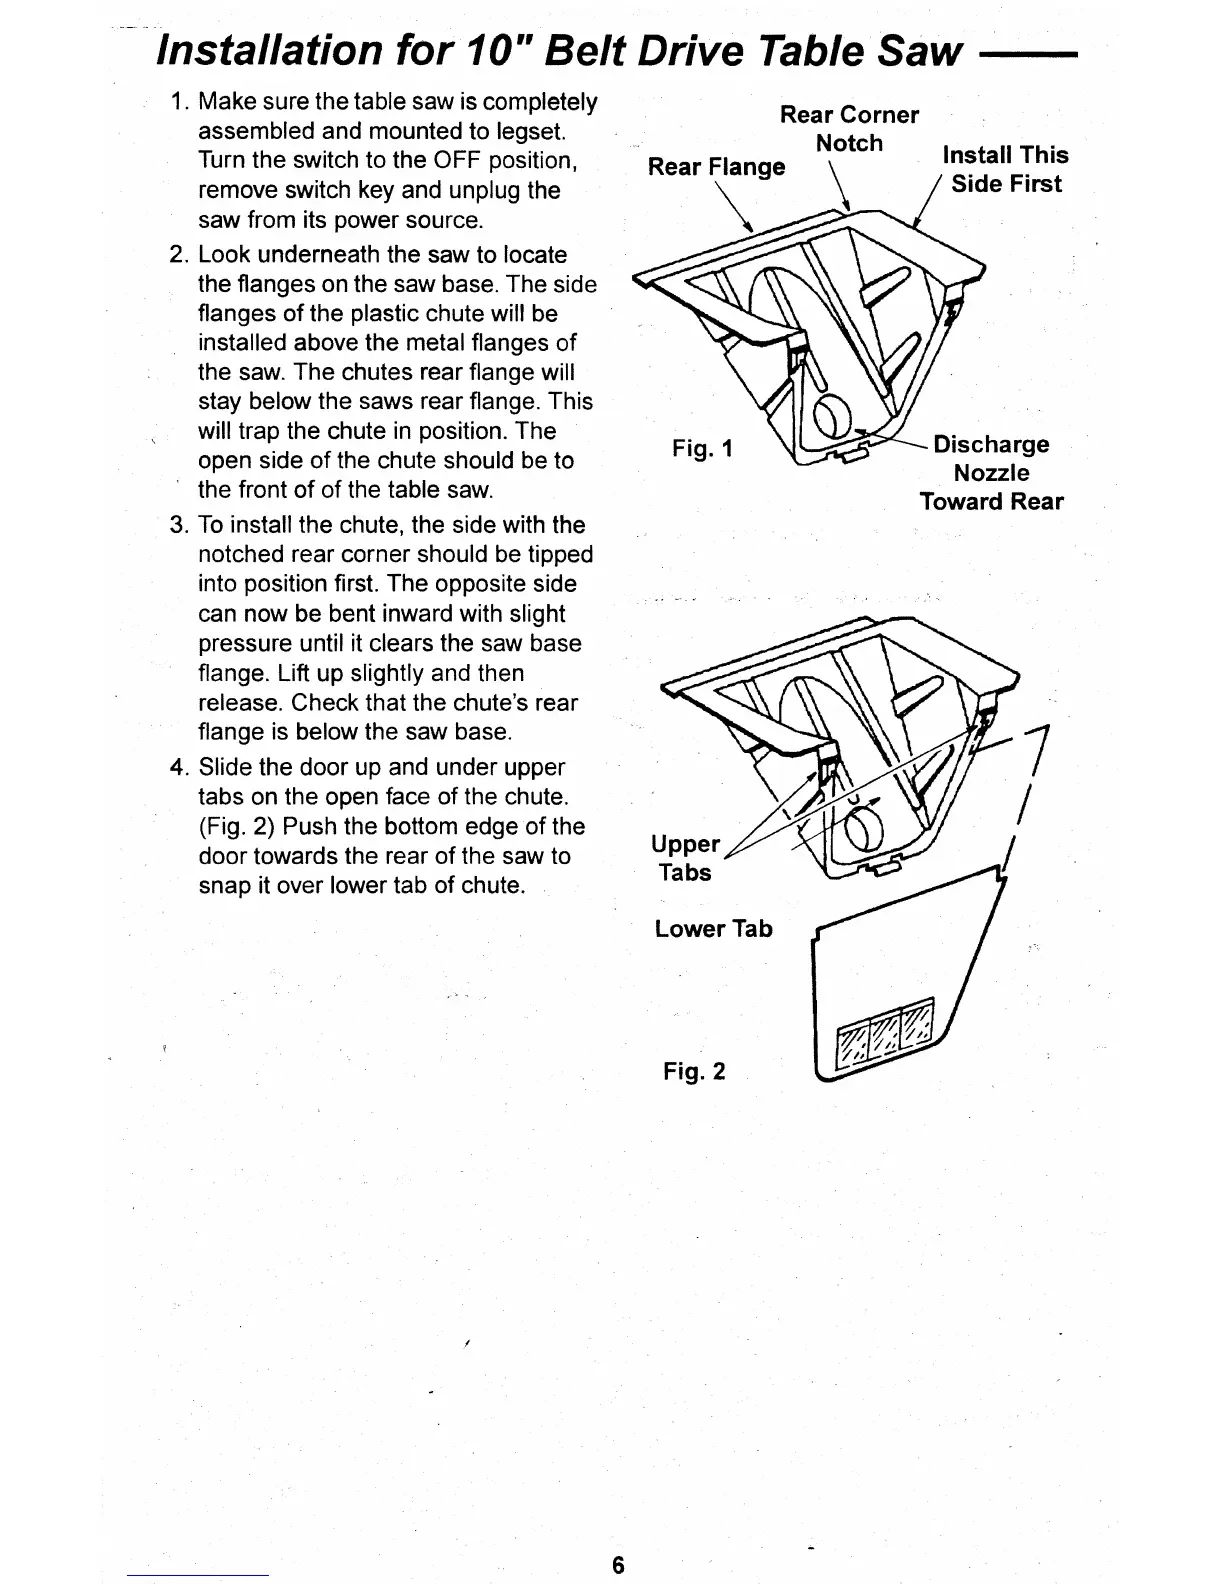
2.
Look underneath the saw to locate
the flanges on the saw base. The side
flan ges
of
the plastic chute wil! be
installed above the metal flanges
of
the saw. The chutes rear flange will
stay below the saws rear flange. This
wil! trap the chute
in
position. The
open side
of
the chute should be to
the front
of
of the table
saw.
3.
To
install the chute, the side with the
notched rear corner should be tipped
into position first. The opposite side
can now be bent inward with slight
pressure until it clears the saw base
flange. Lift up slightly and then
release. Check that the chute's rear
flange
is
below the saw base.
4.
Slide the door up and under upper
tabs on the open face of the chute.
(Fig. 2) Push the bottom edge
of
the
door towards the rear
of
the saw to
snap it over lower tab of chute.
6
Rear Corner
Notch
Rear Flange
~
\
Fig. 1
LowerTab
Fig. 2
lnstall This
Side
First
Dis charge
Nozzle
Toward Rear
 Loading...