6
6. The next step is to install the eye bolts
in the top of the unit. To do this, you
must remove the three filters first.
Refer to drawing under “Maintenance”
section for location of three types of fil-
ters.
7. Remove the fasteners holding the filter
doors (2) against the side panel of the
unit. Pivot the cover plate towards the
end of unit and pull away from end
where cover plate tab enters slot in
end frame at top and bottom.
8. The Pre Filter (intake) slides out of the
channel in the cabinet.
9. To remove the fine filter (mid bag type)
slide filter out about 2" to the left. Push
right end of filter into cabinet about 4".
Slide filter further into cabinet at an
angle. Tilt in at top and pull filter
towards you and out of the unit.
10. The exhaust filter slides out of the
channel in the cabinet.
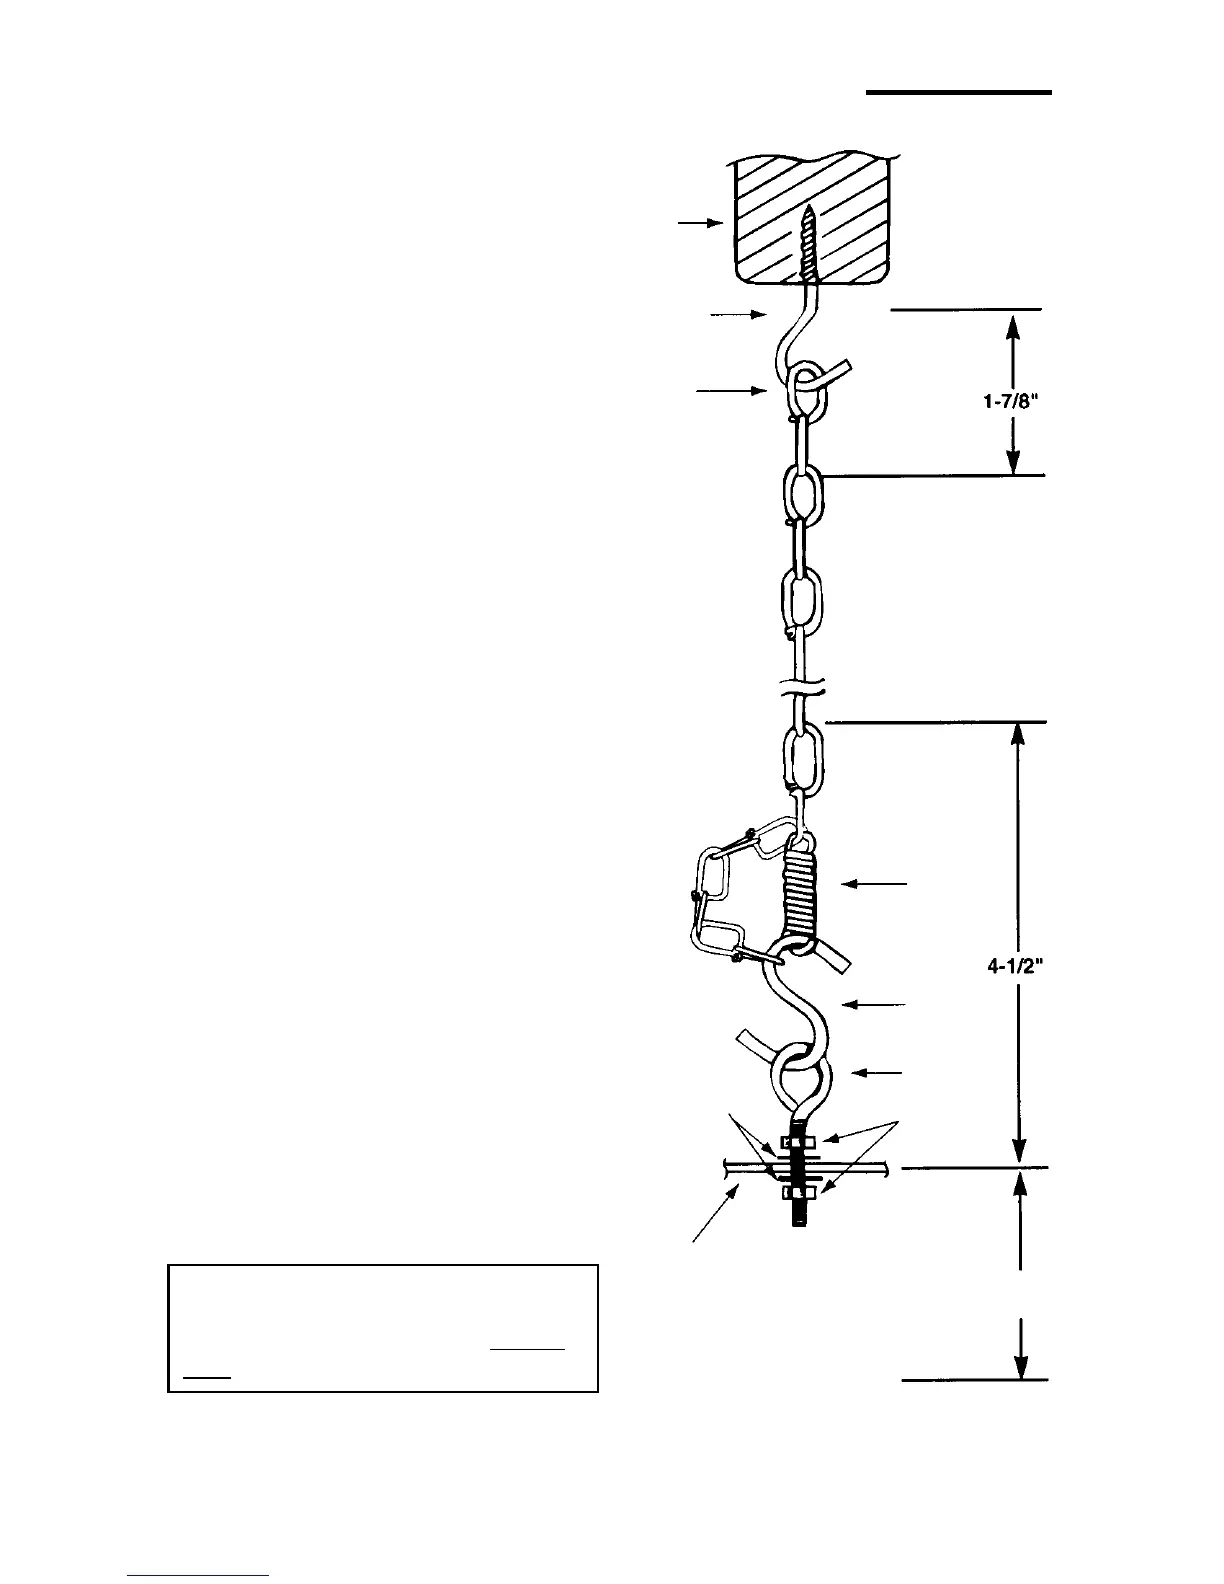
11. Install a hex nut on an eye bolt until 1/4"
of thread is showing below the eye. Slip
on a lockwasher and put eye bolt in hole
in top of cabinet. Repeat for other three
eye bolts.
12. Slip lockwasher and hex nut on eye
bolt as shown. Repeat for other three
eye bolts and then tighten nuts with
two wrenches until all nuts are snug.
13. Filters can be reinstalled at this point.
• Exhaust Filter - slide into channel.
• Fine Filter (mid bag type) - reverse
motions for removing the fine filter,
shown in step 9.
• Pre Filter (intake) - slide into chan-
nel.
WARNING: Although compact in
size, the Air Filtration Unit weighs
40 lbs. To avoid back injury obtain
help to lift the unit into place.
Ceiling
Joist
Screw
Double
Loop
Chain
Extension
Spring
Eye Bolt
Hex Nuts
“S” Hook
Lockwashers
Top of
Cabinet
11" Height
of Unit
Hook
Installation Procedure (continued)