7
ASSEMBLY
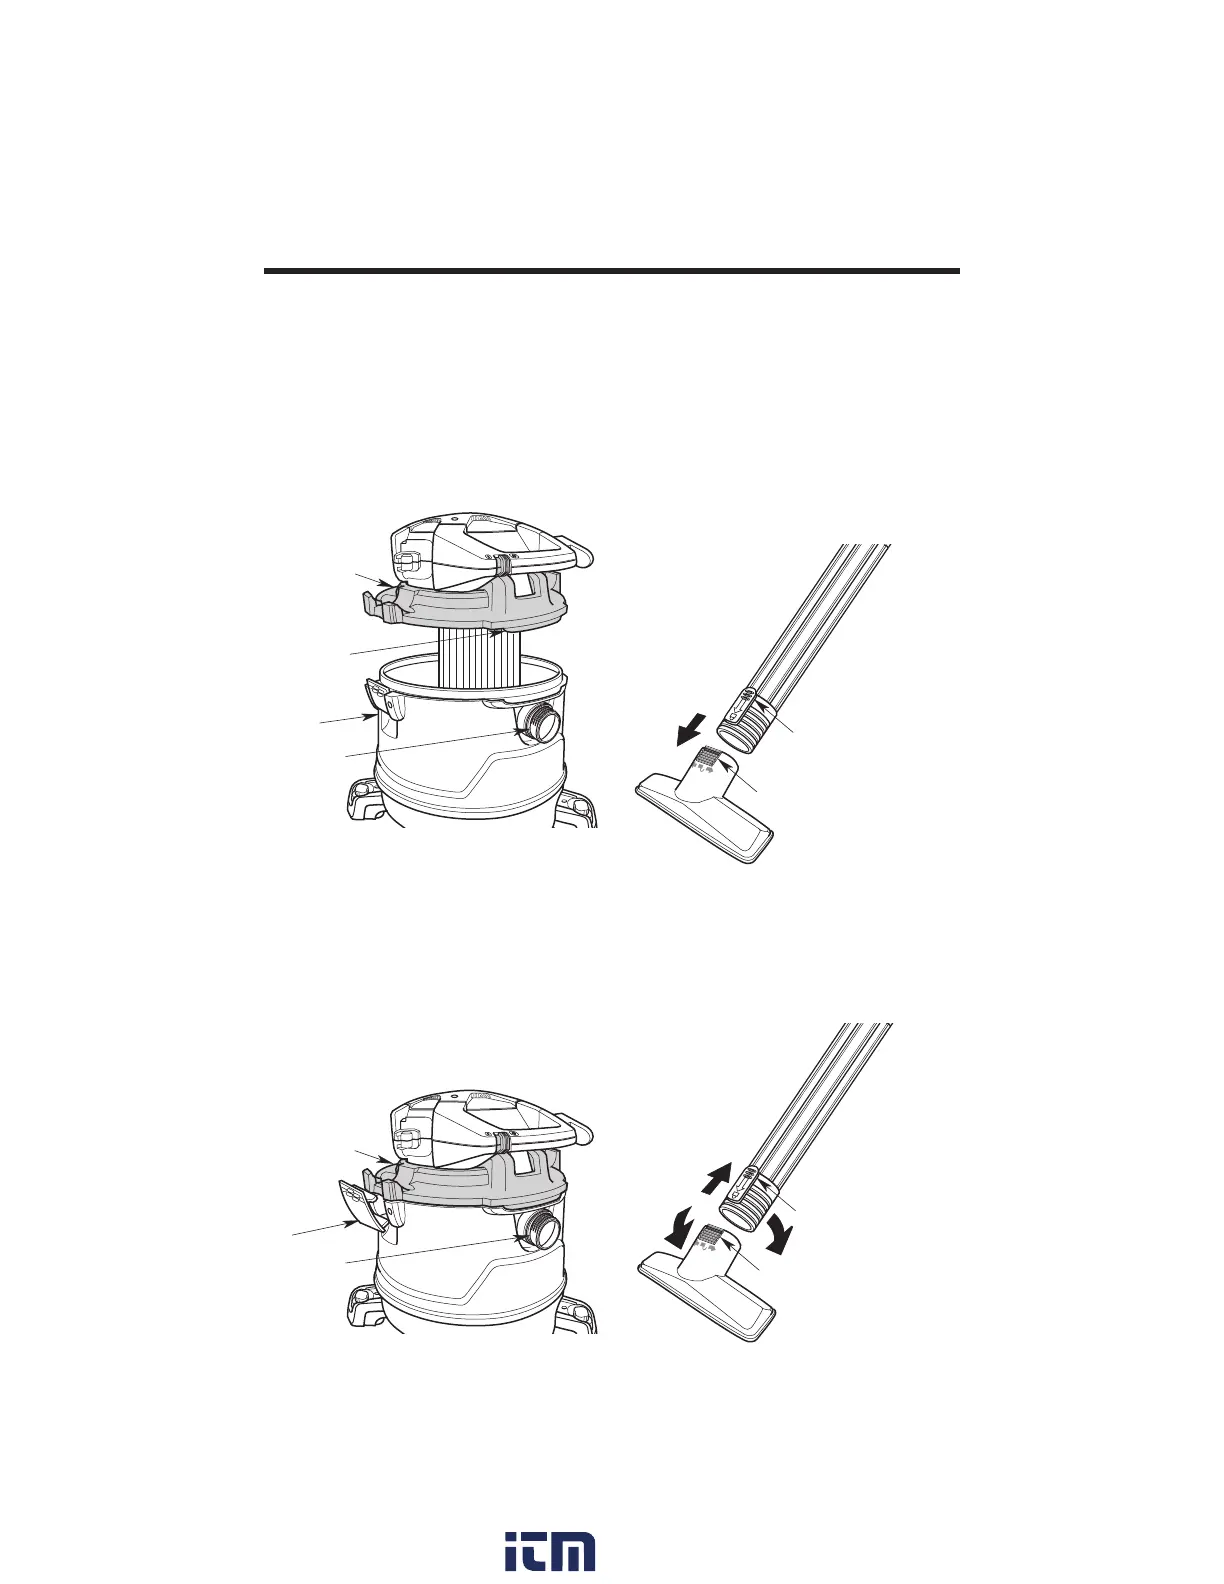
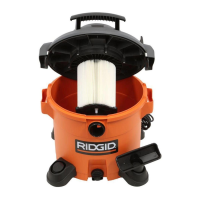
2. Install: Press in on the two Latches
located on either side of the Dust Drum
until they snap into place, securing the
Powerhead Assembly to the Dust Drum.
3. Remove: Pull out on the two Latches
and lift Powerhead Assembly from the
Dust Drum. Do not force the Latches to
rotate more than slightly outside Drum
flange.
D
R
A
I
N
Vac Inlet
Latches
(2)
Powerhead
Assembly
Attaching / Removing
Powerhead Assembly to
Dust Drum
1. Place Powerhead Assembly on top of
Dust Drum with the Extended Lip of the
Powerhead Assembly aligned with the
Inlet. Be sure Powerhead Assembly is
fully seated on the Dust Drum.
D
R
A
I
N
Extended
Lip
Powerhead
Assembly
Vac Inlet
Dust
Drum
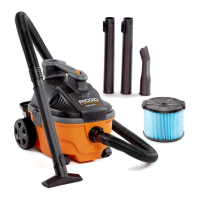
Extension Wand
Release Button
Accessory Nozzle
Ridges
CONNECT:
Locking Accessories
1. To Connect Accessory: Your
RIDGID Wet/Dry Vac includes Locking
Accessories to prevent the Accessories
from falling off when in use. To
connect the Accessories, align the
Nozzle Ridges of the Accessory with
the Release Button of your Extension
Wand. Press to secure the Nozzle to
the Extension Wand.
2. To Disconnect Accessory: Twist
the Nozzle and Extension Wand to
disengage the Nozzle Ridges and pull.
You may also press the Release Button
and pull to disengage.
Accessory Nozzle
Ridges
Extension Wand
Release Button
DISCONNECT:
w ww. . com
information@itm.com1.800.561.8187