RigMaster Service and Repair Manual
Document # S280909
Copyright RigMaster Power by Mobile Thermo Systems Inc. 09-28-09
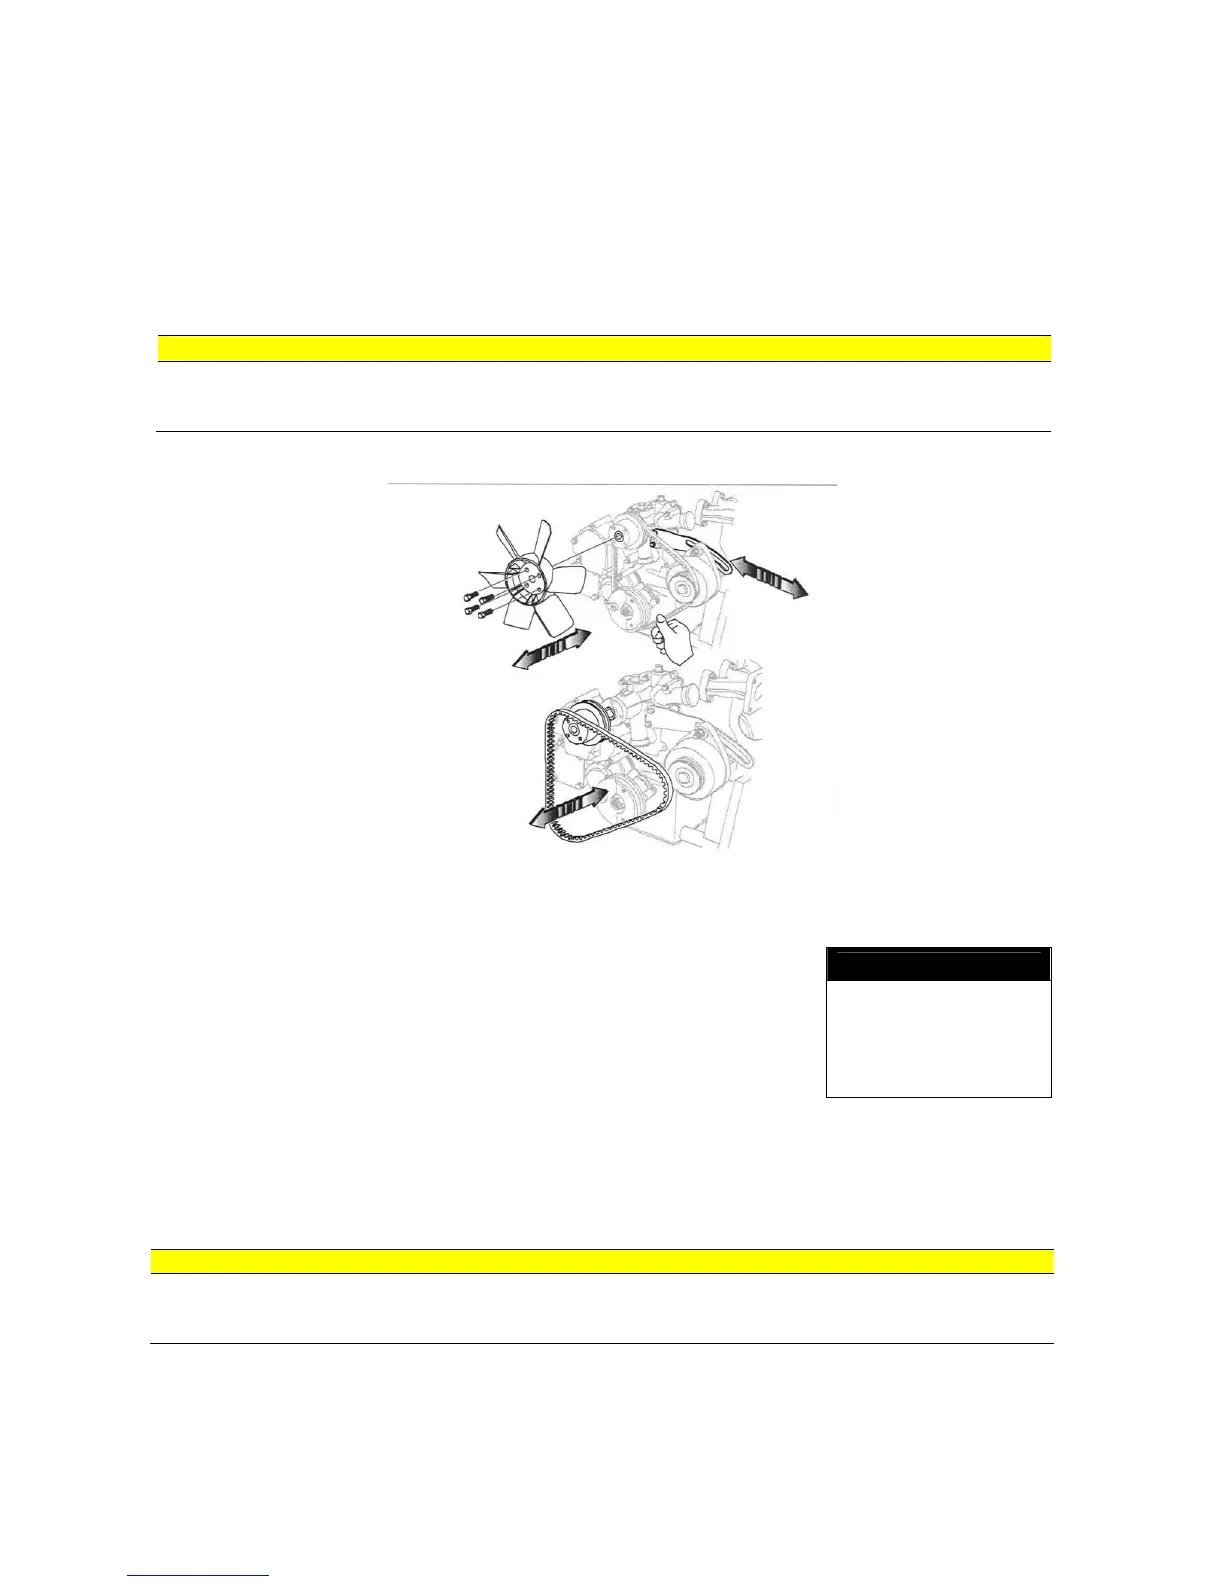
S2.8 Replacing Fan Belt for 25A and 40A Alternators
To replace the fan belt, the right-hand side chamber must be removed. It is also necessary that
the engine cooling fan be removed.
Procedure
1. Remove the right hand side panel using a 7/16 socket.
2. Loosen the adjustment bolt using a 12mm wrench and a 12mm
socket.
3. Loosen the pivot bolt using a 12mm socket.
4. To remove the fan belt, slide the alternator down towards the
engine and remove the belt.
5. Install the new fan belt and slide the alternator up towards the top
of the engine using a 16 inch pry bar until the belt deflection is less than 6 mm. (1/4").
6. When the fan belt is tensioned, tighten the adjustment bolt using a 12mm wrench and 12mm
socket. Then tighten the pivot bolt using a 12mm socket.
7. Reinstall the right hand side panel using a 7/16 socket. Make sure the shroud on the side
panel does not touch the engine fan blade.
mounts and bottom stiffeners for damage, loose bolts or worn engine mounts. Also see
that a foreign object did not enter the engine compartment.
CAUTION
 Loading...