EasyManua.ls Logo

Rinnai Pipe Cover User Manual

Rinnai Pipe Cover
2 pages
To Next Page IconTo Next Page
Page #1 background imageLoading...
Page #1 background image
Pipe Cover Enclosure Installaon Instrucons Copyright © 2018 Rinnai America Corporaon. All Rights Reserved.
INSTALLATION INSTRUCTIONS
Pipe Cover Enclosure
Before installaon, please make sure that all parts are located inside the product box. If any items are missing or
damaged, contact your local dealer/distributor or contact Rinnai.
For installaon related inquiries concerning this product please contact Rinnai, see the Installaon and Operaon
Manual for your local Rinnai Help Line contact details.
1. Secure the two boom frames ① to the le panel
② and right panel ③ with screws ⑦and plasc
washers ⑧ .
NOTICE
An approved weatherproof electrical GPO can be located inside the pipe cover. Installaon of the
GPO must comply with AS/NZS 3000 Wiring Rules (Australia and New Zealand installaons only)
For Use With Rinnai Condensing Tankless Water Heaters
(Please contact Rinnai for model compability)
Phillips head screwdriver
Item # Item Qty
1 Boom Frame 2
2 Le Panel 1
3 Right Panel 1
4 Front Panel 1
5 L Bracket 2
6 Plasc Retaining Clip 2
7 Screw M4 X 12 12
8 Plasc Washer M4 12
9 Wall Anchor 2
10 Screw Ø4.8 X 32 2
1 2 3
4
5
6
7
8
9
10
Inial Assembly
ITEMS INSIDE PRODUCT BOX
TOOLS/MATERIALS REQUIRED:
INSTRUCTIONS
7
8
1
2
3
1
*Four of the M4 X 12 screws ⑦ and four of the M4 plasc washers ⑧ are not required for Australian installaons.
Drill
Question and Answer IconNeed help?

Do you have a question about the Rinnai Pipe Cover and is the answer not in the manual?

Rinnai Pipe Cover Specifications

General IconGeneral
CategoryEnclosure
TypePipe Cover
MaterialPlastic
ColorWhite
Temperature ResistanceUp to 80°C

Summary

Items Inside Product Box

Tools and Materials Required

Installation Instructions

Initial Assembly

Secure the two bottom frames to the left and right panel with screws and plastic washers.

Water Heater Preparation

Attach L Brackets to Water Heater

Install two L brackets to the bottom of the water heater using removed screws and washers.

Pipe Cover Installation

Attach and Secure Pipe Cover

Temporarily fit enclosure, adjust frame, press clips, and secure to brackets.

Mounting Pipe Cover to Wall

Drill holes, install wall anchors, and secure pipe cover to the wall.

Front Panel Installation

Attach Front Panel

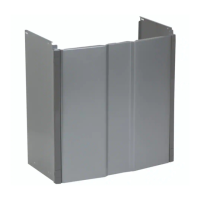
Insert the four tab hooks on the front panel into the slots of the left and right panels.

Secure Front Panel

Secure front panel to enclosure using screws and washers (except Australian installations).