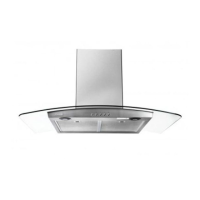
This document is an instruction and installation manual for the Rinnai Extractor Hood, model RH-C1159-PBW. It provides comprehensive information on the intended use, safety, operation, maintenance, and installation of the appliance.
Function Description
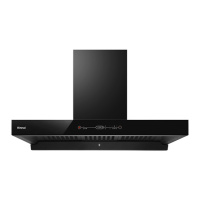
The Rinnai Extractor Hood RH-C1159-PBW is designed for domestic kitchen use to eliminate unpleasant odors from the kitchen. It functions by extracting cooking vapours and odors, either by recirculating filtered air back into the kitchen (Recirculating Air Mode) or by ducting them outside (Ducted Mode). The appliance is equipped with a control panel that allows users to adjust fan speed, set a timer, control lighting, and monitor filter saturation.
Important Technical Specifications
- Model: RH-C1159-PBW
- Power Rating: 253W
- Voltage: 220-240V~
- Power Frequency: 50/60Hz
- Power of Lamps: 1 X 3W LED strip light
- Length of the cable: 1.5m
- Appliance Dimensions: 895 x 504 x 567 - 1045mm (W x D x H)
- Minimum Installation Height: 700mm (gas range) and 550mm (electric range).
- Max weight of the extractor hood: 18kgs.
- Ducting: Supports Ø150mm pipe directly to the air outlet or Ø120mm pipe using a reducing connector.
- Filters: Metal grease filters (for both recirculating and ducted modes) and charcoal filters (for recirculating mode only).
Usage Features
The extractor hood offers several features to enhance user experience:
- Operating Modes:
- Recirculating Air Mode: The extractor hood fan draws in cooking vapours and odors, which are then cleaned by the grease filter and plasma filter. The clean air is then conveyed back to the kitchen via a vent opening in the hood. This mode is intended for use when recirculating air is the only option.
- Ducted Mode: In ducted mode, the extractor hood fan extracts the cooking vapours and passes them through the grease filters. The air then flows to the outside. The grease filter absorbs the solid particles in the cooking vapours. This mode, only grease filters are installed (charcoal filter is optional).
- Control Panel:
- ON/OFF: Turns the extractor hood on/off.
- Fan Speed Increase/Decrease: Allows selection of fan speed (1, 2, 3) and a booster mode (P). The booster mode operates for approximately 10 minutes before automatically switching back to fan setting 3.
- Wave Control: Gesture sensing allows control of fan speed (1-2 seconds for speed 1, 2-3 seconds for speed 2, 3-4 seconds for speed 3).
- Real Clock Timer: Displays real-time clock. The '∧' and '∨' buttons are used to set the current hour and minute.
- Delay Timer: Sets a delay timer for the extractor hood to continue operating for a specified period (5, 10, 15, 20 minutes) before turning off automatically.
- Clean and Fresh Function: Activates a 5-minute cleaning and fresh function every 24 hours at fan setting speed 1.
- Saturation Display: Indicates when metal grease filters or charcoal filters need cleaning/replacement. A white dot indicator light illuminates on the lower right side of the display window.
- Lighting: Controls the lights on the ON/OFF position.
- Energy Saving: The appliance is designed to operate efficiently with a low level of operating noise. It includes a booster mode for intensive cooking and a switch-off feature for the extractor hood if no longer required.
Maintenance Features
Regular maintenance is crucial for the efficient and safe operation of the extractor hood.
- Cleaning Agents: Use mild cleaning agents such as soft sponge or brush, soft damp sponge or damp cloth, or a solution of warm water and a little washing up liquid. Avoid harsh or abrasive cleaning agents, scouring powder, liquid scouring cleaner, cleaning products with a high alcohol content, hard scouring pads or cleaning sponges, pressure washers or steam cleaners, cleaning products that dissolve limescale, and aggressive all-purpose cleaning products.
- Surface Cleaning:
- Stainless Steel: Clean with warm soapy water using a soft damp sponge or damp cloth. Wipe off with a dry lint free cloth to avoid smearing or staining on the hood. Clean in the direction of the grains only.
- Painted Surface: Clean with warm soapy water using a soft damp sponge or damp cloth. Wipe off with a dry lint free cloth. Do not use any stainless steel cleaner.
- Aluminium and Plastic: Clean with warm soapy water using a soft damp sponge or soft damp cloth. Wipe off with a dry lint free cloth.
- Glass: Clean with a solution of warm water and a little washing up liquid using a soft damp sponge or damp cloth. Wipe off with a dry lint free cloth. Do not use a scraper.
- Controls: Clean with warm soapy water using a soft damp sponge or soft damp cloth. Wipe off with a dry lint free cloth. Never clean the controls with a wet cloth as there is a risk of damage to the electronics.
- Metal Grease Filter Cleaning:
- The metal grease filters should be cleaned regularly (every 4 weeks depending on usage).
- They can be soaked in warm detergent solution (approx. 40°C) to simplify removal of grease, then brushed, rinsed thoroughly, and left to dry before refitting.
- Alternatively, they can be cleaned in a dishwasher using normal domestic dishwashing detergent (no more than 70°C).
- A slight discolouration of the metal grease filter may occur, which does not affect performance.
- Oil Collector Cup Cleaning:
- The oil collector cup should be cleaned regularly.
- It can be cleaned using warm detergent solution and left to dry before refitting.
- Charcoal Filter Replacement (if applicable):
- Charcoal filters are not washable and cannot be restored. They must be replaced periodically (usually after 2 months depending on conditions of use).
- The control panel display window will show a white indicator light if the charcoal filter is dirty or discoloured.
- To replace, remove the metal grease filters, turn the charcoal filter anti-clockwise, pull down, and reverse the procedure for refitting new filters.
- Troubleshooting: The manual includes a troubleshooting guide for common issues like the extractor hood not working, faulty fuse, whirring sound, motor not running, and lights not working, along with possible causes and solutions. For complex issues, contacting the local Rinnai After Sales Service Center is recommended.
The manual also emphasizes safety information, environmental protection, and detailed installation instructions, including preparing the installation area, attaching and aligning the extractor hood, and attaching the flue ducts. It highlights the importance of professional installation and adherence to safety guidelines.