8
IMPORTANT- Please make sure the installation surface can support at least 3
times the weight of the camera and the bracket.
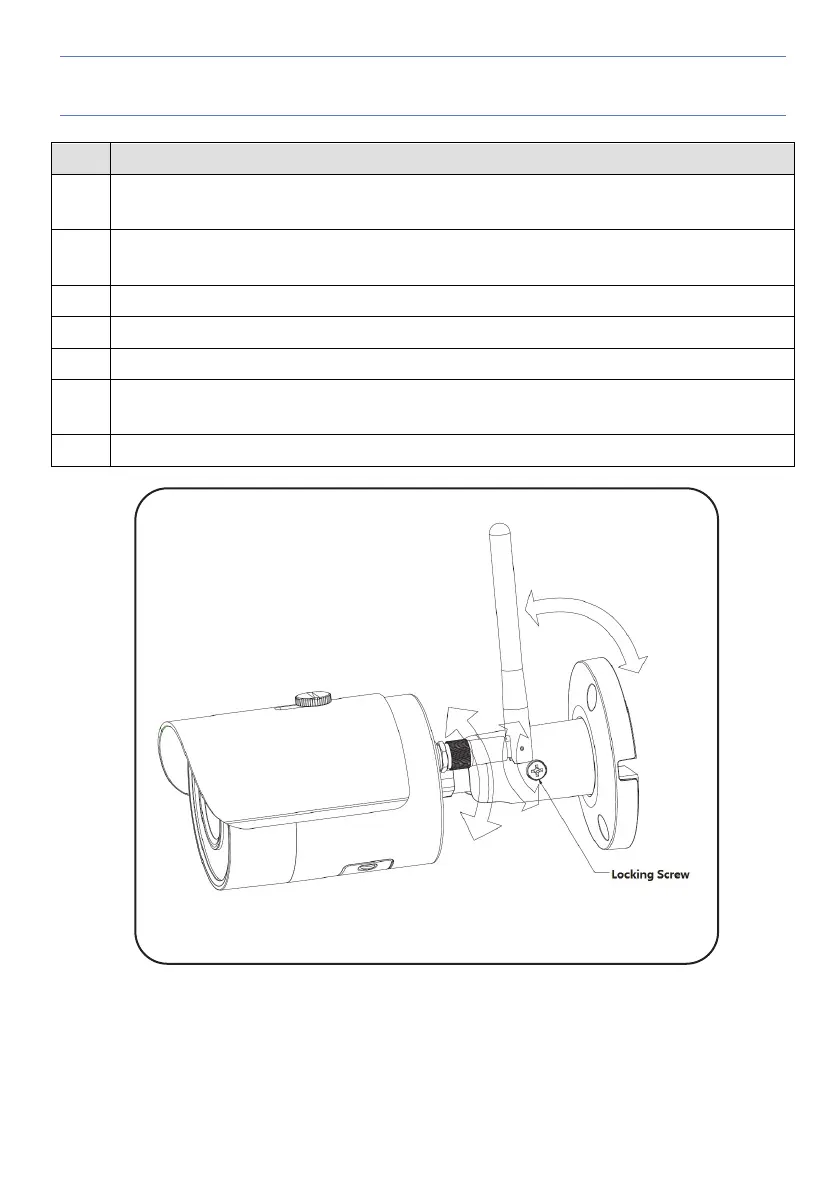
Step Description
1 Place the installation positioning template on the installation surface such as
ceiling or wall.
2 Make holes in the installation surface according to the installation positioning
template.
3 Insert the expansion bolts from the accessories bag into the holes you just made.
4 Position the IP camera base over the holes
5 Use the screws from the accessories bag to secure the IP camera firmly.
6 Loosen the adjusting screw and rotate the IP camera to the correct surveillance
position according to your actual requirements.
7 Secure the locking screw to fix the IP camera.
Figure 5 IP Camera Adjustment
 Loading...