Do you have a question about the riva racing maptuner x and is the answer not in the manual?
Read all pages before starting to tune and understand potential differences in screenshots.
Explains the need for a VIN-specific tuning license for BRP vehicles to access RIVA's library.
Important step to remove specific fuses for 300 HP models to prevent programming failure.
Enter a license code and select desired tune files from the available library.
Confirm the tune request for the selected craft and press synchronize to transfer files.
Unplug MaptunerX from the computer and plug it into the vehicle's OBD connector.
Select the desired tune file and confirm necessary parts, then select 'Download'.
Replace the fuses removed at the beginning of the flashing process for 300 HP models.
Instructions on how to recover an ECU if a flash fails, including manual powering.
Lists common reasons for flash failures, such as forgotten fuses or low battery voltage.
| Brand | Riva |
|---|---|
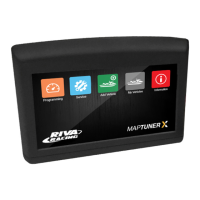
| Product | MapTuner X |
| Connectivity | Bluetooth |
| Display | LCD screen |
| Function | Engine diagnostics and tuning |
| Real-time Data | Yes |
| Updateable | Yes |