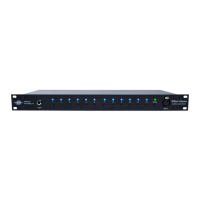
Connecting the Mastermind PBC/6X
This diagram shows a configuration with the Mastermind PBC/6X switching 7 pedals in front of an amp. In a basic configuration like this,
the insert loop (INS S and INS R) can be used as an additional pedal switching loop. Or, it’s an ideal place to connect a volume pedal if
you have one. The amp’s channel switching is also controlled by the PBC. Most amps that have 1/4-inch switching jacks and a 1 or 2
button footswitch can be controlled by the Mastermind PBC/6X.
For more wiring diagrams, please refer to the Mastermind PBC/6X manual, available on our website (www.rjmmusic.com/downloads).
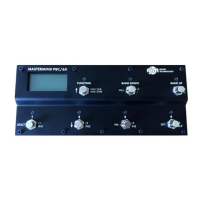
Main Screen
The main screen displays the name of the currently selected preset, as well as the status of
the PBC’s audio features. The upper row has the following indicators:
F: Function switches 1 and 2. These are used to control amp channel switching.
I: Inputs 1 and 2. One input can be active at a time.
B: Input buffer.
O: Output(s). There will be one output shown when configured as mono, and two outputs
when configured as stereo.
The indicators at the bottom of the screen show the current order of the loops in the signal
path, as well as which loops are currently turned on. The “+” icon represents the insert loop.
Buttons and Button Pages
The Mastermind PBC/6X’s buttons are arranged in button pages. The PBC’s buttons have different functions on each page. Pressing the
FUNCTION button switches from one page to the next.
!
Preset and Bank Page
Buttons 1-4 select a preset
BANK UP and BANK DOWN shift up or down
banks of 4 presets
Hold FUNCTION to activate tuner
Loops Page
Buttons control loops 1-6 (see L1 through L6
labels to the right of each button)
Hold FUNCTION to store the currently
selected loops to the current preset
Switches Page
Buttons control function switches, insert point,
input buffer, input and output (see the labels to
the right of each button, below the loop labels)
Hold FUNCTION to store to the current preset