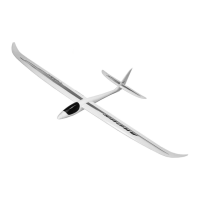
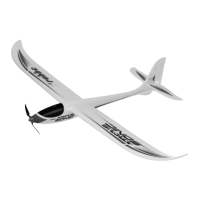
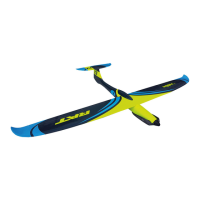
AMX - Jet
3
Specification
Wingspan: approx. 608 mm
Overall length: approx. 900 mm
Total surface area: approx. 12 dm²
All-up weight: approx. 540 g
Total surface area loading: approx. 45 g / dm²
Dear customer,
Congratulations on your choice of a factory-assembled
model aircraft from the robbe Modellsport range. Many
thanks for placing your trust in us.
Very little work is required to prepare the model ready for
flying. You can make it as easy as possible to operate your
new aeroplane safely by taking the trouble to read right
through these instructions attentively, together with the
separate information sheets, before you fly it for the first
time.
The model is available in two different colour schemes. The
decals are already applied. In terms of technical features the
two models are identical.
These instructions apply to both versions; the illustrations
show the single-colour model.
All directions, such as “right-hand”, are as seen from the
tail of the model, looking forward.
The power system
The model is powered by a brushless outrunner motor and
ducted fan, both of which are factory-installed.
The motor is connected to the speed controller, ready to
run, and the controller is factory-adjusted.
All you have to do is connect the LiPo flight battery to the
speed controller.
The radio control system
To fly the AMX - Jet you need a radio control system with at
least four channels. We particularly recommend 2.4 GHz
systems.
The servos for the ailerons and the elevators are factory-
installed; the elevator servos and aileron servos are wired in
parallel using Y-leads.
The power supply for the receiving system is drawn from
the speed controller’s integral BEC system.
The speed controller is located under the black plastic
hatch on the underside of the fuselage.
To check the model’s working systems, first set the control
surface servos to neutral from the transmitter, after check-
ing that the transmitter sticks and trims are at centre.
When you wish to fly the model, always move the throttle
stick to the “Motor OFF” position before switching the
transmitter on, and only then connect the flight battery to
the speed controller.
Switch off in the reverse order: disconnect the battery from
the speed controller first, and only then switch the transmit-
ter off.
Gluing techniques, adhesives
Check the fit of parts “dry” before reaching for the glue bot-
tle.
Epoxy adhesive should be used for almost all joints:
robbe ropoxy No. 5066
UHU por (for plastic hatch cover)
Additional parts required
Item Order No.
Battery charger, e.g.
Compact Duo Power 6S EQ 8506
or
Duo Power 8S EQ 8504
Adapter lead for Equalizer socket, e.g. 8214
(please refer to the charger instructions
for help with selecting the appropriate
adapter lead)
CT 2 connectors 4077
for flight battery
Red / black heat-shrink sleeve 5149
Velcro (hook-and-loop) tape 1713
Replacement battery
LiPoly battery, 3S 1P, 1300 mAh 32700004
Replacement parts Order No.
AMX - Jet impeller set, excl. motor 32700001
AMX - Jet brushless outrunner motor 32700002
AMX - Jet canopy + fittings set 32700003
Kit contents
Fuselage, with motor, speed controller and servos
Clear canopy and cockpit
Left / right wing panels with ailerons and servos
Left / right tailplane panels with elevators
Fin
2 x aileron pushrod, one Z-bend
2 x elevator pushrod, one Z-bend
1 x LiPo battery, 3S 1 P 100 mAh 20 C
2 x Y-lead
Fig. 1
- Glue the left-hand tailplane panel in the recess in the tail
end of the fuselage. Note that the elevator horn must be
on the bottom.
Check that the panel is located correctly.
Assembly and operating instructions
© robbe Modellsport
No. 3270
No. 3271
 Loading...