20
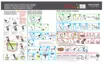
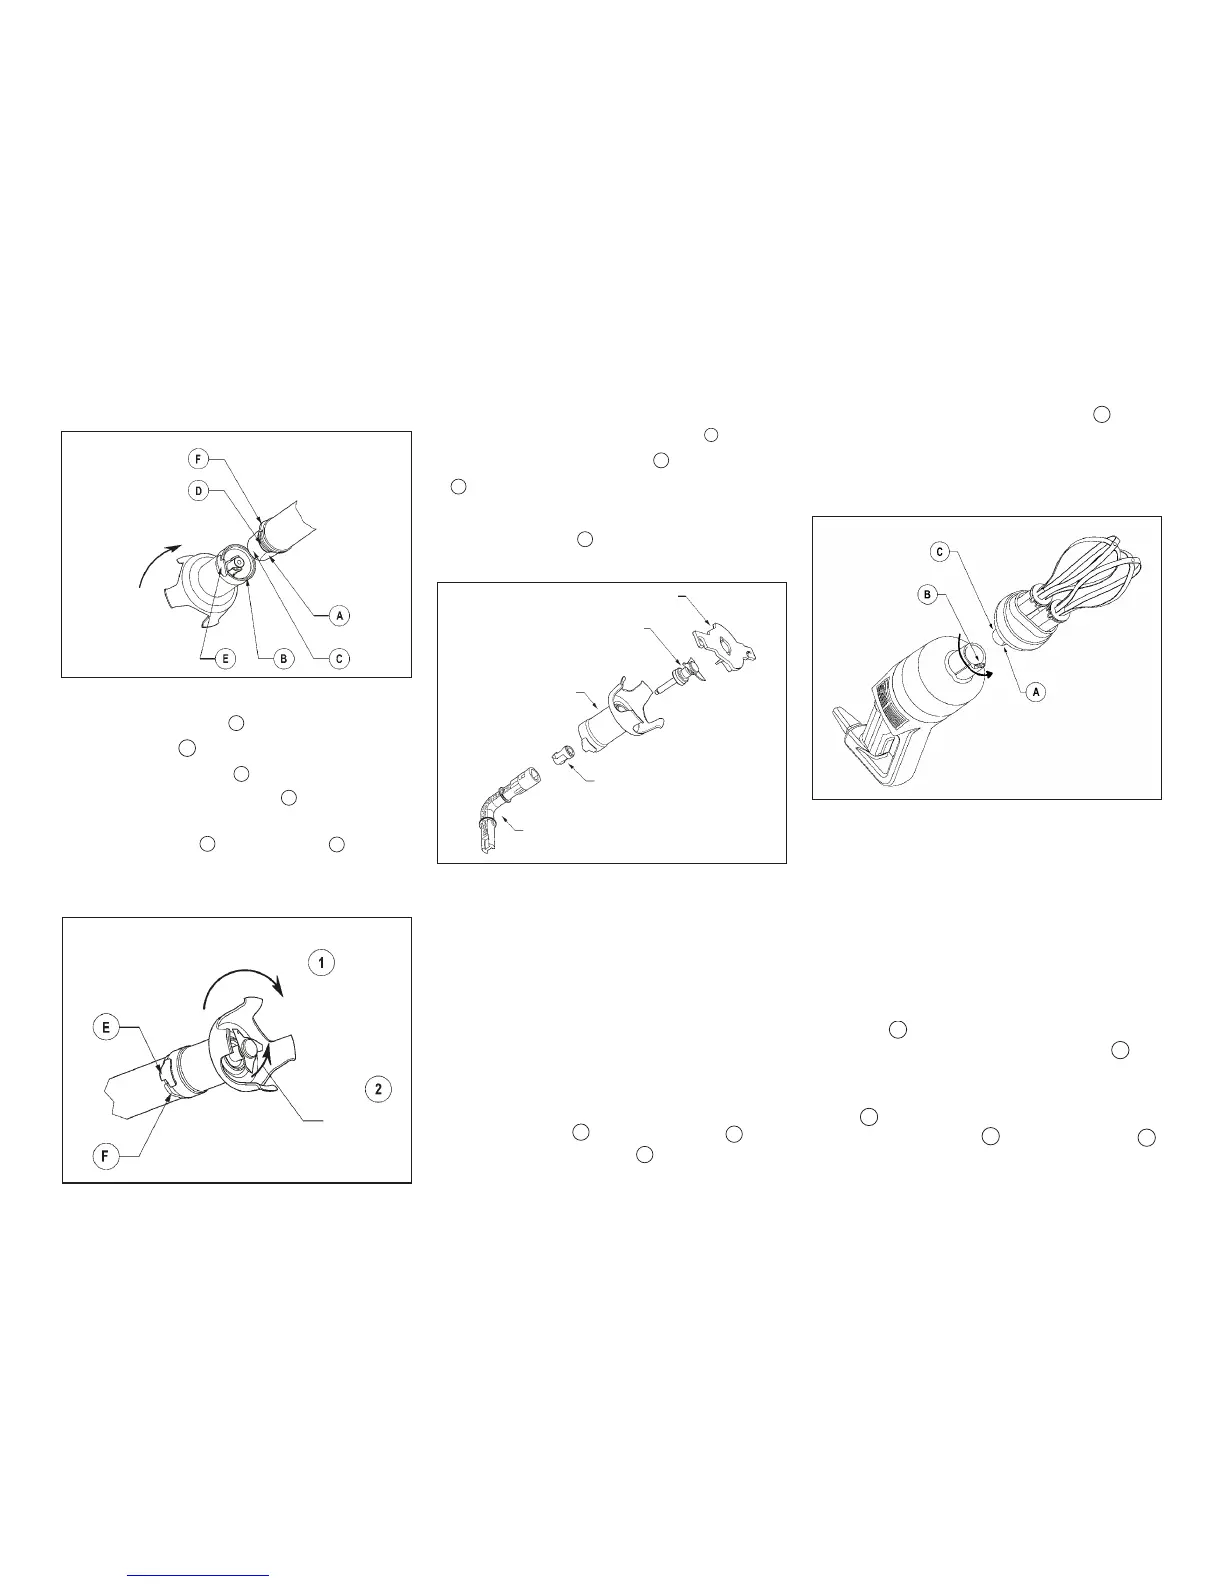
Attaching the bell from the tube
- Check that the machine is not plugged in.
- Turn the bell in the direction of arrow
1
(see next
figure) to separate the bell lug
from the tube lug
F
. Remove the bell.
- If jammed, turn the blades inside the bell in the
direction of arrow
2
to disengage them from the
drive shaft.
- Insert the whole of the conical part
of the
whisk holder into the aluminium casing.
- Turn the whisk holder in the direction of the arrow
(see figure) until it is locked into place moderately
tightly.
Removing the blade
- To remove the blade safely, hold them with the
tool provided or an oven glove or a thick cloth.
- Using the removal tool, unscrew the drive
coupling.
- As soon as the drive coupling has been uns-
crewed, the blade can be removed for cleaning.
• WHISK FUNCTION (only for CMP Combi)
Attaching the whisk holder to the motor unit.
- Check that the machine is not plugged in.
- Align the flat side
A
of the conical part
of the
whisk holder with the catch
B
on the inside of the
aluminium casing.
Removing the casing
- Check that the machine is not plugged in.
- Turn the whisk holder in the opposite direction to
that used when attaching it.
- When it will go no further, remove the whisk
holder from the aluminium casing.
Fitting the whisks into the whisk holder
- Grasp the holder in one hand.
- With the other hand, take the first whisk and insert
the shaft
into the bore B of the whisk holder
drive shaft. Make sure the drive lugs
are
properly aligned with the notches.
- As you push the whisk into the whisk holder drive
shaft
, rotate it slightly in order to slot the drive
lugs into the notches
,
thereby locking the whisk into place inside the
shaft.
Blade locking
Blades with watertight seals
Bell
drive coupling
Blade removal
turn to remove Bell
turn to
disengage Blades
turn to
attach Bell
- Check that the machine is not plugged in.
- Align the flat side of
A
the conical part of the
tube with catch
B
he inside of the bell.
- Insert the conical part
C
into the bell. With the
washer touching the tube seal
D
, turn the bell in
the direction of the arrow (see above figure) to
lock the bell lug
E
and tube lug
F
together
moderately tightly.
Removing the bell from the tube