15
STEP
1
STEP
2
1-1 1-2 1-3
2 3
4
5 6
Robot
bottom side
Robot
upper side
Robot
upper side
BIOLOID GP Assembly Start
Robot
bottom side
혼 위치에 주의
/
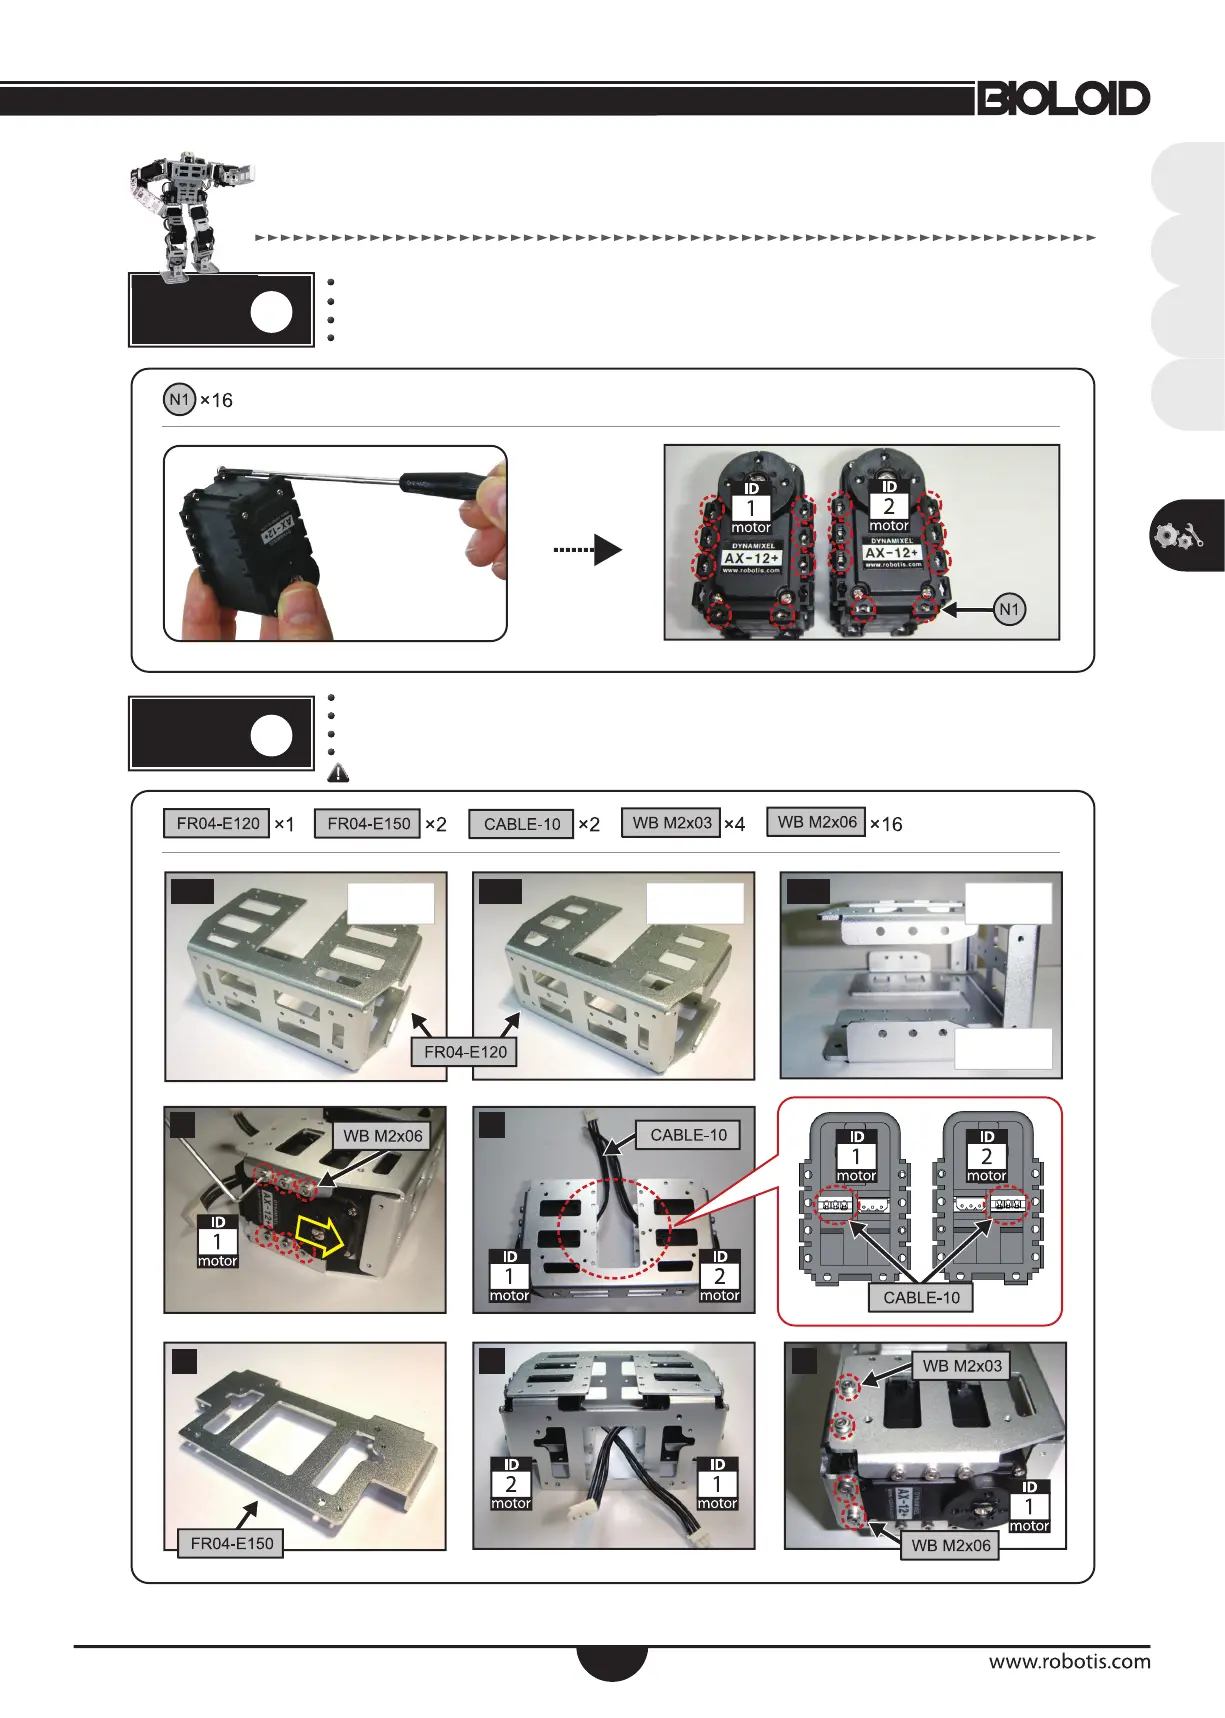
Do not misalign horn position during attachment/
ホーンの位置に注意
/
注意舵机盘的位置,不要使舵机盘位置发生偏移
AX-12A ID1과 ID2에 너트를 삽입한다.
AX-12A ID1과 ID2에 CABLE-10을 연결하고 가슴프레임F(FR04-E120)와 체결한 후, 가슴프레임B(FR04-E150)와 체결한다.
AX-12A ID1とID2にナットを挿入する。
AX-12A ID1とID2にCABLE-10を接続して、胸のフレームF(FR04-E120)と締結した後、胸のフレームB(FR04-E150)と締結する。
Insert nuts ID1 and ID2 of AX-12A.
Connect ID1 and ID2 with CABLE-10, then attach them to chest F(FR04-E120) frame, and then, attach them again to chestB(FR04-E150).
在编号为ID1和ID2的AX-12A中插入螺母。
在ID1和ID2上连接电线CABLE-10,并固定在胸部连接件F(FR04-E120)之后将胸部连接件B(FR04-E150)固定在FR04-E120上。
한국어
ENG
日本語
中文