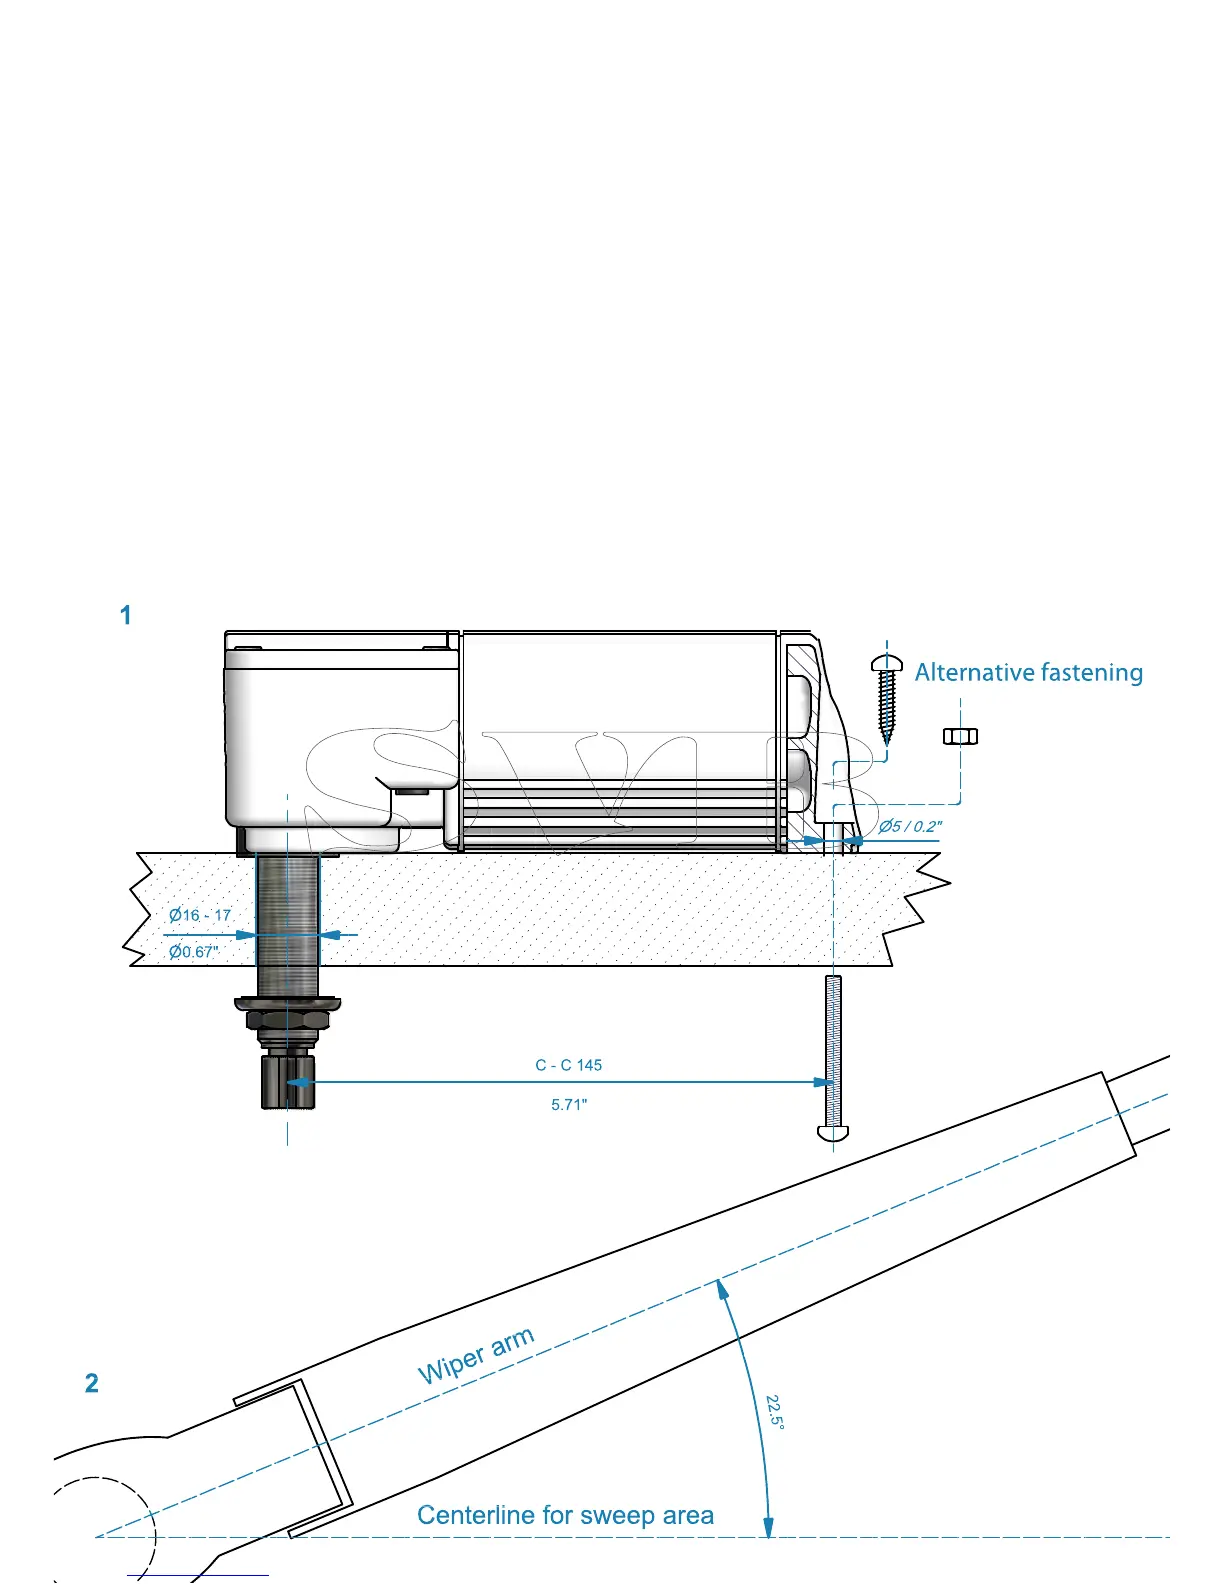
Centerline for sweep area
Wiper arm
22.5°
2
Alternative fastening
C - C 145
5.71"
16 - 17
0.67"
5 / 0.2"
1
Mounting instructions - Wiper motor | W12
Keep battery main switch turned off during operation inside of the wiper motor
1. Remove cover with enclosed torx key.
2. Locate the mounting position .Drill mounting holes (template provided on the box).
Mount motor to the surface. See picture 1.
3. The motor is pre-set to 45° sweep and right parking position. To set the arm in correct position do as following:
a. Find the centerline of the desired sweep area.
b. Attach the wiper arm 22.5° from the centerline (use the attached template below). See picture 2 and 3.
4.
Loosen the two screws on the angle plate with the enclosed torx key. See picture 5. Move the arm to desired end position of
sweep area. See picture 4. Tighten the two screws rmly.
5.
To set the self-parking feature to park in the left position use the enclosed torx key and turn the parking selector clockwise See
picture 5.
6. Connect wires as shown in picture 6.
If using Roca switch 466099/466208 use 6a. For all other switches use 6b.
Use a 5Amp fuse for 12V and 3Amp for 24V.
7. Make sure the gasket is in right position and replace the cover on the motor with the screws taken out.
Note: If the arm sweeps too far out on both sides, the sweep angle needs to be reduced, repeat
point 5 above. If the arm goes too far on one side only then you did not start with the arm in
center of the sweep. Remove the arm and place it at the correct position.
 Loading...