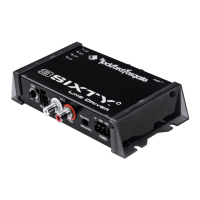
Set Up Guide
First, before anything else you need to ensure the audio connections are correct and that you have tested and
documented the maximum useable output voltage and volume position of the source unit, either aftermarket or OEM.
It does not matter if you are connecting your signal outputs from the source unit to a the 3Sixty through high level or
preamp level (RCA) inputs. No matter which way you go, you need a “reference” level and volume position on which other
subsequent settings are based. If you are not sure where you are starting in the level setting process then you will never
fully know if you are maximizing the potential of the audio system you have installed. It all starts with ensuring the rst
building block in the system is “clean”.
1) Identify and verify correct left and right channel conguration by using Track 3 of the RTTI/3Sixty set up disc. If
fading via front and rear connections are enabled, verify this as well. See notes about Sub and Center channels in the
attached System Set Up Worksheet. Once L and R channels are veried correctly, unplug all 3Sixty outputs.
2) Find the Maximum Output Level (MOL) of the source unit. To do this you must connect an oscilloscope to the output
of the source unit and use the RTTI/3Sixty set up disc on Track 7 for a reference sine wave. Record the maximum
unclipped output of the source unit on the attached System Set Up Worksheet.
3) Perform an audio signal polarity check by using Tracks 4 or 5 of the RTTI/3Sixty set up disc.
4) Set the input levels on the 3Sixty using Track 1 of the RTTI/3Sixty set up disc. Increase the input controls until they
just begin to blink red.
5) Establish a Bluetooth
®
link with 3Sixty through a PC or hand held device. Remember the default pass code is 0000.
6) Run the “OEM Integration” or “New Setup” routine at this time depending on your source unit. Follow the steps on the
screen for either routine. Note: Sub and Center channel outputs only become active after running either routine.
7) Set the nal gain levels at the amplier(s) and implement the appropriate amount of gain overlap. Use Tracks 6-17 of
the RTTI/3Sixty set up disc to do this. See the attached System Set Up Worksheet for more information.
Tuning Guide
Next, with the system properly set up you can proceed to tuning the system using the powerful DSP engine of 3Sixty.
8) Set the crossovers. Remember that both the crossover frequency and the slope are adjustable. Of course you can also
specify whether the crossover is HP/LP/BP, or AP (All Pass). You can link the left and right channels so the crossover
settings are the same for each channel (this is easiest) or you can set the channels independent of one another.
9) Set the time alignment for Front, Rear, and Center channels. You can compensate for speaker placement between 0-5
feet away from the listening position(s). Adjustments are in 2 inch increments. Remember that the channels for left
and right are independent and do not link, even if it’s set for linking on the crossovers and levels. Time alignment is
always independent.
10) Set the equalization. Remember with equalization it’s most important to use smooth transitions from band to band.
If you have a big peak or dip in the frequency response, sliding the EQ up or down all the way is not the way to x
it. Those issues are most likely phase related. If you can’t move the speakers or get it xed with time delay, you may
consider inverting polarity of the sub relative to the other speakers so you can get the best result with which to begin
your equalization. 3Sixty will let you hear, in real time, what effect the setting you choose has on the sound.
11) Save the le and note the le name on the attached System Set Up Worksheet. This will allow you to establish a
known good reference point for this vehicle and you can load that same le in vehicles of the same type as a quick
starting point and rene the tuning from there.
12) Now all that’s left is to enjoy the killer sound system you just installed and tuned!

 Loading...