EasyManuals Logo

Rockford Fosgate Punch P300-10 User Manual

Rockford Fosgate Punch P300-10
9 pages
To Next Page IconTo Next Page
To Previous Page IconTo Previous Page
Page #5 background imageLoading...
Page #5 background image
Contents
P300-1
0
or
P300-12
-
Punch
Powered
Loaded
RCNSpeaker
Harness
Power
Connector
Remote
Punch
Level
Control
Installation
&
Operation
Manual
Fuse-holder
and
fuse.
(See
specifications
for
fuse
rating)
VoiVOhm
Meter
Wire
strippers
Wire
crimpers
Wire
cutters
#2
Phillips
screwdriver
Battery
post
wrench
Installation
Considerations
Hand
held
drill
w/assorted
bits
Assorted
connectors
Adequate
Length-:-Red
Power
Wire
Adequate
Length-Remote
Turn-on
Wire
Adequate
Length-Black
Grounding
Wire
The
following
is
a
list
of
tools
needed
for
installation
:
This
section
focuses
on
some
of
the
vehicle
considerations
for
installing
your
new
powered
loaded
enclsoure.
Pre-planning
your
system
layout
and
best
wiring
routes
will
save
installation
time.
Lh
CAUTION
When
deciding
on
the
layout
of
your
new
sys-
tem,
be
sure
that
each
component
will
be
easily
accessible
for
making
adjustments.
Lh
CAUTION
If
you
feel
unsure
about
installing
this
sys-
tem
yourself,
have
it
installed
by
a
qualified
technician.
Before
installation,
disconnect
the
battery
negative
(-)terminal
to
prevent
damage
to
the
unit,
fire
and/or
possible
injury.
Before
beginning
any
installation,
follow
these
simple
rules:
1.
Be
sure
to
carefully
read
and
understand
the
instructions
before
attempting
to
install
the
unit.
2.
For
safety,
disconnect
the
negative
lead
from
the
battery
prior
to
beginning
the
installation.
3.
For
easier
assembly,
we
suggest
you
run
all
wires
prior
to
mounting
your
unit
in
place.
4.
Route
all
of
the
RCA
cables
close
together
and
away
from
any
high
current
wires.
Installation
5.
Use
high
quality
connectors
for
a
reliable
installation
and
to
minimize
signal
or
power
loss.
·
6.
Think
before
you
drill!
Be
careful
not
to
cut
or
drill
into
gas
tanks,
fuel
lines,
brake
or
hydraulic
lines,
vacuum
lines
or
electrical
wiring
when
working
on
any
vehicle.
7.
Never
run
wires
underneath
the
vehicle.
Running
the
wires
inside
the
vehicle
provides
the
best
protection.
8.
Avoid
running
wires
over
or
through
sharp
edges.
Use
rubber
or
plastic
grommets
to
protect
any
wires
routed
through
metal,
especially
the
firewall.
9.
ALWAYS
protect
the
battery
and
electrical
system
from
damage
with
proper
fusing.
Install
the
appropriate
fuse
holder
and
fuse
on
the+
12V
power
wire
within
18"
(45.7
em)
of
the
battery
terminal.
10.
When
grounding
to
the
chassis
of
the
vehicle,
scrape
all
paint
from
the
metal
to
ensure
a
good,
clean
ground
connection.
Grounding
connections
should
be
as
short
as
possible
and
always
be
connected
to
metal
that
is
welded
to
the
main
body,
or
chassis,
of
the
vehicle.
Seatbelt
bolts
should
never
be
used
for
connecting
to
ground.
Mounting
Locations
Trunk
or
Passenger
Compartment
Mounting
Choose
a
structurally
sound
location
to
mount
your
powered
loaded
en-
closure.
Mount
the
enclosure
in
such
a
manner
that
the
amplifier
has
a
minimum
of
1"
(2.54cm)
of
air
gap
around
the
amplifier's
heats
ink
to
pro-
vide
proper
cooling
to
ensure
optimum
performance
of
the
amplifier
is
strongly
recommended.
Battery
and
Charging
Amplifiers
will
putan
increased
load
on
the
vehicle's
battery
and
charging
system.
We
recommend
checking
your
alternator
and
battery
condition
to
ensure
that
the
electrical
system
has
enough
capacity
to
handle
the
increased
load
of
your
stereo
system.
Stock
electrical
systems
which
are
in
good
condition
should
be
able
to
handle
the
extra
load
of
any
Prime
Series
amplifier
without
problems,
although
battery
and
alternator
life
can
be
reduced
slightly.
To
maximize
the
performance
of
your
amplifier,
we
suggest
the
use
of
a
heavy
duty
battery
and
an
energy
storage
capacitor.
Wiring
the
System
1.\.l
CAUTION
If
you
do
not
feel
comfortable
with
wiring
your
L.1.1
new
unit,
please
see
your
local
Authorized
Rockford
Fosgate
Dealer
for
installation.
1.\.l
CAUTION
Before
installation,
disconnect
the
battery
neg-
L.1.1
ative
(-)terminal
to
prevent
damage
to
the
unit,
fire
and/or
possible
injury.
A\
Avoid
running
power
wires
near
the
low
level
ill
CAUTION
input
cables,
antenna,
power
leads,
sensitive
equipment
or
harnesses.
The
power
wires
car-
ry
substantial
current
and
could
induce
noise
into
the
audio
system.

Questions and Answers:

Question and Answer IconNeed help?

Do you have a question about the Rockford Fosgate Punch P300-10 and is the answer not in the manual?
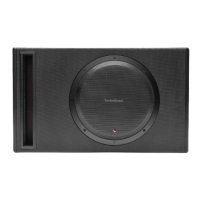
Rockford Fosgate Punch P300-10 Specifications

General IconGeneral
TypePowered Subwoofer
Subwoofer Size10 inches
Power Output300 Watts RMS
Peak Power Handling600 Watts
Enclosure TypeSealed
Woofer Impedance4 Ohms
Crossover Frequency50Hz - 200Hz
Shipping Weight32.2 Lbs. (14.6 Kg.)

Related product manuals