EasyManua.ls Logo

Rockler Gold Slimline Pencil User Manual

Rockler Gold Slimline Pencil
2 pages
To Next Page IconTo Next Page
Page #1 background imageLoading...
Page #1 background image
Blank Preparation
1. Cuttheblanksabout1/8"longerthantheBrassTubes
toallowfor“blow-out”orholeelongation.Maintaingrain
orientationofthetwoblanksforturningbyplacingan“x”
oneithersideofthecutline.
2. Drilltheblankswitha7mmdrillbitataspeedof900
to1200RPM.
3. PolishtheBrassTubeswith220gritsandpapertoremove
oxidationandroughentheTubesforbetteradhesion.This
canbedonebyhandorbychuckingtheminadrillpress
orportablehanddrill.
4. PreparetogluewithmediumCA(cyanoacrylate)glueor
two-partfastdryingepoxy.
5. ApplythegluetotheoutsideofoneBrassTubewithaliberal
amountaroundtheendthatisinsertedfirst.Donotapply
gluetotheinsideoftheblank,asthiswillcausetheglueto
getinsidetheBrassTubeandruinit.
6. InserttheBrassTubewithatwistingmotionintotheblank
untiltheTubeisequidistantbetweenbothendsofthe
blank.Wipeoffanyexcessglueontheendsoftheblank.
Allowthegluetodry.GluethesecondBrassTubeusing
thesamemethod.
7. Usingabarreltrimmer,disk,orbeltsander,trimtheends
oftheblanksuntilyoucanjustseethebrightbrassends
oftheTubes.Thefacesoftheendsmustbeperpendicular
totheBrassTubesandparallelwitheachother.Itis
imperativetomatchthelengthofthetrimmedblanksto
theoriginallengthoftheBrassTubesandthattheinsides
oftheBrassTubesarecleanandfreeofanyglue.
Turning the Blanks
1. Assembletheblanksonthemandrelwiththebushings
placedtoeithersideoftheblanks.Keepthegrainorientation
oftheblanksinlinewhenmounting.Notethatallofthe
bushingsarethesamesize.
2. Tightenthetailstockandthentightenthemandrelnutthat
holdstheblanks.Donotover-tightenthetailstockormandrel
nutasthismaycausethemandreltoflex,causingtheblanks
togooutofround.
3. Turntheblankstothedesiredshape,makingsurethatthe
surfacesnexttothebushingsareturnedtothesame
diameterasthebushings.
4. Afterturning,sandthesurfacesinprogressivestepsof
220,400,600,and1000grit.Ifahigherfinishisdesired,
micromeshsandpapermaybeused.
5. Applythefinishofchoiceandpolish.
6. Removetheblanksfromthemandrel,keepingtheblank
orientationandgrainpatternsinline.
Gold Slimline Pencil Preparation and Turning
61254
© Rockler Companies Inc. 2012
Visit Rockler.com for the most current product
information and videos or call 1-800-260-9663.
Upper Tube
Nut
Slimline Bushing Set
Mandrel “A” Lower Tube
Question and Answer IconNeed help?

Do you have a question about the Rockler Gold Slimline Pencil and is the answer not in the manual?

Rockler Gold Slimline Pencil Specifications

General IconGeneral
BrandRockler
ModelGold Slimline Pencil
CategoryAccessories
LanguageEnglish

Summary

Blank Preparation

Cut Blanks to Length

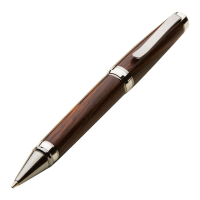
Cut blanks slightly longer than brass tubes to allow for elongation, maintaining grain orientation.

Drill Blanks

Drill blanks with a 7mm drill bit at a speed of 900 to 1200 RPM.

Polish Brass Tubes

Polish brass tubes with 220 grit sandpaper to remove oxidation and roughen for better adhesion.

Prepare for Gluing

Prepare to glue using medium CA glue or two-part fast drying epoxy.

Apply Glue to Brass Tubes

Apply glue to the outside of one brass tube with a liberal amount around the inserted end.

Insert Brass Tubes into Blanks

Insert brass tube with twisting motion until equidistant, wipe excess glue, and allow to dry.

Trim Blank Ends

Trim ends using a barrel trimmer, disk, or belt sander until brass ends are visible and perpendicular.

Turning the Blanks

Assemble Blanks on Mandrel

Assemble blanks on mandrel with bushings on either side, keeping grain orientation aligned.

Tighten Mandrel and Tailstock

Tighten tailstock and mandrel nut, but do not over-tighten to prevent mandrel flex.

Turn Blanks to Shape

Turn blanks to desired shape, ensuring surfaces next to bushings match bushing diameter.

Sand Blanks

Sand surfaces in progressive steps from 220 to 1000 grit, or use micromesh for higher finish.

Apply Finish and Polish

Apply the chosen finish and polish the turned blanks.

Remove Blanks from Mandrel

Remove blanks from the mandrel, maintaining blank orientation and grain patterns.

Pencil Assembly

Attach Clip to Cap

Slide clip onto the stepped end of the cap, only a short distance, do not force.

Attach Cap Assembly to Upper Tube

Press cap assembly into the upper tube, ensuring pattern or grain match.

Attach Center Coupler to Upper Tube

Press the center coupler into the open end of the upper tube.

Attach Tip Coupler to Lower Tube

Press tip coupler into the lower tube, ensuring larger diameter end fits correctly.

Connect Lower Tube to Center Coupler

Connect lower tube to center coupler, avoiding excessive force to prevent buckling.

Insert Pencil Mechanism and Tip

Insert pencil mechanism into cap end until it stops, then thread tip onto mechanism.

Attach Cover to Pencil Mechanism

Slide cover over eraser on pencil mechanism to protect eraser and finish the pen.

Advance and Load Lead

Press cover to advance lead; remove cover and pull eraser to load new lead (0.7mm).

Related product manuals