12
IT
INSTALLAZIONE
• Il motore con bracci arcola serie H23 può essere installato indierente-
mente a destra o a sinistra, orientandolo come indicato in g. 1.
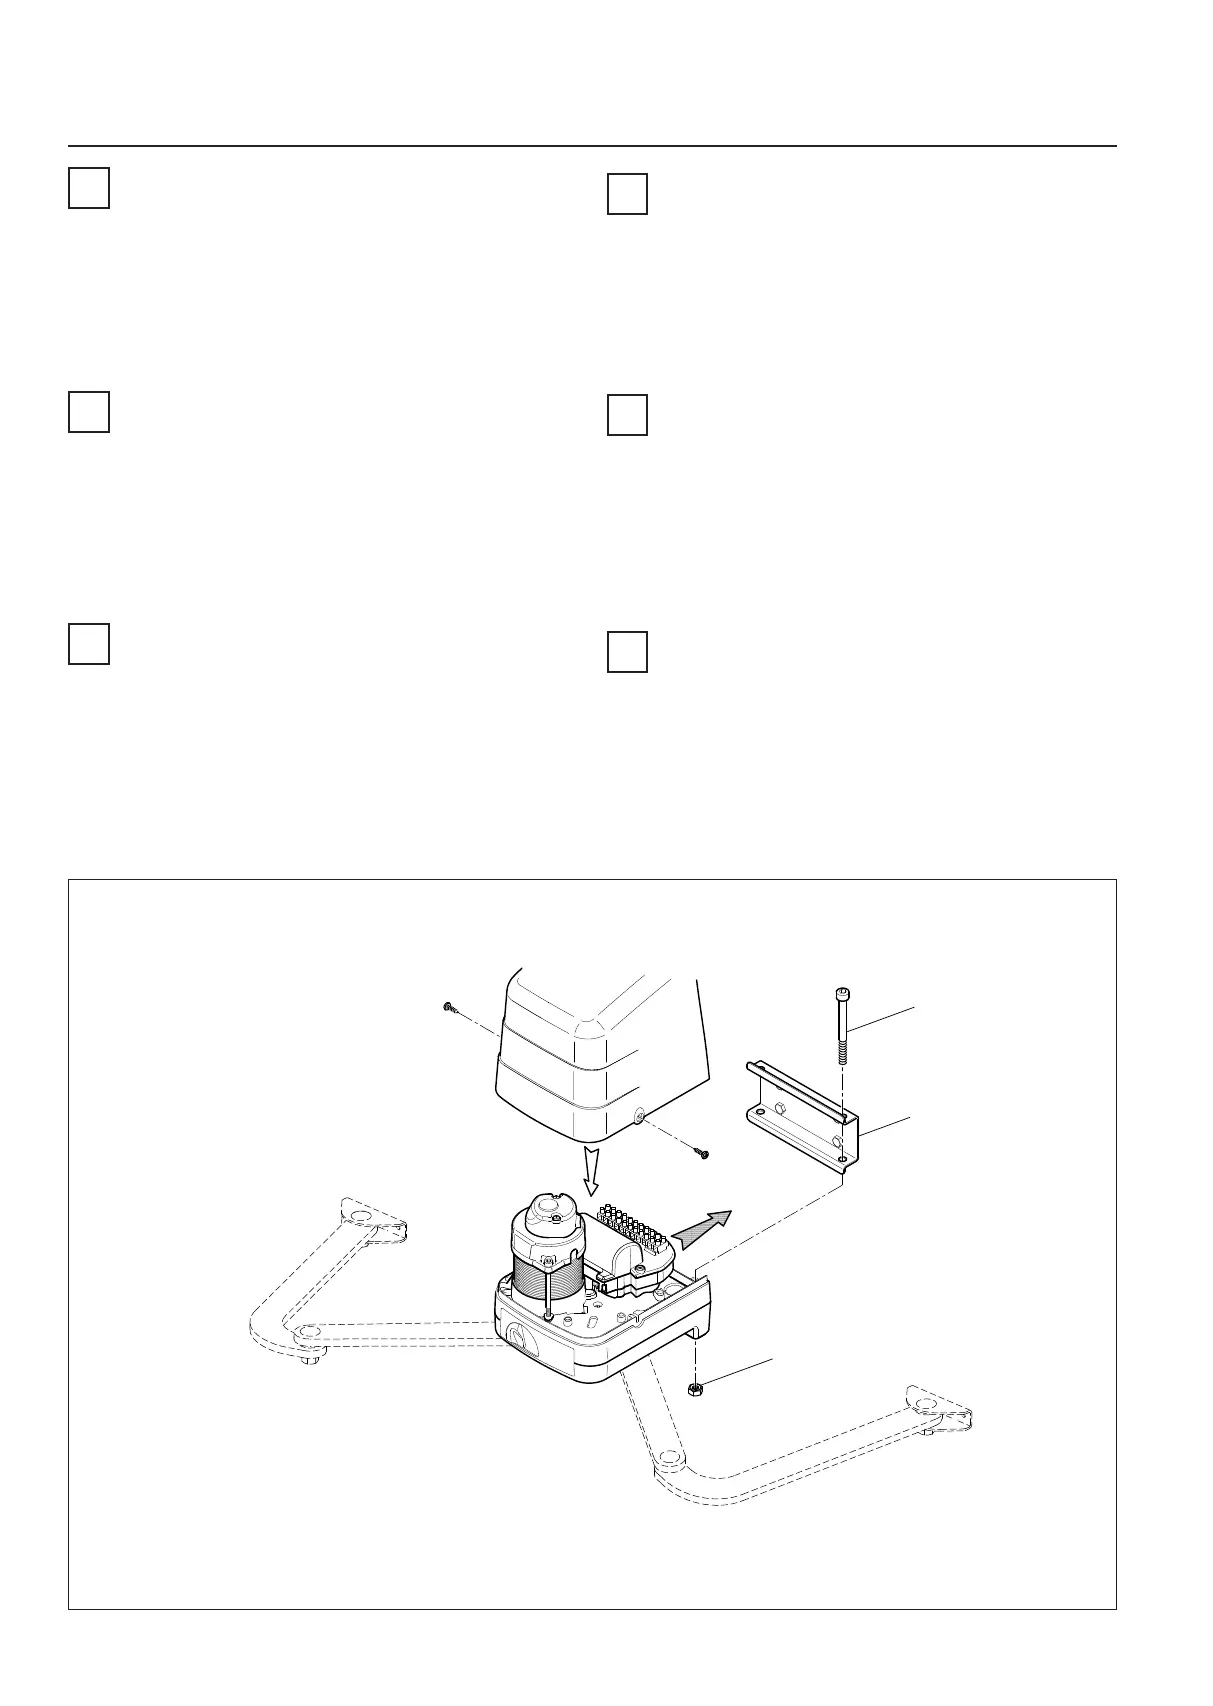
• Fissare il motore H23 alla staa posteriore KT209 con le vi in dotazione
come indicato in g. 1.
• Assemblare i bracci snoda (g. 3) come da sequenza indicata in g. 2 e s-
sarli alla staa anteriore KT218 lubricando i pun di rotazione.
• Muovendo manualmente il cancello vericare che tua la corsa sia regolare
e senza ari.
EN
INSTALLATION
• The H23 series motor with arculated arm may be installed either on the
right or le hand side, oriented as shown in g. 1.
• Fasten the H23 motor to the rear bracket KT209 with the screws included,
as shown in g. 1.
• Assemble the arculated arms (g. 3) in the sequence indicated in g. 2 and
fasten to the front bracket KT218, lubricang the pivot points.
• Move the gate manually and check that it moves smoothly throughout its
enre travel without impediment or fricon.
DE
INSTALLATION
• Der Motor mit Gelenkarmen Baureihe H23 kann sowohl rechts als auch links
installiert werden und ist wie in Abb. 1 gezeigt auszurichten.
• Den Motor H23 am hinteren Bügel KT209 mit den im Lieferumfang en-
thaltenen Schrauben befesgen, wie in Abb. 1 gezeigt.
• Die Gelenkarme (Abb. 3) in der in Abb. 2 gezeigten Folge zusammensetzen
und am vorderen Bügel KT218 befesgen, dabei die Drehpunkte schmieren.
• Das Tor von Hand bewegen und prüfen, dass sein Lauf regelmäßig und
reibungslos erfolgt.
FR
INSTALLATION
• Le moteur à bras arculés série H23 peut être installé indiéremment à
droite ou à gauche, en l’orientant comme indiqué en g. 1.
• Fixer le moteur H23 à l’étrier arrière KT209 avec les vis fournies comme in-
diqué en g. 1.
• Assembler les bras arculés (g. 3) selon la séquence indiquée en g. 2 et les
xer à l’étrier avant KT218 en lubriant les points de rotaon.
• Tout en aconnant manuellement le portail, vérier que toute la course soit
régulière et dépourvue de froements.
ES
INSTALACIÓN
• El motor con brazos arculados de la serie H23 puede instalarse
indisntamente a la derecha o a la izquierda, orientándolo como se muestra
en la g. 1.
• Fije el motor H23 al soporte trasero KT209 con los tornillos suministrados,
como se muestra en la g. 1.
• Monte los brazos arculados (g. 3) según lo indicado por la secuencia en la
g. 2 y jelos al soporte delantero KT218 lubricando los pivotes de rotación.
• Moviendo a mano la cancela, compruebe que toda la carrera sea homogénea
y no presente roces.
PT
INSTALAÇÃO
• O motor com braços arculados série H23 pode ser instalado tanto à direita
ou à esquerda, orientando-o conforme mostrado na g. 1.
• Fixe o motor H23 ao suporte traseiro KT209 com os parafusos fornecidos
conforme indicado na g. 1.
• Monte os braços arculados (g. 3) de acordo com a sequência indicada na
g. 2 e xe-os ao suporte dianteiro KT218 lubricando os pontos de rotação.
• Movendo manualmente o portão verique se todo o curso é regular e sem
atritos.
109 15
15
13
14
4
LT317
LT318
6
1
2
3
11
12
641
7
8
5
6 9 10 15
12 13
14 11
5
7
8
1
2
2
INSTALLAZIONE AUTOMAZIONE H23 INSTALLATION DES
INSTALLATION DE ACTIONNEUR H23 INSTALACIÓN DEL ACTUADOR H23
INSTALAÇÃO ACCIONADOR H23
 Loading...