Do you have a question about the Roland E-16 and is the answer not in the manual?
Always mention the instrument type and serial number when contacting support or the dealer.
Verify the outer packing is undamaged and contains the instrument, power adapter, music stand, and owner's manual.
Ensure that no damages are visible on the instrument upon delivery.
If parts are damaged or missing, provide detailed information to your dealer.
Unauthorized copying or transfer of this document is strictly prohibited.
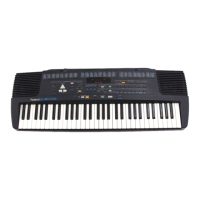
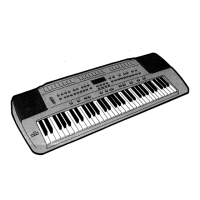
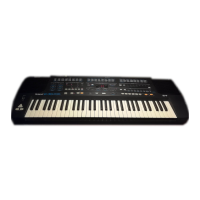
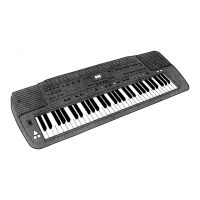
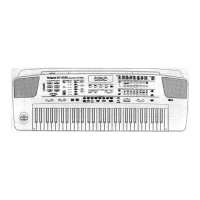
The E-16 is a 61-note, professional-quality polyphonic synthesizer.
Features a dynamic keyboard to modify sound velocity by key pressure.
Utilizes a new generation system with TVF for realistic sound tones.
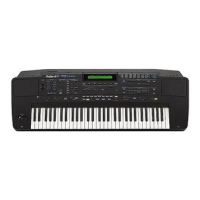
The E-16 can connect to other MIDI devices via its MIDI sockets.
Unplug the AC cord if the instrument will not be used for an extended period.
Use only the supplied power adapter and avoid connecting to overloaded outlets.
Avoid placing liquids on the keyboard to protect sensitive electronic components.
Ensure the volume is not set to maximum before turning on the instrument.
Disconnect the power adapter immediately during an electrical storm.
Reset the instrument by power cycling if static electricity causes malfunction.
Do not attempt servicing; refer all repairs to qualified personnel or your Roland dealer.
Features a 61-key, velocity-sensitive, synthesizer-type action keyboard.
Newly developed sound source with TVF, supporting multitimbral and rhythm parts.
Offers 24-voice polyphony with dynamic voice allocation.
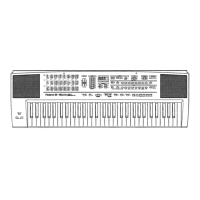
Lists all available ports: Phones, Output, Sustain, DC IN, MIDI (In/Out).
Place the unpacked instrument on a flat, stable surface.
Avoid extreme heat, humidity, dust, and vibrations for optimal operation.
Ensure the POWER ON/OFF switch is in the OFF position before proceeding.
Plug the AC adapter into the ADAPTOR SOCKET '2'.
Connect the AC adapter to a standard wall outlet.
Set the MASTER VOLUME SLIDER to within 2/3 of its range.
Press the POWER switch; LEDs and display indicate selected style (e.g., 51=Rock 2).
Test the instrument by playing keys or using DEMO/START/STOP buttons.
Controls the instrument's power supply, turning it on or off.
Socket for connecting the AC power adapter; use only the supplied adapter.
Connect headphones here; stereo with 8-32 ohm impedance is recommended.
Connect other MIDI devices here for data exchange.
Adjusts the overall instrument volume and headphone volume.
Activates vibrato/tremolo effects on sounds.
Temporarily adjust the pitch of the selected tone.
Allows transposing the instrument to different keys.
Used for tuning the instrument to standard pitch (A=440Hz).
Adjusts keyboard touch sensitivity, affecting volume output based on playing force.
Activates/deactivates Reverb and Chorus effects by pressing for at least 2 seconds.
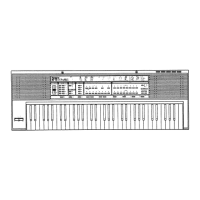
Controls recording and playback for melodies and accompaniments.
Indicates the selected tone, displayed numerically.
Enables splitting the keyboard into sections for different functions (Arranger, Lower, Drum, Upper).
Enables/disables Chord Memory; when lit, last chord is not held.
Simplifies chord input by playing single keys for common chords.
Adds automatic countermelodies based on played chords.
Automatically sets tone, effects, and tempo for accompaniment styles.
Plays the built-in demo songs for listening.
Selects music styles when DEMO LED is off, or plays demo songs when DEMO LED is on.
Selects tones for Upper, Lower sections, or enables drum tones on the full keyboard.
Inserts a one-measure fill-in and continues with style variation.
Performs a fill-in and returns to the original style.
Enables and disables style variations.
Starts/stops style performance and controls recorder functions.
Sets the tempo for selected music styles; simultaneous press resets to standard tempo.
LEDs indicate tempo progression and timing for the selected style.
Built-in speakers for sound output.
The instrument contains 8 demo songs to showcase its tones, styles, and effects.
Connect power, then press the rear panel Power button to turn on for demo playback.
Options to play all demo songs or select a single song.
Instructions on how to play the demo songs sequentially.
Press START/STOP '38' or DEMO '28' to stop demo playback.
Connect power adapter and press the POWER ON/OFF switch to begin.
Display shows '51' and LEDs light up upon initialization.
The instrument is now ready for playing.
The default tone is A11 (Piano 1), automatically selected on startup.
Press SELECT '30' to view the default tone (A11=Piano 1).
Steps to choose and play a different tone.
Find the desired tone in the TONE GROUP '8' tables.
Press GROUP '31' until the group indicator ('a' or 'b') appears.
Press TONE buttons '32' to enter the tone number (e.g., 22).
Play the keyboard to hear the selected tone (e.g., Flute).
Press the MODULATION button '10' to add vibrato/tremolo effect while playing.
Press PITCH SHIFT buttons '11' to add pitch change feature.
Details on available tone variations, referencing the TONES and VARIATIONS table.
Steps to select a specific tone variation for a selected tone.
Press and hold GROUP '31' to initiate variation selection; VARIATION LED flashes.
Press SELECT '32' to choose a variation; display shows the number.
The keyboard can be divided into two sections: right and left.
Two operating modes available for the left keyboard section.
Left part functions as Arranger control.
Left part functions as a lower tone section.
Use the SPLIT button '23' and check LEDs for available split combinations.
When LOWER LED is lit, keyboard is split; play Upper tone on right, Lower tone on left.
The default tone for Lower mode is A72 (Slow Strings).
Press SELECT '30' to enable Lower mode tone selection.
Press GROUP '31' to select group A or b; TONES LED '22' will light.
Press buttons (1-8) to select the tone bank; display shows BANK and flashing NUMBER.
The default tone for Upper mode is A11 (Piano 1).
Press SELECT '30' to enable Upper mode tone selection.
Press GROUP '31' to select group A or b; TONES LED '22' lights up.
Press buttons (1-8) to select tone bank; display shows BANK and flashing NUMBER.
Steps to adjust the keyboard split point between left and right sections.
Press and hold SPLIT '23' until ARRANG or LOWER LED flashes.
Press a key between C2 and B4 while holding SPLIT '23' to set the split point.
Instructions for selecting and playing one of the 8 available drum sets.
Press SPLIT '23' until the DRUM LED illuminates.
Steps to select a specific drum set.
Press SELECT '30' until DRUM SET LED lights; display shows '1'.
The E-16 has 64 music styles; the first 32 are simple orchestral accompaniments for beginners.
Styles include Drum track, Bass track, accompaniment, and preset tempo, with specific sections.
The introductory section of a music style.
The main part of the music style.
A transitional section from the main part to a variation.
An alternative arrangement of the music style.
A transitional section back to the original style.
The concluding section of the music style.
Use the MUSIC STYLE '7' table to find and select desired styles.
Press STYLE SELECT '29' (button 38); display shows number and STYLE LED lights.
Three methods for starting a selected music style.
Press START/STOP '38' to start the style immediately.
Press SYNC '33' to enable synchronized start.
Press any key if ARRANG and LOWER LEDs are off to start the style.
Press a left-hand key if ARRANG or LOWER LED is on to start the style.
Press INTRO/ENDING '37' to start the style with its introduction.
Intro can be combined with Sync/Start function.
When stopped, the red TEMPO LED '40' shows the selected style's tempo.
Use TEMPO buttons '39' to change tempo; value is displayed briefly.
Press both TEMPO buttons '39' simultaneously to reset to standard tempo.
Use TAP TEMPO '35' (Fill In To Original) to set tempo by tapping.
Arranger mode provides performance info for accompaniment styles based on left-hand keyboard input.
In Arranger mode, the keyboard zone is inactive when rhythm is not playing.
Enables holding notes in Lower/Arranger sections; Chord Memory '29' requires ARRANG/LOWER LED lit.
Chord Intelligence '25' allows playing complex chords with one or two fingers in Arranger/Lower sections.
Press INTRO/ENDING '37' while stopped to start the style with its introduction.
Press STYLE VARIATION '36' to toggle style variations; press again to return to original.
Press FILL IN TO ORIGINAL '35' for basic fill-in, or FILL IN TO VARIATION '35' for variation fill-in.
MELODY INTELLIGENCE '26' adds countermelody to single notes based on chords.
Press the ONE TOUCH PROGRAM button '27'; the LED will light.
Use STYLE SELECT buttons '29' to choose the desired style.
The instrument automatically configures functions based on the selected style.
Automatically sets the appropriate tone for the Upper section.
Automatically sets keyboard split when in Arrange mode.
Use ARRANGER buttons '17' to adjust accompaniment volume; press two buttons to rapidly deactivate.
Use LOWER buttons '18' to adjust Lower tone volume; press two buttons to rapidly deactivate.
Use UPPER buttons '19' to adjust Upper tone volume; press two buttons to rapidly deactivate.
Press SYNC button '33' until INTELL LED lights to enable Sync Intelligence.
Sync Intelligence temporarily stops style when left hand keys are released, resuming on chord input.
Press and hold TRANSPOSE button '12'; its LED will flash after a few seconds.
Set transpose value by pressing a keyboard note; range is +/- 12 semitones.
Use TUNE buttons '13' to adjust Master Tune; holding scrolls through the range.
Adjustable tune range 415.5-465.9 Hz; press both TUNE '13' to reset to 440 Hz.
Stop the current style by pressing START/STOP '38' before recording.
Press RECORDER button '16'; the REC LED will light up.
Choose style, tones, volumes, and effects for recording.
Three methods for initiating song recording.
Supports recording of Arranger, Lower, Upper, and Drum modes.
Records tone changes for Upper and Lower sections.
Records style changes, variations, fills, intro/ending.
Records tempo changes.
Stop any playing style by pressing the START/STOP button '38'.
Press RECORDER button '16' until the PLAY LED illuminates.
Press START/STOP '38' to play the recorded song; it stops automatically or can be manually stopped.
Press RECORDER '16' until PLAY LED flashes to enable repeated playback (Loop).
Press and hold KBD VELOCITY/SCALE '14'; its LED will flash after a few seconds.
Hold button '14', press a note to lower tuning by a quarter tone (not in last octave).
Release button '14'; selected note is tuned a quarter tone lower than equal temperament.
Tuning alterations made in one octave apply to all 12 octaves.
MIDI (Musical Instrument Digital Interface) is a standard for digital musical instrument data exchange.
The E-16 features two MIDI sockets on its rear panel.
Use MIDI IN to receive signals from external MIDI devices to control the E-16.
Use MIDI OUT to send signals from the E-16 to control external MIDI devices.
Use a soft dry cloth for dusting; a slightly damp cloth with mild detergent for smudges.
Do not use alcohol or solvents like paint thinners for cleaning.
General troubleshooting steps for common operational problems.
Ensure the AC cord is securely plugged into the instrument and the AC line.
Test the wall outlet by plugging in a lamp or radio.
Ensure power switch is ON; contact service if inoperable, do not attempt self-repair.
Play a single key to produce the corresponding major chord.
Play a one-note chord with another note two keys to the left for seventh chords.
Play a major chord note plus a minor third note (three keys right) for minor chords.
| Keyboard | 61 keys |
|---|---|
| Preset Tones | 128 |
| Effects | Reverb, Chorus |
| MIDI | MIDI In/Out |
| Display | LCD |
| Connections | MIDI In/Out |