Sequencer
28
Directly touch parameters in the screen to select them, or
use the [VALUE] dial to edit the value.
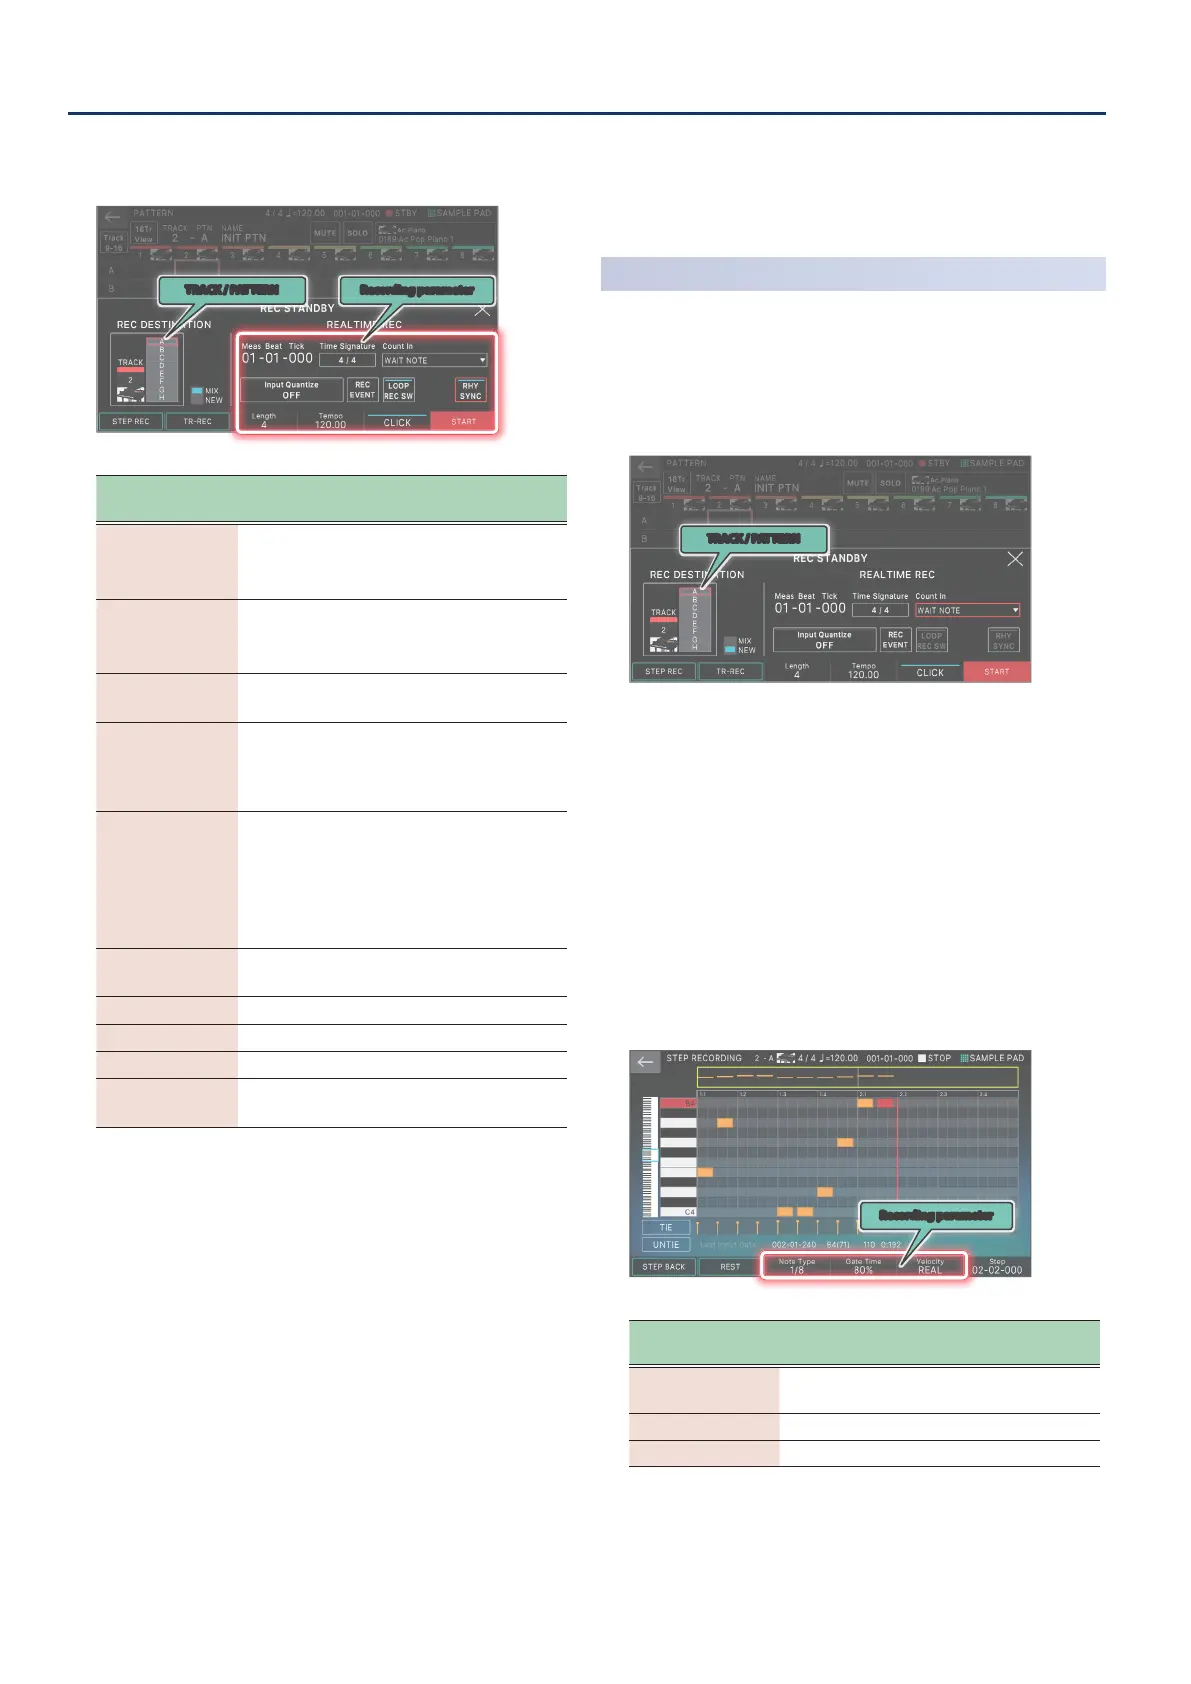
TRACK / PATTERN Recording parameter
Recording
parameter
Explanation
Count In
Adds a count-in when recording starts.
Specify this before you start recording (while
stopped).
Time Signature
Species the time signature.
This can be specied when all patterns are
empty.
Input Quantize
Species the quantization that is applied
during recording.
RHY SYNC
Species whether the currently selected
rhythm pattern automatically plays back and
is recorded when you start recording (ON) or is
not recorded (OFF).
LOOP REC SW
ON: Continue recording even after you’ve
recorded the measures specied by the Length
setting.
OFF: Transition from recording to playback
when you’ve recorded the measures specied
by the Length setting.
REC EVENT
Selects the performance data that will be
recorded during realtime recording.
CLICK Turns the click (metronome) on/o.
Tempo Species the tempo.
Length Species the length of the pattern.
NEW/MIX
Species whether to make a new recording or
to overdub-record.
Since touching <TRACK/PATTERN> will take you to the
PATTERN screen, use this screen to select the track (1–16)
and pattern (A–H) that will be recorded.
When you change the recording-destination track, the zone
played by the track moves in tandem.
(Example) Track 2: Zone 2 (Bass)
Ó
Track 10: Zone 10 (Drum)
After selecting a track and pattern in the PATTERN screen,
press the [REC] button once again.
3.
Press the [
ø
PLAY] button to start recording.
You can also start recording by touching <START>.
4.
Play the keyboard.
Knob and controller operations are also recorded.
5.
Press the [
ð
STOP] button to stop recording.
When you’ve nished recording, you can repeat steps 1–5 as
necessary to record pattern variations on the same track or
to record another track.
If you’re creating groups or a song as described in the next
section, it’s a good idea to divide the recording into several
tracks and create several patterns so that you can distinguish
them.
Step Recording
(Step REC)
1.
Press the [
ó
REC] button.
The REC STANDBY screen appears.
2.
In <TRACK/PATTERN>, note the track that you’ll be
recording.
TRACK / PATTERN
Since touching <TRACK/PATTERN> will take you to the
PATTERN screen, use this screen to select the track (1–16)
and pattern (A–H) that will be recorded.
When you change the recording-destination track, the zone
played by the track moves in tandem.
(Example) Track 2: Zone 2 (Bass)
Ó
Track 10: Zone 10 (Drum)
After selecting a track and pattern in the PATTERN screen,
press the [REC] button once again.
3.
Touch <STEP REC>.
The STEP RECORDING screen appears.
4.
Specify the settings of the note that you will input.
Set the various recording parameters in the screen.
Recording parameter
Recording
parameter
Explanation
Note Type
Selects the rhythmic value of the notes that
you input.
Gate Time Species the gate time.
Velocity Species the velocity.
5.
Play a key once.
The note is recorded in step 1, and the step position in the
screen automatically advances by the length of the step
time.