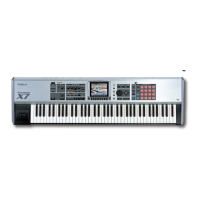
Panel Descriptions
9
Controller Explanation
[MASTER FX] button
The MASTER FX screen appears.
If you hold down the [SHIFT] button and press
this button, the MASTER EQ editing screen
appears.
[MOTIONAL PAD]
button
The MOTIONAL PAD screen appears.
[DAW CTRL] button Lets you use this unit as a DAW controller.
[MENU] button The MENU screen appears.
Display
Shows various information depending on
operation.
FUNCTION knobs [E1]–
[E6]
Turning a knob modies the function or
parameter value that is shown below in the
screen.
You can also press these knobs in to execute
an operation or conrm a value.
[TEMPO] button
The TEMPO screen appears.
You can set the tempo by repeatedly pressing
the button at the desired interval.
[VALUE] dial
Changes a value.
If you hold down the [SHIFT] button and turn
the [VALUE] dial, the value changes more
greatly.
[DEC] [INC] button
Changes a value.
If you press one of these buttons while
holding down the other, the value changes
more rapidly.
If you press one of these buttons while
holding down the [SHIFT] button, the value
changes more greatly.
Cursor [
à
] [
á
] [
ã
] [
â
]
buttons
Move the cursor position up/down/left/right.
These buttons also switch between screens.
[SHIFT] button
Accesses the corresponding edit screen when
pressed together with another button.
[EXIT] button
This button returns to the previous screen or
closes the open window.
If you press this button while holding down
the [SHIFT] button, an all note-o message
is output to the sound engine and via MIDI.
This is useful for muting sounds including the
sounds of external devices that keep playing,
and in other similar instances.
[ENTER] button
Used to conrm a value, execute an operation,
or view lists or other items.
4
Scene section
Controller Explanation
[SCENE SELECT] button
The SCENE SELECT screen appears.
Here you can select a scene.
[SCENE CHAIN] button
The SCENE CHAIN screen appears.
This lets you recall scenes in a specied order.
[ZONE VIEW] button
The ZONE VIEW screen appears.
Here you can check the state of each zone.
[SINGLE TONE] button
Recalls a piano sound to zone 1. Zones other
than 1 are turned o.
NOTE
Note that when you press this button,
unsaved scene settings are lost.
5
SYNTH control section
Controller Explanation
[OSC] button
Accesses the OSC setting screen of the TONE
EDIT ZOOM screen.
[CUTOFF] knob Species the cuto frequency of lter.
[RESONANCE] knob
Species the resonance of lter.
RESONANCE
[FILTER TYPE] button Species the type of lter.
[PARAM] button
Accesses the FILTER setting screen of the TONE
EDIT ZOOM screen.
[AMP] button Accesses the AMP ENV screen.
[FX] button Accesses the MFX EDIT screen.
[LFO] button Accesses the LFO1 screen.
6
Sequencer section
Controller Explanation
[PATTERN] button The PATTERN screen appears.
[GROUP] button The GROUP screen appears.
[SONG] button The SONG screen appears.
[TR-REC] button Enables TR-REC. (p. 29)
[RHYTHM PTN] button The RHYTHM PATTERN screen appears.
[
ð
STOP] button
Stops pattern playback or recording, or stops
playback of the group or song.
[
ø
PLAY] button Plays the pattern, group, or song.
[
ó
REC] button Enters the record-standby condition.
Tone category buttons
[1]–[16]
Select tones in each category.
Depending on the situation, these buttons
are also used for other things such as TR-REC
input or as a selector for the SCENE CHAIN
function.
7
Pad section
Controller Explanation
[SAMPLING] button Lets you sample.
[PAD MODE] button
Species the functions that are assigned to
the pads.
Hold down the [SHIFT] button and press
this button to access the edit screen for the
currently selected pad mode and related
screens.
[CLIP BOARD] button
Lets you move or copy a sample from one pad
to another.
[BANK] button Switches the pad bank.
[HOLD] button
Turns hold on/o (allowing the sound to
continue even after you release the pad).
Pads [1]–[16]
Play the samples assigned to each pad.
You can make pad mode settings to assign
various functions to the pads.