8
3. Strike a pad so its rhythm plays—recording begins and the
Realtime Rec Control window opens.
4. Let four beats go by so you can get used to the groove,
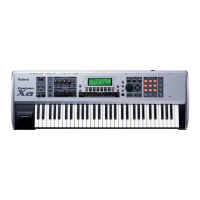
and then play your idea on the Fantom-Xa keyboard.
You won’t need to do this for our tutorial, but you can remove extra
measures at the front or end of a recording using the Delete editing tool,
described in the Fantom-Xa Owner’s Manual
.
5. Once you’ve played the idea, press Stop. That’s it—you’ve
recorded your playing.
6. Press RHYTHM to turn off the rhythm pattern.
7. Press Reset, and then Play to hear your idea.
We didn’t want to distract you earlier, but when the Realtime Rec Control
window is open, you can rehearse without recording
.
Undoing Your Work
If you’d like to start over again, you can “undo” your recording.
1. Press the UNDO button—a window pops open and asks
if you’re sure you want to undo your last recording (or
editing action, by the way).
2. Press F6 (EXEC) to complete the Undo procedure.
3. Now that you’re back to Square One, you can press
RHYTHM and hit the desired pad to resume playback of
your rhythm pattern, and then repeat the steps in the
previous section of this booklet if you like.
About Recording on the Fantom-Xa
The Fantom-Xa’s recorder is a MIDI “sequencer” that captures
MIDI data that the keyboard and rhythm section produce.
When it plays it back, your performance is reproduced.
You can do all sorts of things to refine your music by editing
the captured MIDI data, such as correct its timing, add or
remove notes, change its sounds, and much more.
While the Fantom-Xa sequencer doesn’t actually record audio, its sampler
certainly does, as we’ll see later.
Once you’ve recorded something, you can move over to the
sequencing area to add more instruments, or even sampled
vocals. See the Fantom-Xa Owner’s Manual to learn more.
The Arpeggiator
The Fantom-Xa’s arpeggiator produces repeating note patterns
called “arpeggios.” These patterns can provide dance grooves
or add texturing to any kind of music. The arpeggiator can also
automatically generate a bass line for any chord.
Before we check out the arpeggiator, press PATCH/RHYTHM,
and then turn VALUE to select User :001 A’Live Piano again.
1. Press ARPEGGIO so it lights.
2. Hold down a handful of notes on the
keyboard—listen to how the arpeggiator
takes the notes you’re playing and uses them
in the currently selected arpeggio.
3. Let go of the keys.
4. Hold down SHIFT and press ARPEGGIO to
display the Arpeggiator editing screen.

 Loading...