EasyManua.ls Logo

ROLEC WallPod Series - User Manual

ROLEC WallPod Series
2 pages
Print Icon
To Next Page IconTo Next Page
Loading...
WALLPOD: EV COMMERCIAL
CHARGE SUPERFAST
Doc No.: EVWPI-003 Rev: 01
This instruction is applicable to the following EV Commercial Charge Superfast range of products:
EVWP2096, EVWP2156, EVWP2036, EVWP2046, EVWP2056 & EVWP2066.
INSTALLATION INSTRUCTIONS
NOTE: WallPods must always be installed on a flat and smooth surface. When installing a Wallpod
always remove the unit from the wall before drilling to avoid any brick dust contaminating the
internal components.
All installation work is to be carried out by a competent and suitably qualified engineer.
1. Establish a suitable mounting location for the WallPod that is both secure and environmentally safe.
2. Carefully remove the WallPod from its packaging and check that it is undamaged.
3. Open the front of the unit by unscrewing the six screws that secure the front cover to the base (retain
the screws).
4. Drill out the four oval shaped mounting points, located at the rear of the base unit.
5. Cut a suitably sized hole in the base unit to receive the supply cable.
6. Whilst supporting the front of the unit, carefully place the base unit in the desired location and mark
the four fixing points.
7. Remove the WallPod from the wall and drill the wall to receive the fasteners.
8. Using the four fixing points and suitable fasteners, screw the base unit into position.
9. Using an appropriate and water resistant method of cable entry into the unit, connect the supply cable
to the 3 Phase, Neutral and Earth terminals.
10. For models EVWP2056 & EVWP2066 fit the supplied switchgear at source in compliance with current
regulations and then connect to the appropriate terminals within the WallPod.
11. Switch on the overload/fault current device(s).
12. Refit and secure the front cover, ensuring no cables are trapped beneath it.
13. Switch on the power to the unit and test in accordance with current regional electrical regulations.
14. Secure the IP65 cover.
OPERATING INSTRUCTIONS
Status Indicator Guide
Flashing blue light - Ready for Charge (IEC socket only)
Fixed blue light - Cable plugged in but not charging
Fixed green light - Charging in progress
Flashing red light - Fault indicated - Switch off unit at source and switch back on after 20 secs to
clear fault. If fault persists, contact your installer
Question and Answer IconNeed help?

Do you have a question about the ROLEC WallPod Series and is the answer not in the manual?

Summary

Installation Instructions

Mounting and Preparation

Covers establishing location, unpacking, accessing unit, preparing mounting points and cable entry.

Securing the Base Unit

Details marking fixing points, drilling the wall, and screwing the base unit into position.

Electrical Connections

Explains connecting the supply cable and fitting switchgear for specific models.

Final Assembly and Testing

Covers switching on protection devices, refitting cover, powering up, testing, and securing the IP65 cover.

Operating Instructions

Status Indicator Guide

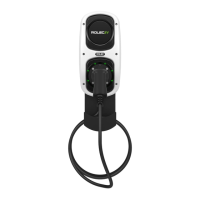
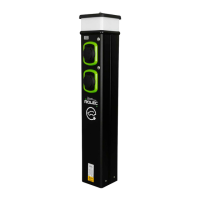
Explains the meaning of different light indicators (blue, green, red) for charging status and faults.

Vehicle Charging Procedure

Details the steps for initiating and disconnecting vehicle charging using the status indicator.

Optional Feature Operation

Describes how to operate Key Switch, Amp Selector, and Solar Switch options if fitted.

Maintenance Guidelines

Provides instructions for cleaning the exterior, visual inspection, and electrical testing.

ROLEC WallPod Series Specifications

General IconGeneral
InstallationWall-mounted
Charging ModeMode 3
Operating Temperature-30°C to +50°C
Socket TypeType 2
ConnectivityWi-Fi, Ethernet
Weatherproof RatingIP54
Connector TypeType 2
Rated Current32A
Input Voltage230V AC (single-phase) or 400V AC (three-phase)
Standards ComplianceIEC 61851, IEC 62196
Cable Length5m or 7.5m (depending on model)
CompatibilityAll Type 2 compatible EVs
FeaturesRFID

Related product manuals