FIGURE 1
CP
CP
F
S
6
4
6
4
3
3
3
3
TAKE CARE NOT TO
SCRATCH THE FINISH
OF YOUR PARTS!
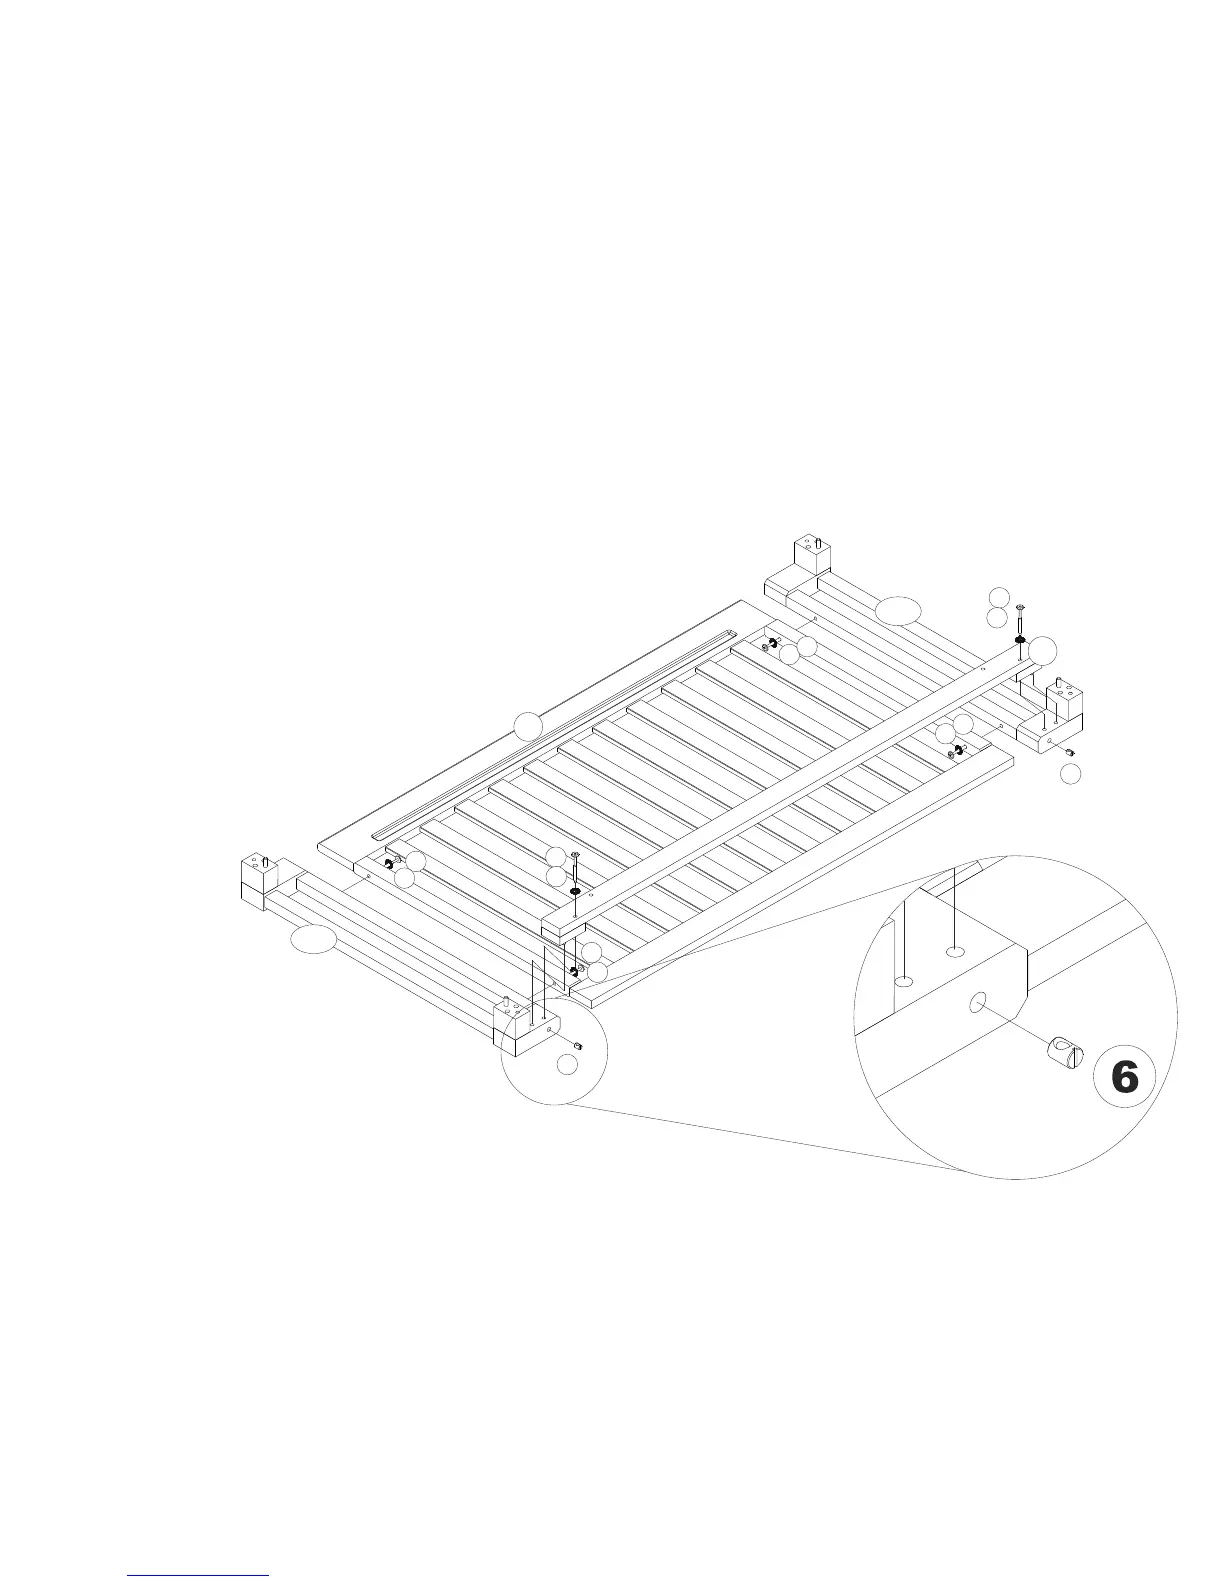
STEP 1
Attach two corner pieces to one of the fixed sides using 4 smaller Allen bolts , 4 washers and
the Allen wrench supplied .
Then attach one of the stabilizing bars to the corner
pieces using 2 medium Allen bolts , 2 washers , 2 barrel nuts and the Allen wrench supplied .
(CP) (F) (3) (10)
(1)
(S)
(CP) (4) (10) (6) (1)
(follow the instructions attached to the stabilizing bar)
Push the barrel nut into the hole drilled in the corner piece then align the straight slot in the head of the barrel
nut vertically, so the threads in the bolt will insert in the barrel nut. You can adjust the position of the barrel nut
with a flat head screwdriver (not supplied) or a coin.
Push the Alen bolt through the stabilizing bar. Start the threads by hand to assure you don't strip
the threads, then use the suplied Allen wrench.
Repeat the same actions for the second fixed side & stabilizing bar .(F) (SB)
10
10
10
10
10
10